Many Windows users believe accessibility features are only for those with disabilities, but that’s not the case. I don’t have a disability, but I use some accessibility features to be more productive. I can’t imagine using Windows without them. Here are some features you should try.
1
Use Live Captions to Follow the Video Easily
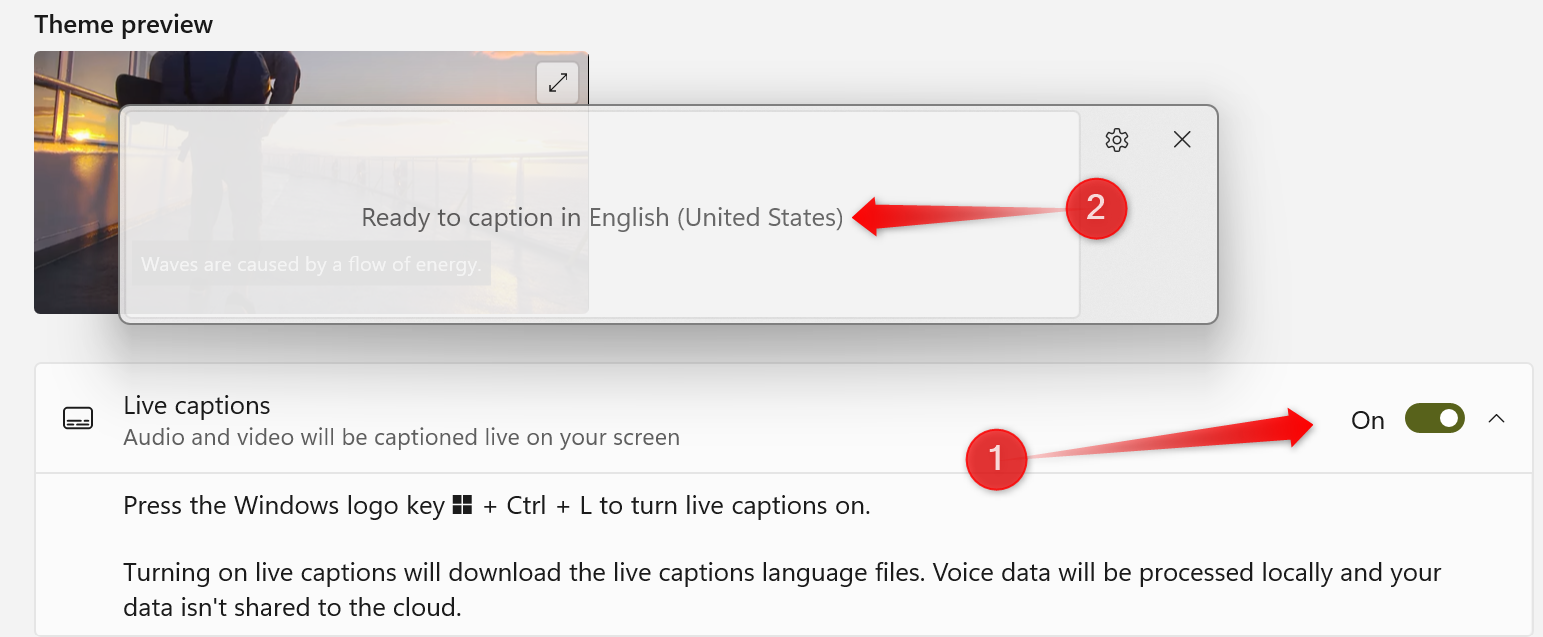
Sometimes, I speed up video playback to save time, but this can make the audio harder to follow. Other times, the speaker has a strong accent, the content includes technical jargon, or I’m at the library without headphones. In such situations, I rely on Windows’ Live Captions feature, which generates real-time captions for any audio, making it easy to read along.
To enable this feature, open the Settings app and navigate to Accessibility > Captions. Then, turn on the toggle next to “Live Captions.” A pop-up will appear asking for permission to process voice data locally—click “Download” and wait for the setup to complete. Once enabled, Windows will generate live captions for any video you play.
If the feature gets turned off, you can quickly enable it using the shortcut Win+Ctrl+L. Additionally, you can customize the caption settings to suit your preferences.

Related
How to Get Live Captions For Any Video or Audio in Chrome
Chrome can now create captions for any website.
2
Voice Typing to Let Your Fingers Have Rest
As a writer, I spend all day typing on my laptop. To give my fingers a break, I use the voice typing feature to dictate instead of pressing keys. It also helps me jot down ideas or continue writing when my hands are occupied. Plus, when watching a video and taking notes, I can simply pause, speak key points aloud, and have them transcribed instantly instead of typing.
To enable this feature, open the Settings app, navigate to Accessibility > Speech, and turn on “Voice Access.” Then, click “I Agree” to complete the setup. If you’re using it for the first time, a tutorial will guide you through the basics. You can use voice commands for various actions, and I recommend testing it in Notepad to get familiar with how it works.
Be sure to proofread any text you dictate using voice typing, as your device may not always capture your words accurately.
3
Read More Easily by Increasing the Text Size
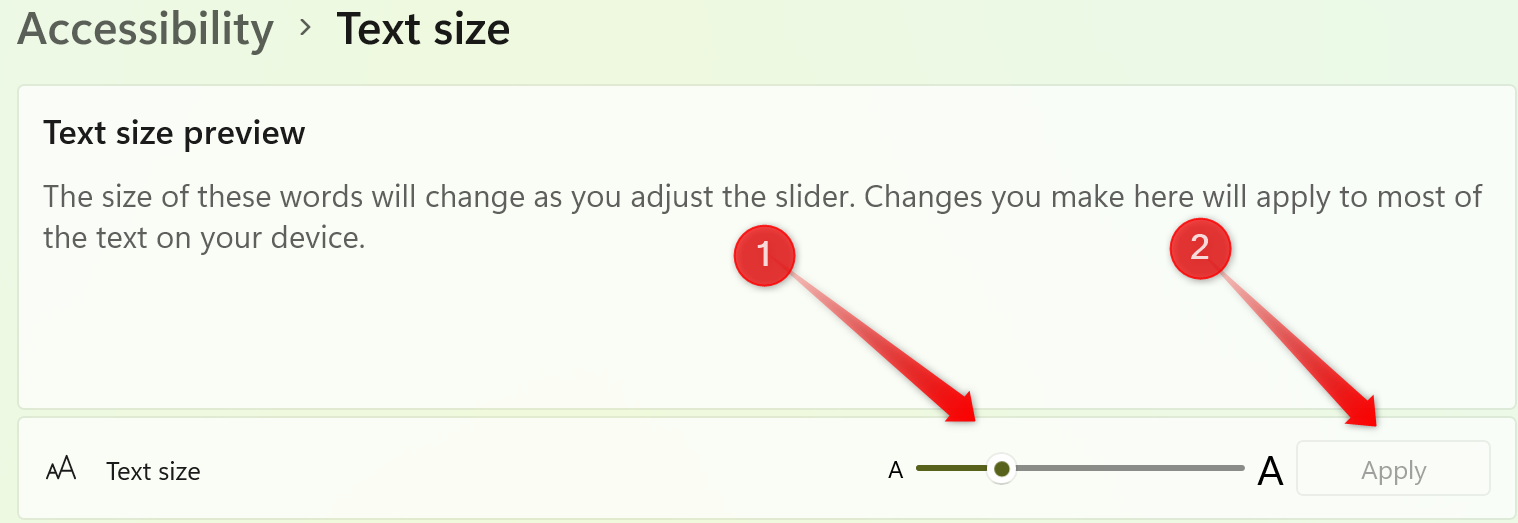
I spend most of my day reading and writing on a screen, and with my weak eyesight, the default text size often feels too small, causing eye strain. This issue is even worse when working on an ultrawide monitor or when my laptop is placed on a stand slightly out of reach. To make reading more comfortable, I always increase the text size.
Adjusting the text size reduces eye strain and helps me maintain a better posture since I don’t have to lean in to read. To change the text size, open the Settings app, go to the “Accessibility” tab, select “Text Size,” and use the slider to adjust it. You’ll see a preview of how the text will appear before applying the change.
I set the slider to 130 when writing on my laptop and adjust it to different sizes when using an ultra-wide high-resolution monitor. Adjust the settings to make the display easier on your eyes.
4
Mouse Pointer and Touch
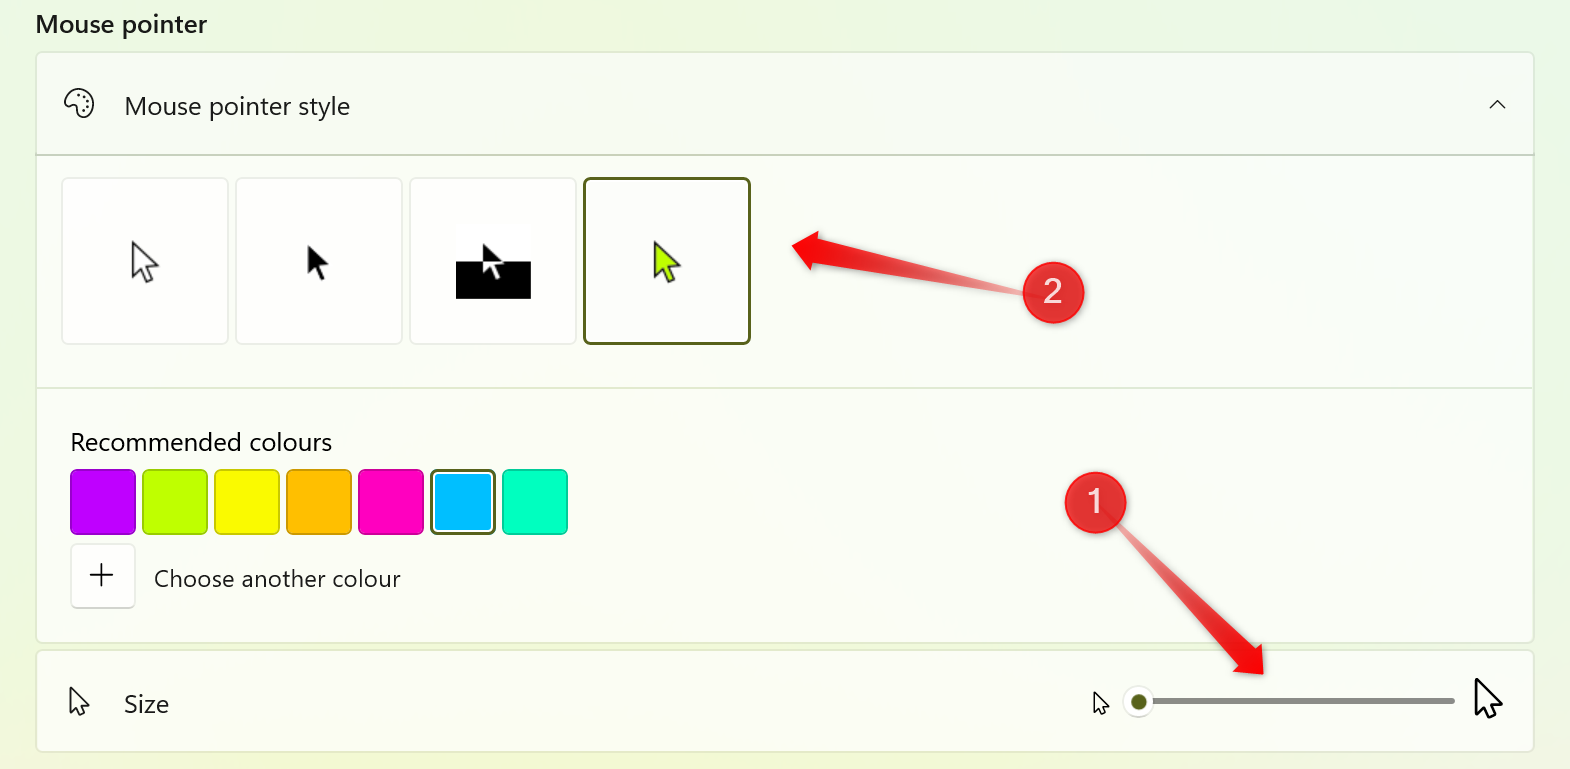
Like text, the default mouse pointer feels too small for me. Plus, after using a blue-shaded pointer for years, I find it hard to work with the default one. That’s why I always customize its size and style. To do this, open the Settings app, go to Accessibility > Mouse Pointer and Touch, then adjust the slider to resize it and select your preferred pointer style.
Likewise, my old laptop’s touchscreen has become less responsive over time, sometimes requiring multiple taps to register a touch. To get a visual cue when my touch is detected, I enable the Touch Indicator, which shows a circle where I tap. To turn it on, enable the toggle next to “Touch Indicator” and check “Make the Circle Darker and Larger.”
Now, a dark circle will appear whenever you touch the screen. I’ve grown used to this feature, but if you find it distracting, you can turn it off anytime.
5
Change the Visual Effects Settings
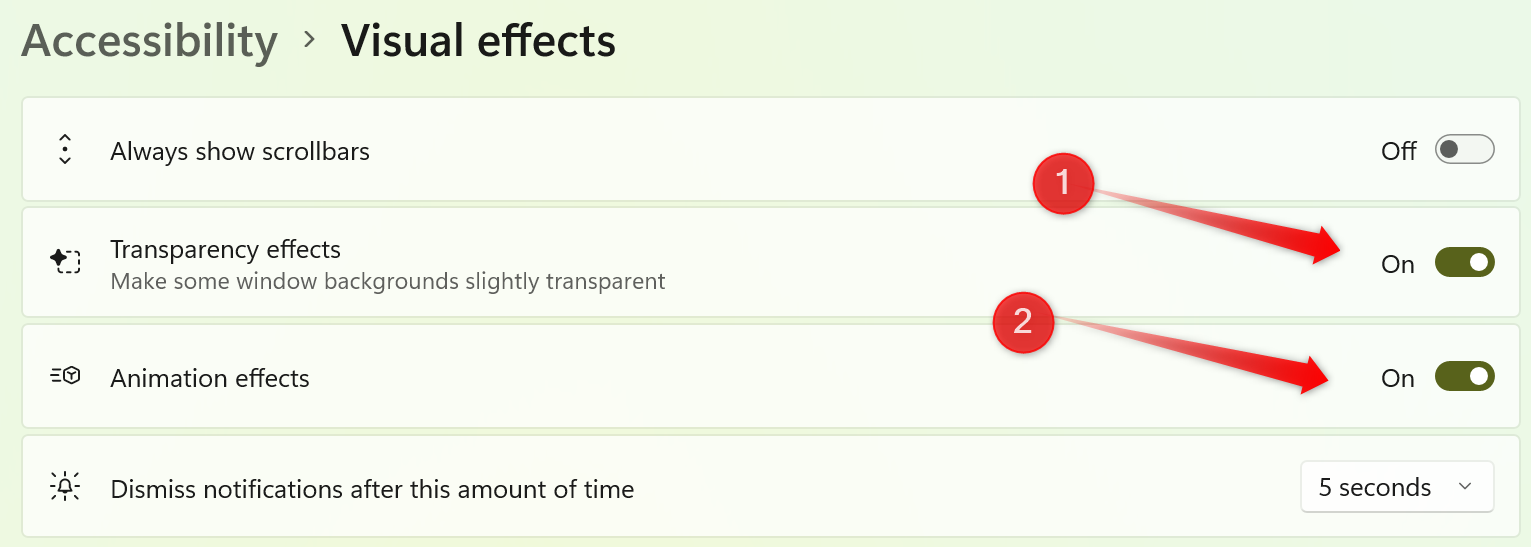
Windows comes with visual effects like transparency, which creates see-through backgrounds and animations that add smooth transitions when opening or closing apps, menus, and more. However, these effects are turned off by default. On my older, low-spec laptop, I keep them off to improve performance, but on my high-performance PC, I enable them for a more refined look.
If you have a low-end device, leave these settings off to prevent system slowdowns. However, if your computer has a high-end GPU, you can turn it on without worrying about performance issues. To adjust these settings, open the Settings app, go to the “Accessibility” tab, select “Visual Effects,” and toggle the options as needed.
These are the accessibility features I always adjust when resetting my computer, reinstalling the operating system, or getting a new device. Now that I’ve shared how these settings improve my experience, you can decide if they’re worth enabling on your device. Try them out and see how they improve your workflow.


