Summary
- Microsoft Paint’s Generative Erase feature lets you easily remove unwanted elements from photos.
- The Generative Erase uses AI to analyze the surrounding areas of an image.
- The tool performs well when removing inanimate objects but struggles with living subjects or complex backgrounds.
Do you have a beautiful photo that you want to upload to social media, but there’s an unwanted element in the background ruining it? You can use the Microsoft Paint Generative Erase feature to remove that element and upload the photo online.
How to Use Microsoft Paint’s Generative Erase Feature
Microsoft has been integrating a lot of AI features into native Windows apps recently. For example, they are upgrading the Notepad app with AI and adding features like rewrite to it. Similarly, the Microsoft Paint app has also received several AI features, including Generative Fill, Generative Erase, and the Cocreator feature for Copilot+ PCs.
While the Generative Fill feature is at the time of writing available only in the Windows Insider build, and the Cocreator feature is exclusive to Copilot+ PCs, the Generative Erase feature is now accessible to all Windows users. You can use it to remove unnecessary elements from an image.
To use Microsoft Paint’s Generative Erase features, first, open Microsoft Paint, click the “File” option, and choose “Open.” Then, select the image containing the unwanted element you want to remove and click “Open” again.
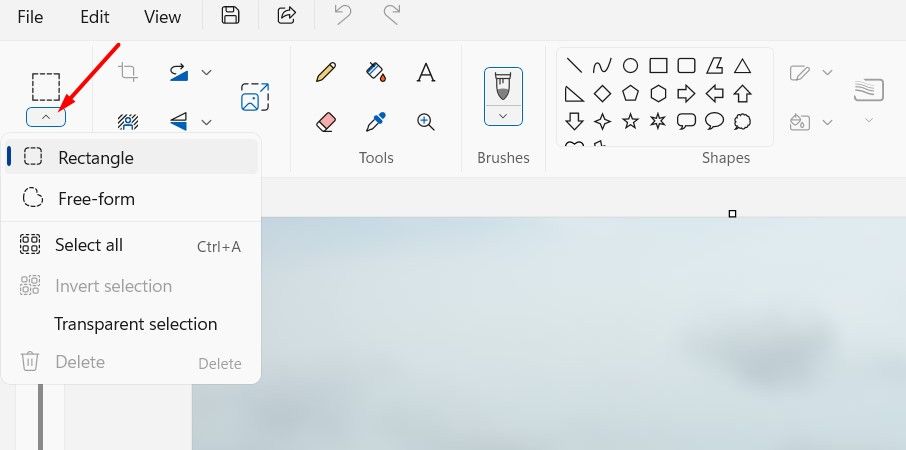
Next, click the drop-down icon above the Selection option and choose between Rectangle and Freeform. While you can choose either option, I recommend using the Rectangle option for more precise area selection. The Freeform option will be useful when you want to remove an element that has a lot of curves.
Once you’ve selected the unwanted element in the image, click the Generative Erase icon that appears. Microsoft Paint will take a few seconds to process and remove the element from the image.
What happens in the background is that Paint uses AI to analyze the image and the surroundings of the element you want to remove. Specifically, the AI assesses the colors, textures, and patterns of the area around the selected element. When you use the Generative Erase feature, the AI fills the area from which the element is removed with colors and patterns that blend seamlessly with the surrounding environment.
I used the Generative Erase tool with several images, and my conclusion is that the tool performs well when removing a non-living object. However, the results are less effective when removing a living element, like a human being, or when there are multiple objects surrounding the one you want to remove from the image.
For example, in the image below, I tried removing the iPhone from the table where it was placed. The iPhone is a nonliving object, and there aren’t many other objects surrounding it in the image. As a result, the tool produced decent results.
However, when I tried removing a human subject from an image with many surrounding elements like rocks, grass, and water, as shown in the example below, the tool struggled to fill the area properly after removing the subject.
Surprisingly, Microsoft Paint’s Generative Erase tool isn’t the only one that struggles with removing human elements or objects surrounded by multiple elements. I also tried Canva Pro’s Magic Eraser tool, and the results were almost identical to those of Microsoft Paint’s Generative Erase tool.
Whether it’s Apple, Google, or Microsoft, everyone is integrating new AI features into their operating systems. And while the Generative Erase tool can occasionally help remove unnecessary elements from an image, it’s still far from perfect. It is, of course, a brand-new feature that could get better in the future. For now, I’d still prefer a dedicated photo editing app like Photoshop over Microsoft Paint for removing unwanted objects from my images.


