Since AI chatbots such as ChatGPT burst onto the scene, there has been a small amount of panic about AI taking all of our jobs. While there are still plenty of things that AI chatbots can’t yet do, one area where they have proved to be impressive is coding.
It’s now possible for anyone to generate their own code using AI chatbots simply by explaining what they want to do in a prompt, a technique that has come to be known as vibe coding. I decided to give vibe coding a try to see if I could create a simple app without entering a single line of code myself.
What Is Vibe Coding?
Vibe coding is a method of creating software or applications using AI tools, such as chatbots, to generate code based on written descriptions. If you want to create a side-scrolling platform game, for example, instead of writing the code yourself, you just explain to an AI chatbot what you want the game to do, and the chatbot will generate all the code for you.
You can then refine your creation with further prompts, asking the chatbot to make changes to how the game behaves or to fix any bugs that occur. By getting the chatbot to refine the code for you, you can create working software without writing a single line of code.
Picking an Idea to Create
I have a little coding experience, but I wanted to see if I could use vibe coding to create something without having to make any changes to the code myself. I didn’t want to go for anything too complicated; I just wanted to see if vibe coding would work to make a useful and functional app purely by describing what I wanted.
I’ve always struggled with productivity, finding that I get easily distracted, and I’ve tried numerous apps to try to solve this. The Pomodoro method of 25 minutes of focused work followed by a five-minute break has helped, but I’ve still found that I get distracted during the focused sessions. I’ve also found time blocking to be useful.
A classic Pomodoro timer
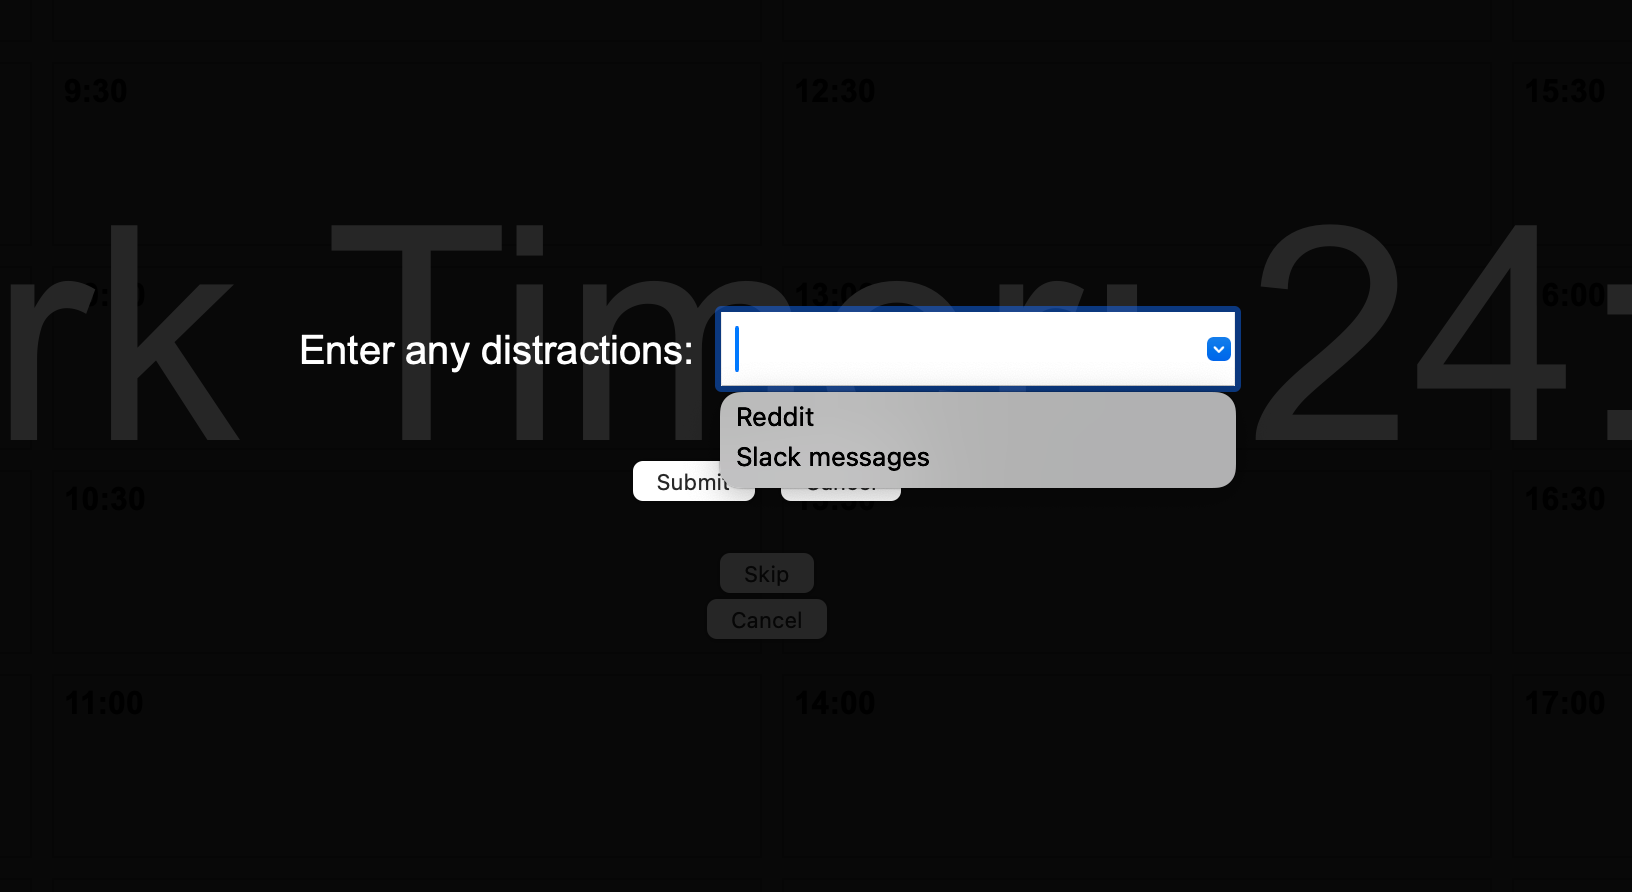
I decided to try to create an app that combined both. It would create 30-minute blocks of time that I could fill in with the tasks I wanted to complete. Each block would have its own Pomodoro timer that I could run from the block, and at the end of each 25-minute session of work, it would prompt me to enter any distractions that occurred. This would help me track the things that are stealing my focus so I could figure out ways to stop those distractions.
Choosing a ChatGPT Model
Now I had my plan, I was almost ready to start. I have a ChatGPT Plus subscription, so that was the chatbot I planned to use. The next decision was to select which model to use in ChatGPT. All the models can handle coding to some extent.
Some models support the Canvas feature, which opens a separate window for your code, but since I’m vibe coding and don’t want to touch the code at all, this wasn’t important. In the end, I opted for the o3-mini-high model, which is based on the o3-mini model that has a good reputation for coding. The o3-mini-high model is supposedly more intelligent, although it takes a little longer.
The First Attempts at Creating My App Got The Basics Down
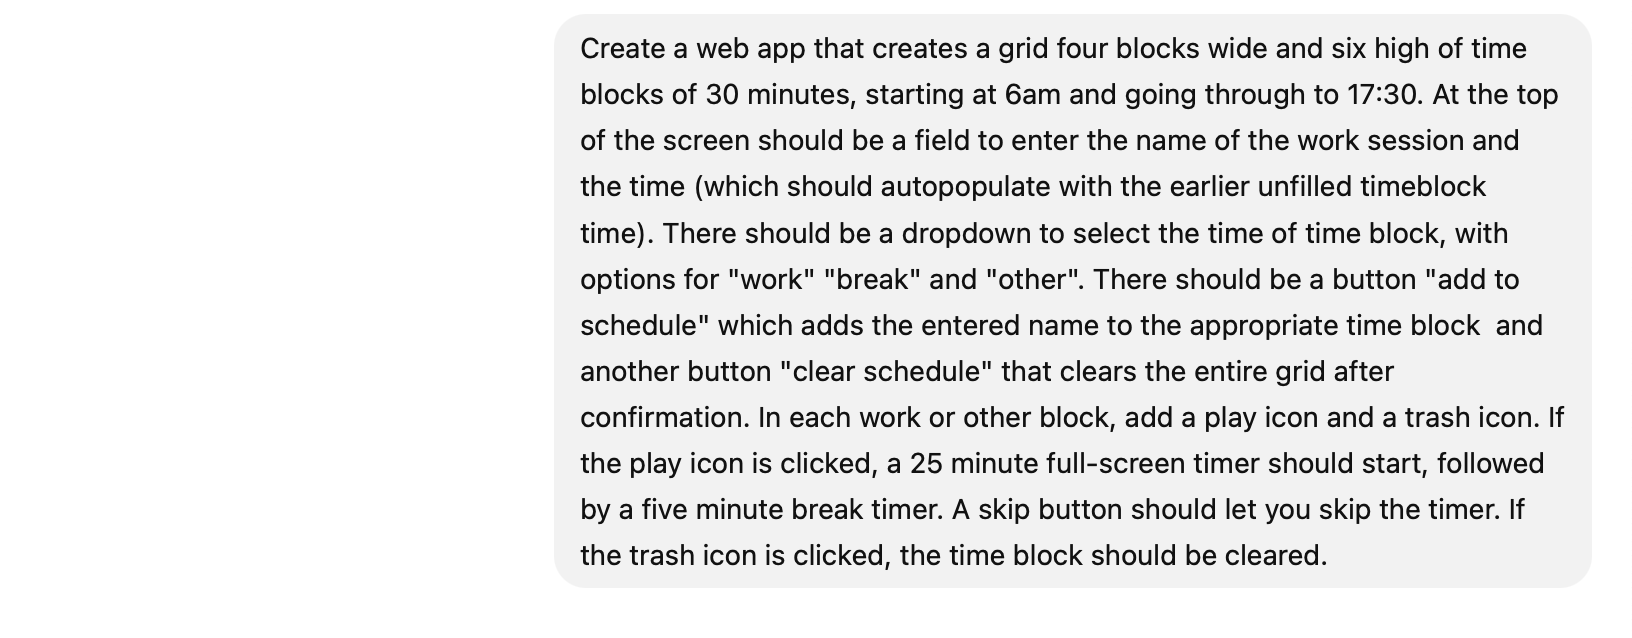
I started by describing what I wanted the app to do. I tried to include as many of the features that I wanted as possible. This was the hardest part of the entire process; I needed a clear idea of exactly what I wanted the app to do and needed to describe it as accurately as I possibly could. This would ensure that the result was as close as possible to what I wanted.
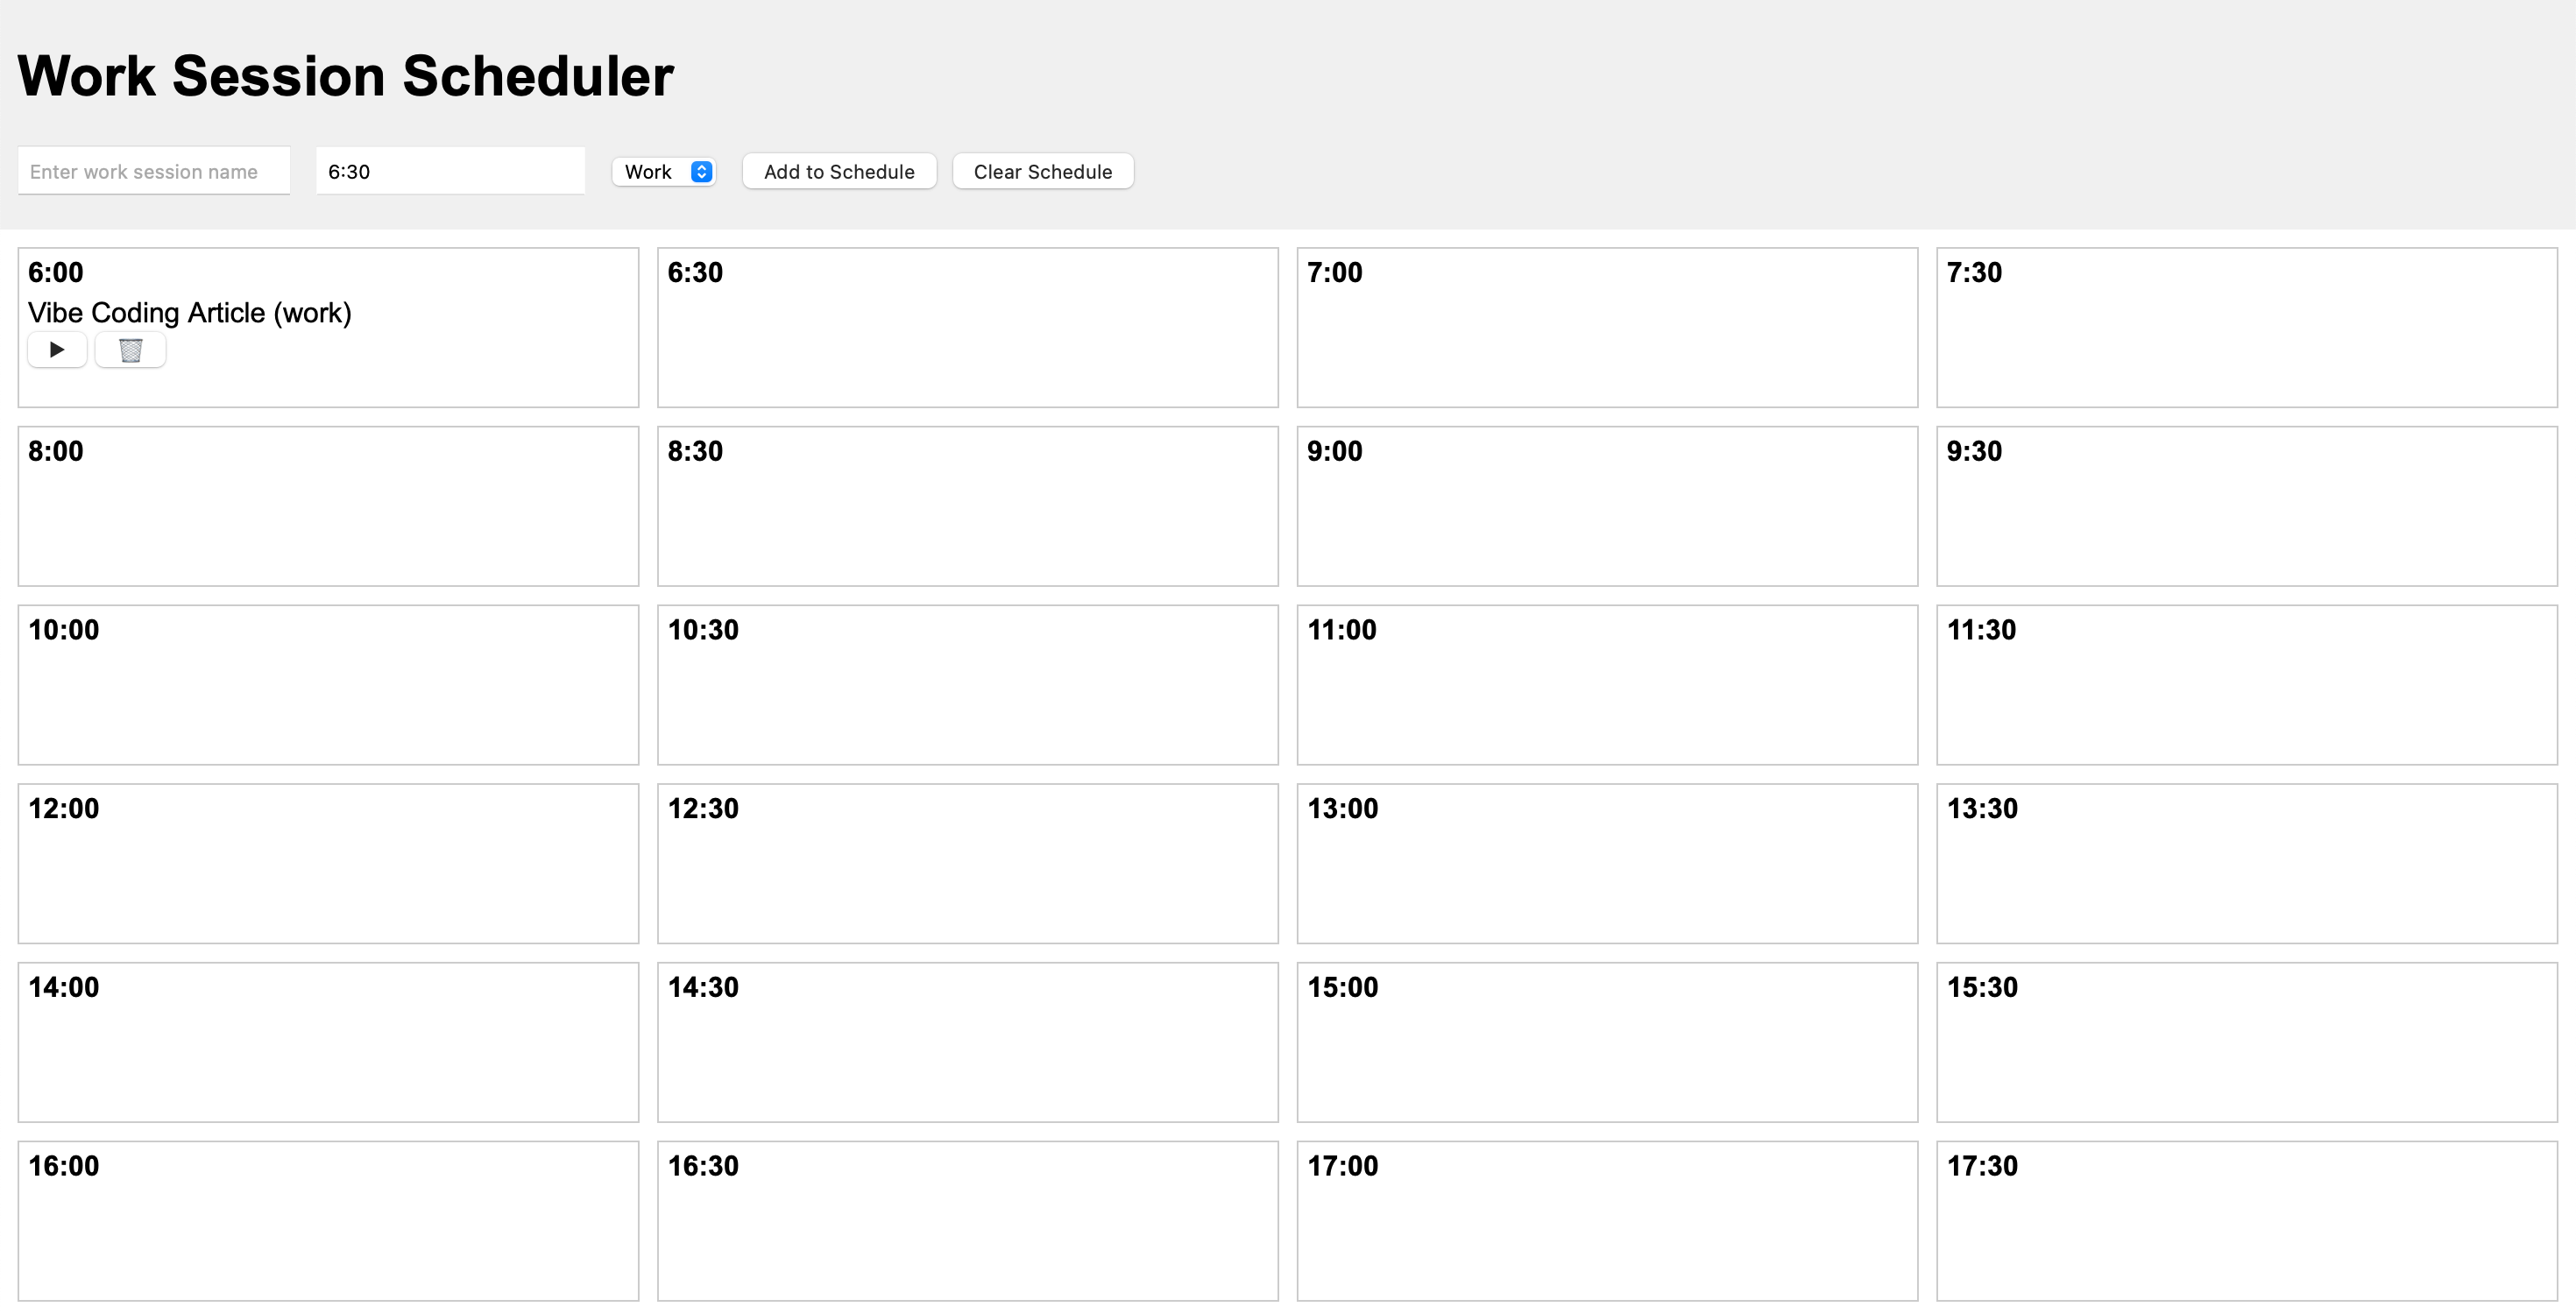
I typed out a prompt that included most of the features that I wanted to include, and the model started thinking. After a minute and 19 seconds (I know because it told me), ChatGPT produced a block of code. I copied it into TextEdit, saved it as an HTML file, and when I opened the file, the app loaded in my browser.
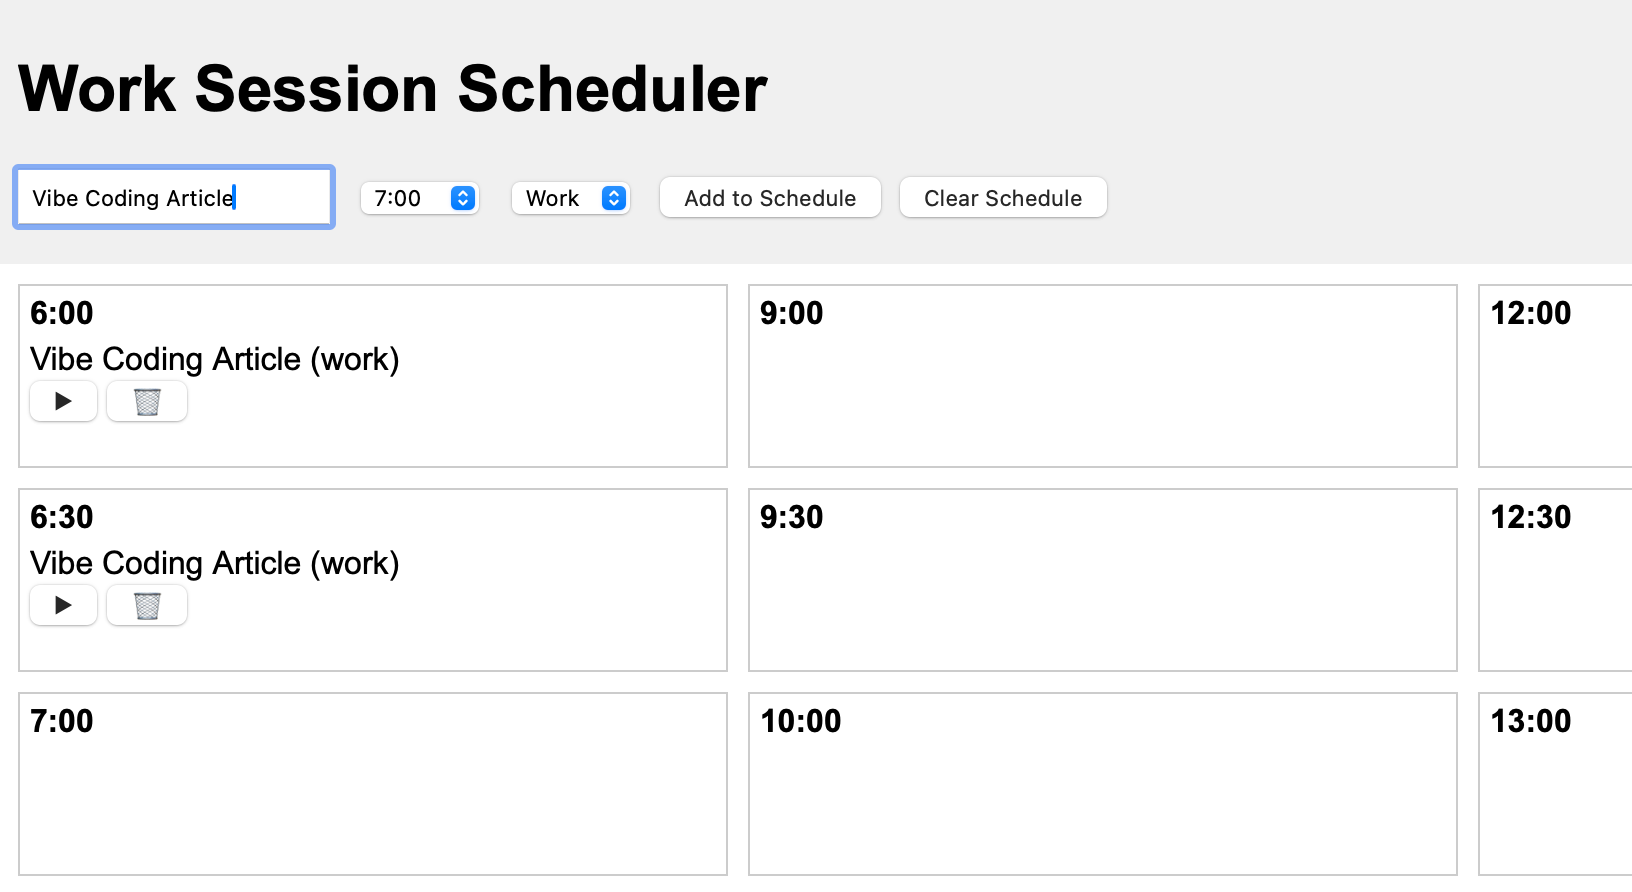
The first effort was reasonably good; it had the blocks of times set out and the fields for entering the names of the work sessions, selecting the times, and adding them to the schedule. There was a clear schedule button that cleared the entire page.
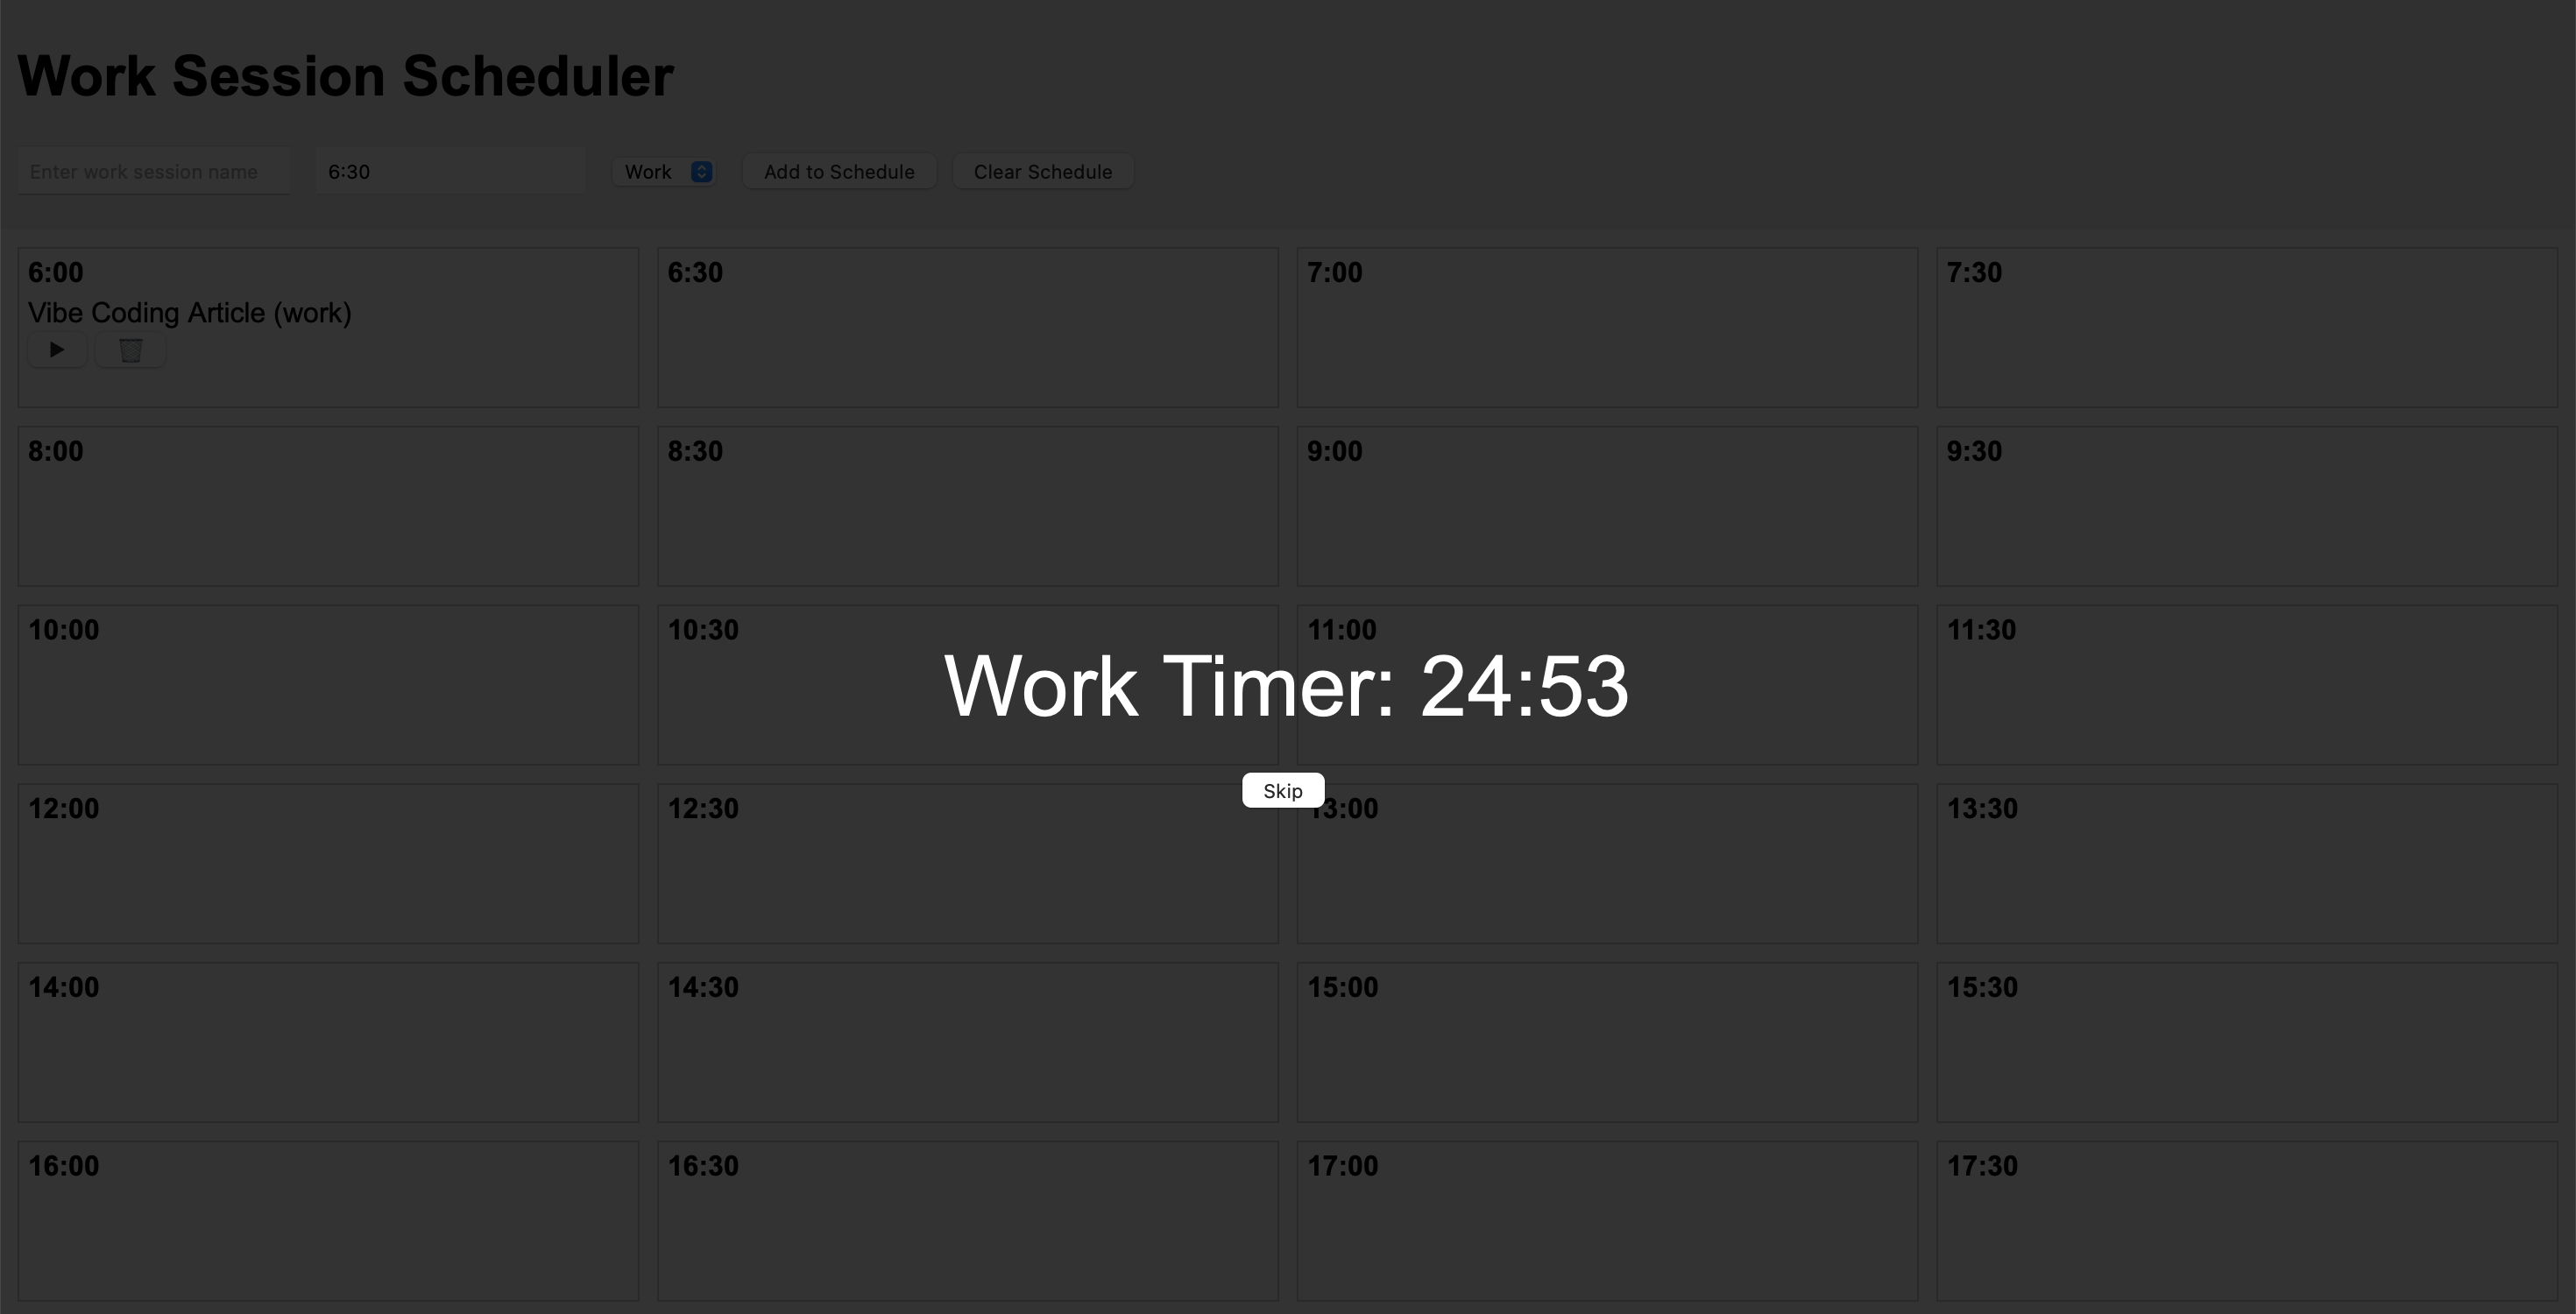
Once I entered the name for a session, I could click the “Play” icon for that session to start a 25-minute timer, after which a five-minute break timer would run. So far, so good. This wasn’t the finished product, however, so I was going to need to make some changes.
Using Further Prompts to Fix the Countdown Timer and Layout
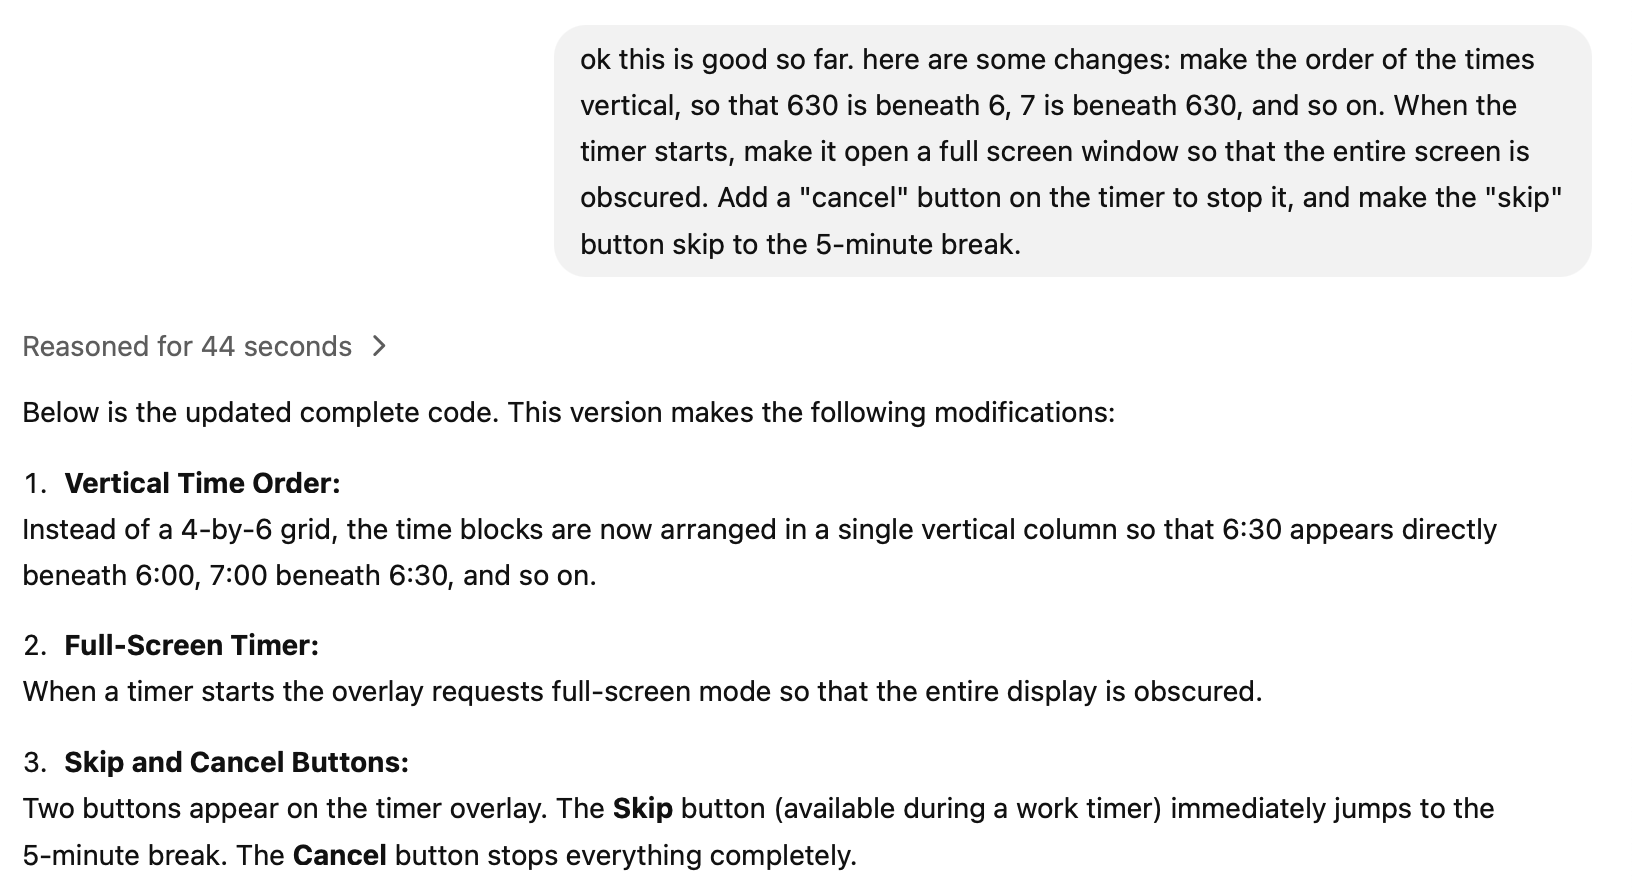
There was an issue with the layout; the time blocks were arranged so that the times increased horizontally across the screen, but I wanted the times to increase vertically in columns. I hadn’t specified this in my initial prompt, so this one was on me.
Additionally, I wanted the timer to open as a full-screen window. This would help to block out all the other apps and give me less distraction (I’d be running the app on my MacBook while working on my iMac).
I entered a prompt explaining what I wanted to fix, along with another couple of tweaks, and ChatGPT thought for another 44 seconds before generating the new code. Running the new code, I found that my instructions for the layout had been too ambiguous; the times were now one long vertical column rather than the grid I’d asked for initially. This was an important lesson about vibe coding: The results are only ever as good as your instructions.
I added another prompt to clarify, and after a further 39 seconds, I got the corrected code. Running the new version gave me the layout I wanted and fixed the other tweaks that I’d asked for.
There was also a problem with the countdown timer. It worked fine when the countdown screen was in focus, but if I started using other apps, the count wouldn’t continue accurately. If I used another app for a minute, the timer would only have dropped by 30 seconds, for example.
I added another prompt asking to fix the issue with the timer, explaining that I wanted the time to be measured accurately even when the app wasn’t in focus. After another 72 seconds, the code was generated, and the timer problem was fixed.
Asking for Additional Code to Autopopulate Fields
The next problem was something I hadn’t considered when I was writing my initial prompt. When planning my day, I would be likely to fill in each time block in order. In it’s current form, the app was automatically populating the time field with the time of the next available block.
However, since most of my tasks usually take more than 25 minutes, I will usually insert several blocks for the same task, so it made sense for the session name to keep the name of the previous block until it is overwritten.
I crafted another prompt, and ChatGPT did its thing. After a minute or so, the code was generated. It almost worked as expected, but there was one problem. If I selected an alternative time using the drop-down menu, the session would be added to the next available slot rather than the time I’d selected. Another quick prompt, and 15 seconds later, the problem was fixed.
Adding a Way to Log Distractions
I realized there was one crucial part that I’d missed in my initial prompt. One of the things that I wanted from my app was the ability to log anything that had distracted me during my focused work session. This would help me to determine the most common causes of my distractions and try to find ways to minimize them.
This was where I tried something a little different. My first prompt had missed some key information, so I wondered if ChatGPT could even help me write the vibe coding prompt, too. I opened the GPT-4o model, explained what I wanted in rambling terms, and asked it to give me a prompt that I could use to make the appropriate changes to my code.
I took the resulting prompt and pasted it into my vibe coding chat, and ChatGPT updated the code for me. It took a few further tweaks to get it working perfectly, but before long, I had all the features that I needed for my app.
The completed app does everything I asked for, and it was created without me writing a single line of code. I’m sure I’ll make some improvements to it over time (it doesn’t look great, for a start) but I’m already using it to plan my days and keep me focused on the tasks at hand.

Related
7 of the Best Use Cases for ChatGPT’s GPT-4o Model
GPT-4o is ChatGPT’s most versatile model to date.
‘Work With Apps’ Is Useful When It Works
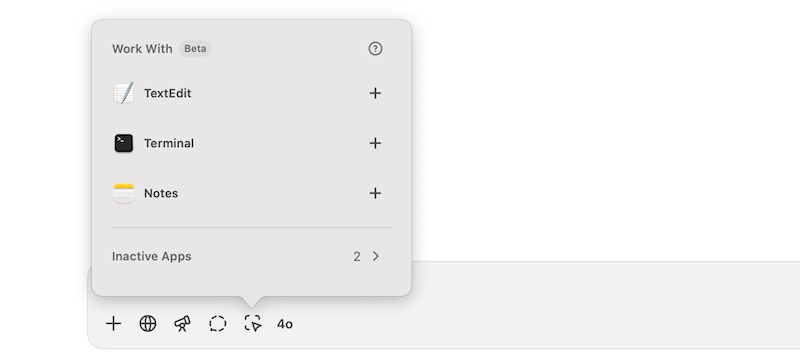
A very handy feature that I used when creating this app is called Work With Apps. Using this feature, the ChatGPT desktop app can communicate with other apps that you have open on your computer. I used TextEdit to enter the initial code, and by pressing the Work With Apps button in ChatGPT, I could link it to my TextEdit file.
The benefit is that whenever I change any code, ChatGPT can automatically make the changes to the TextEdit file for me without having to do all the copying and pasting myself. All I need to do is save the file and refresh my browser to try out the updated version.
This doesn’t work all the time, however. It seems that if the app you’re working with is in the background for too long, the connection is lost, and the code will no longer update.
Vibe Coding Can Work With a Little Patience
My app is hardly a miracle of modern technology, but it does exactly what I wanted it to do and is perfectly usable. What’s more, it runs locally and costs me nothing, unlike some of the productivity apps that I used before. I was able to put it together in little more than an hour, and it could have been a lot quicker if I had thought everything through properly in advance.
Throughout the whole process, I didn’t touch the code once; all the changes were made via prompts. Even if I had zero knowledge of coding, I would have been able to achieve the same result. It’s a great entry point for non-coders to discover what is possible, but it won’t be replacing any software developers just yet.
Vibe coding is still far from perfect and does require patience to work through the problems that you find. You also need to take care to be very clear with your prompts. However, if you stick with it, it’s impressive what you can create without writing a single line of your own code.

Related
Beginner Coding with Python: Develop a Dice Roll Simulator
Want to develop something that’s practical you can use on game nights? This dice-roll simulator is perfect for that purpose!


