Key Takeaways
- You can secure confidential files in OneDrive’s Personal Vault, which adds an extra layer of protection. To access any data within the vault, you first need to confirm your identity.
- Use the Scan and Save feature to store scanned documents directly in OneDrive. Also, free up your local storage space with the Files On-Demand feature.
- Take advantage of OneDrive’s version history to revert to previous file versions as needed. When sharing files, password-protect links or set an expiration date for better security.
OneDrive is a widely popular cloud storage service, but it can do more than just save your important data. If you use OneDrive as your primary cloud storage solution, it’s worth exploring these features to make the most of it.
1. Put Files in OneDrive’s Personal Vault
Personal Vault is a handy feature within Microsoft OneDrive designed to secure your most sensitive information with an additional layer of protection. Any files placed inside require additional verification to access, making it an ideal location for storing legal documents, identification papers, financial records, or any other confidential data.
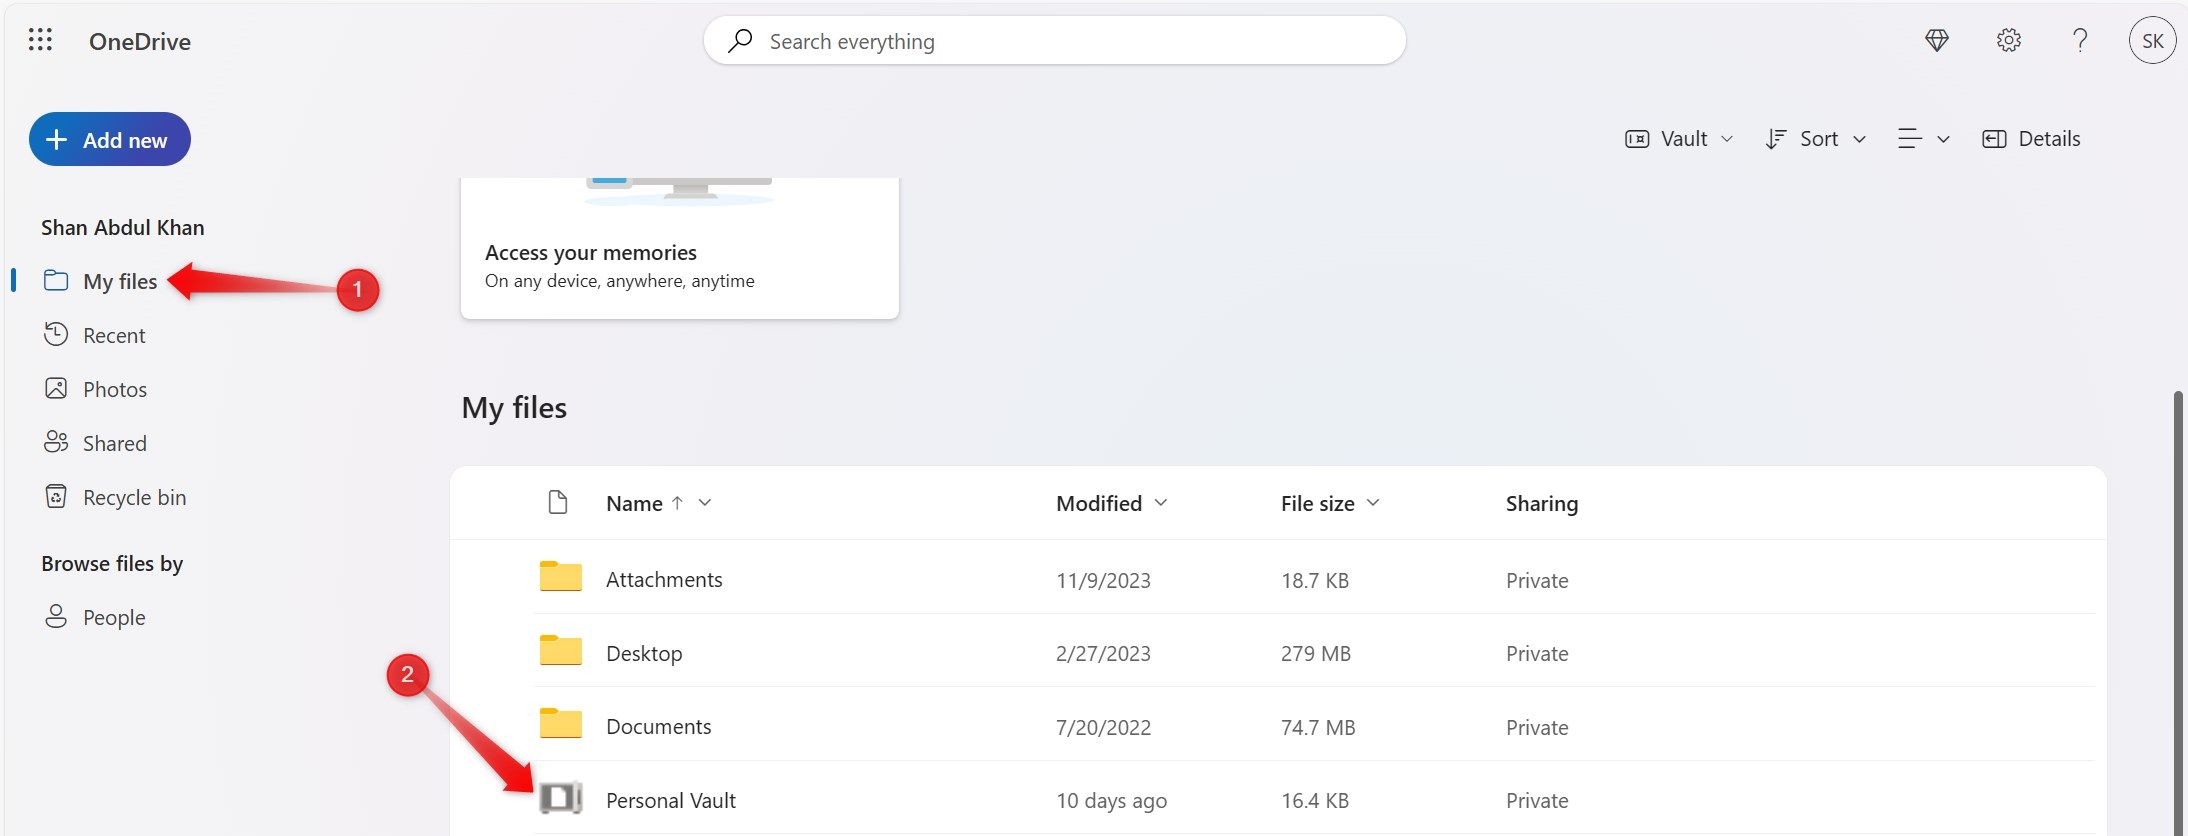
To place a file into your vault, navigate to the “My Files” tab on the left, select “Personal Vault,” then drag the file from your PC into the vault.
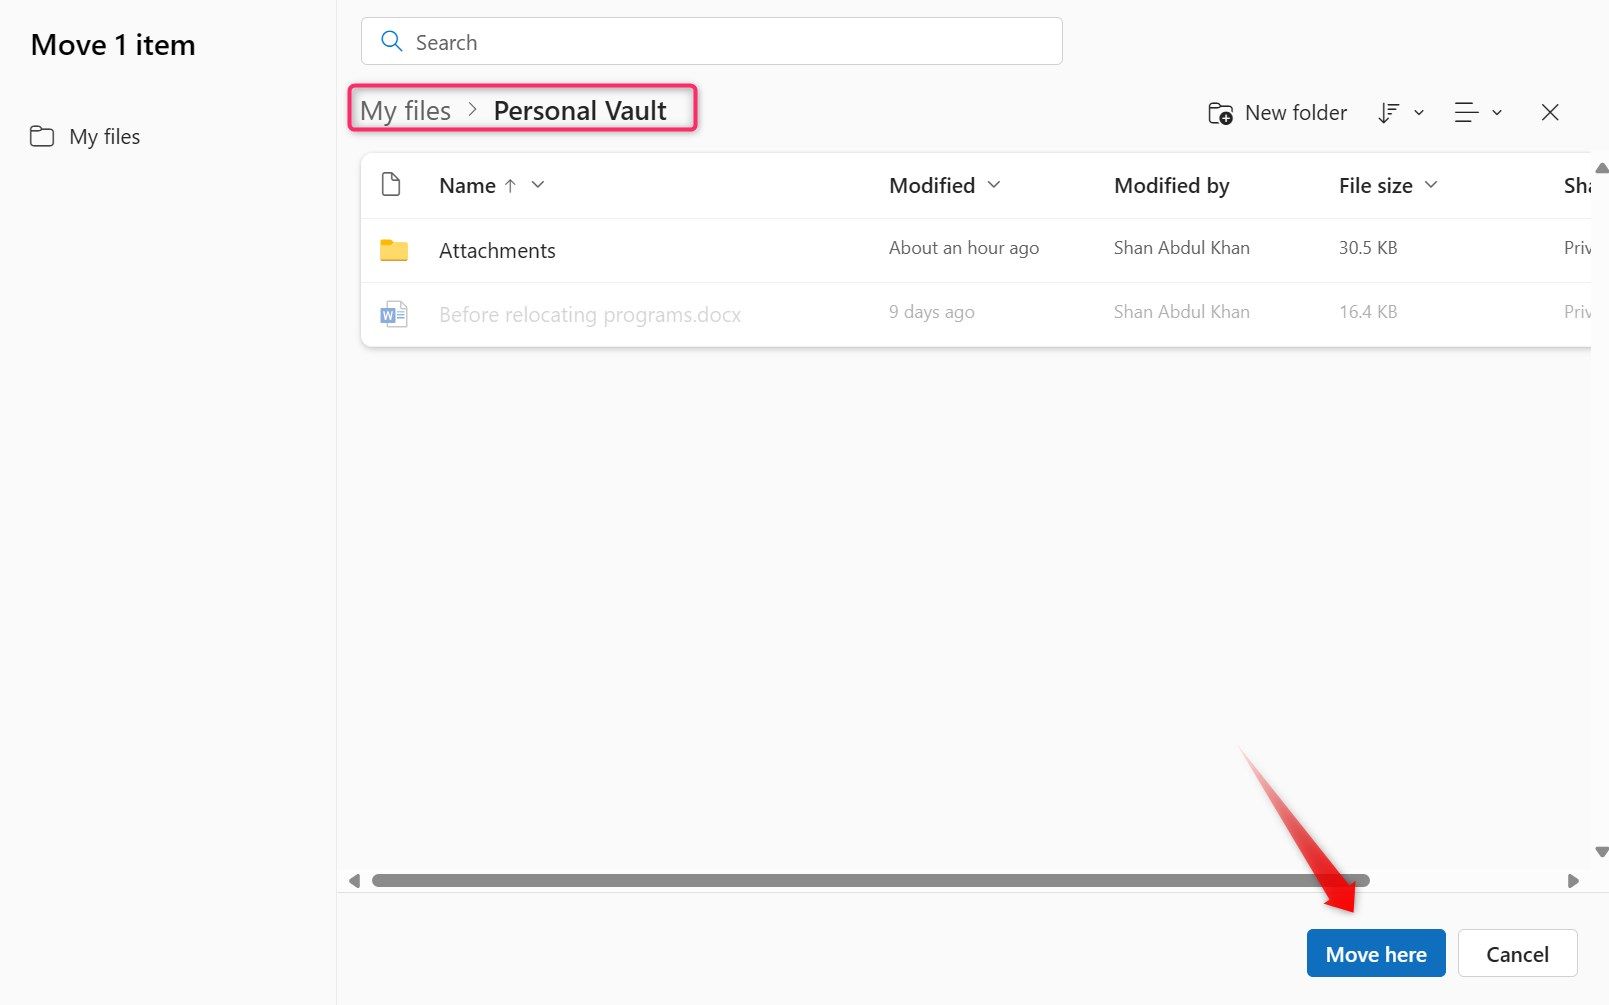
To transfer existing files within OneDrive to the vault, click on the three horizontal dots adjacent to the file and choose “Move to.”
Then, select “Personal Vault” and then click “Move Here.” Remember, you must unlock Personal Vault before you can transfer files into it.
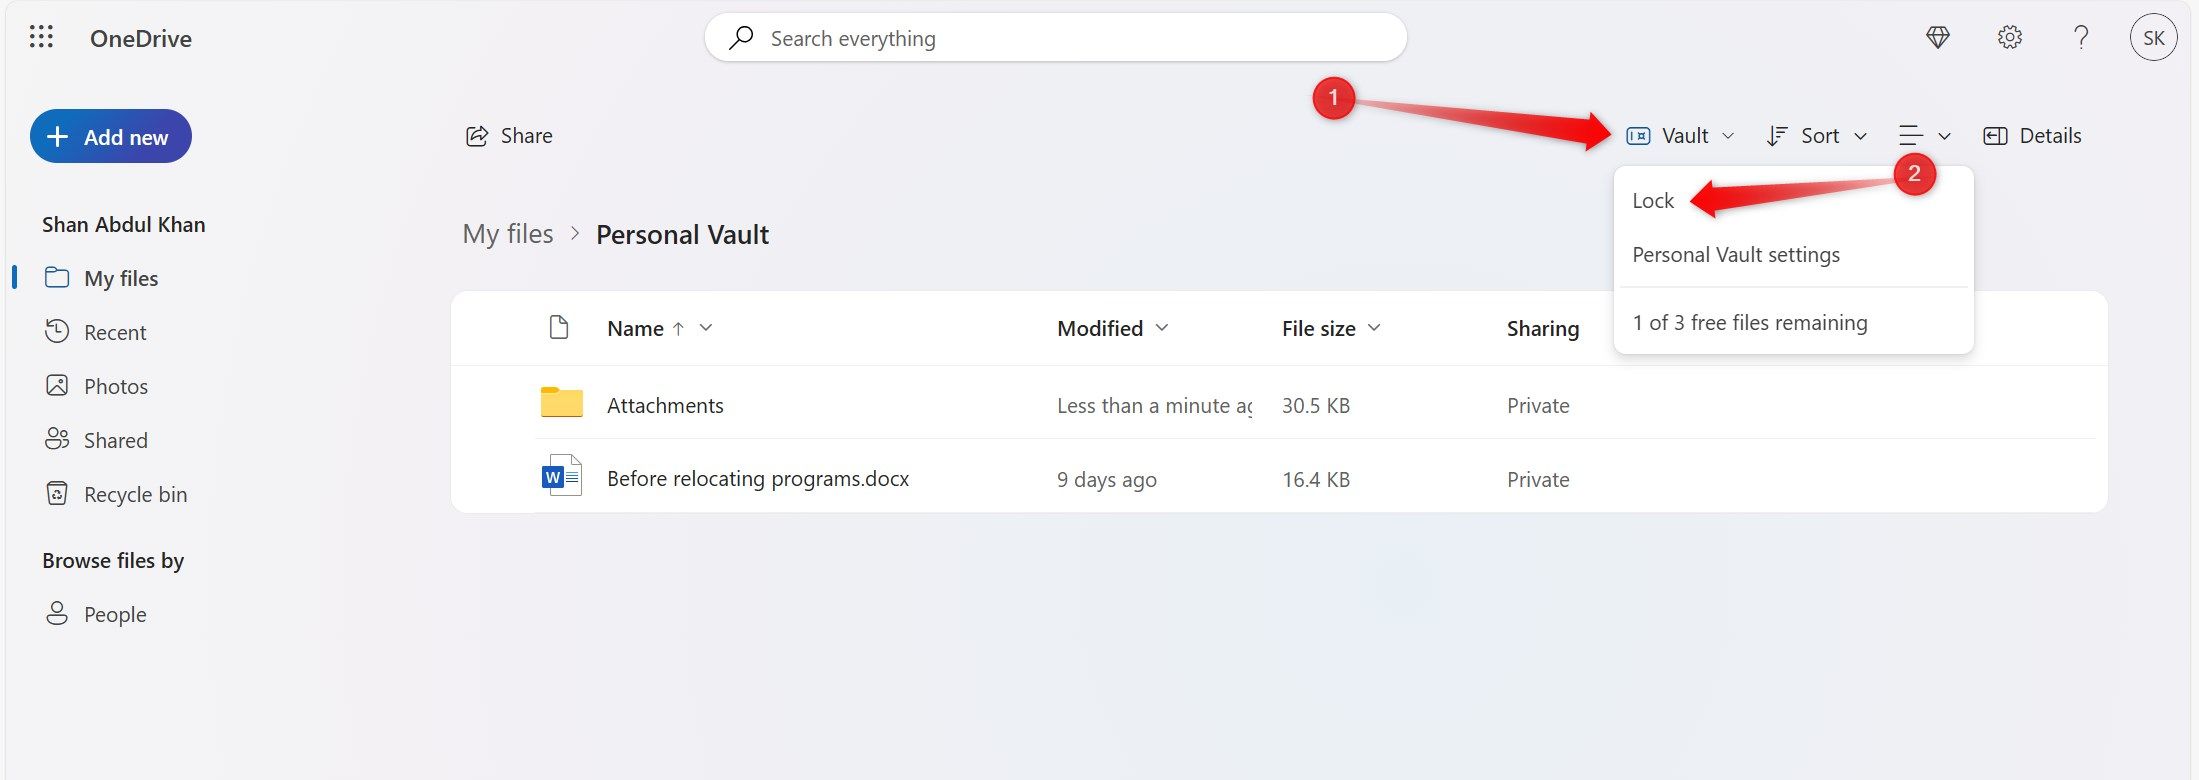
When you have finished adding files to the vault, click on the “Vault” drop-down menu on the top-right side and select “Lock.”
This will secure your vault, and the next time you wish to access any files inside it, you will be required to verify your identity.
2. Use Scan and Save to Convert Paper Documents Into a PDF
If you frequently have to scan and store paper documents in your cloud storage, consider using OneDrive’s scan and save feature. This feature lets you scan documents, convert them into PDF files, and directly store them in OneDrive, all through the convenience of the OneDrive smartphone app.
To use this feature, launch the OneDrive smartphone app, tap on the “Camera” icon located in the bottom-right corner, and position the camera over the first page of the document until the scanner detects the text. Once the desired text is detected, capture the image by tapping the take photo button.
Subsequently, to scan the next pages, tap on “Add,” scan the next page, and repeat the process until you have scanned all pages. After completing the scanning, tap on the “Done” button.
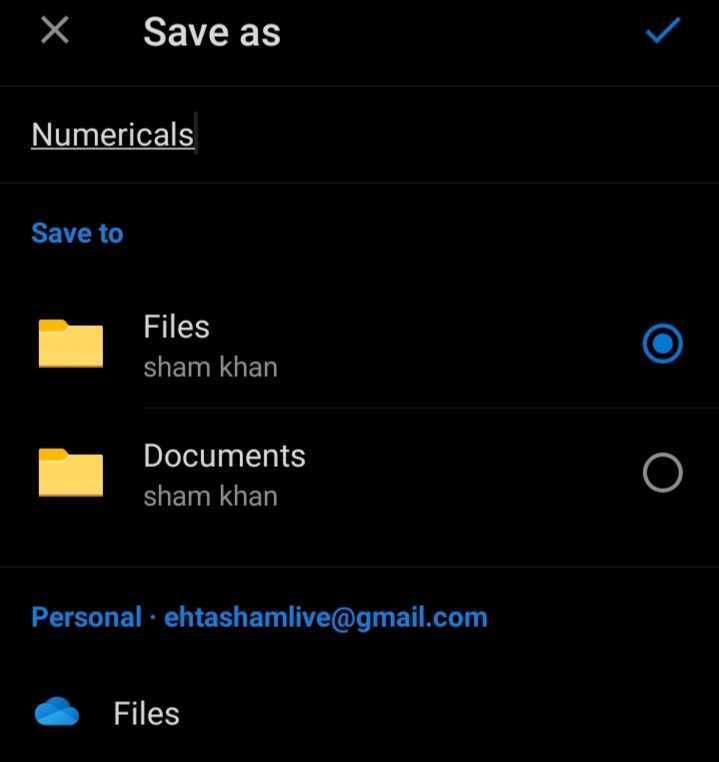
Then, input the desired file name in the space below Save As, designate the storage location, and confirm by clicking the checkmark icon in the top-right corner.
3. Use OneDrive’s Files On-Demand to Save Space on Your Computer
If you’ve synced OneDrive to your PC for easy access to your data but find it eating up considerable storage space, consider using OneDrive’s Files On-Demand feature. This feature enables you to keep your OneDrive files online and download them only when you need them, which eliminates the strain on your local storage.
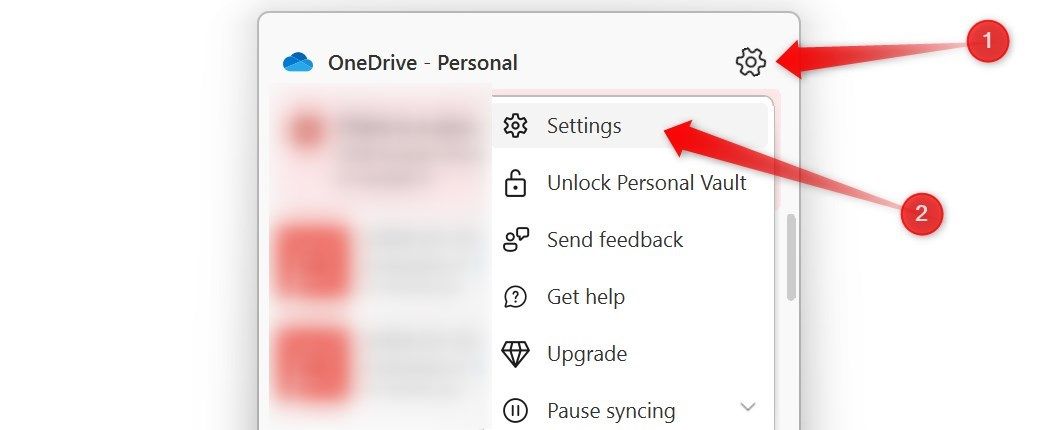
To reclaim space on your system, click on the OneDrive icon in the system tray, then click on the gear icon and select “Settings.”
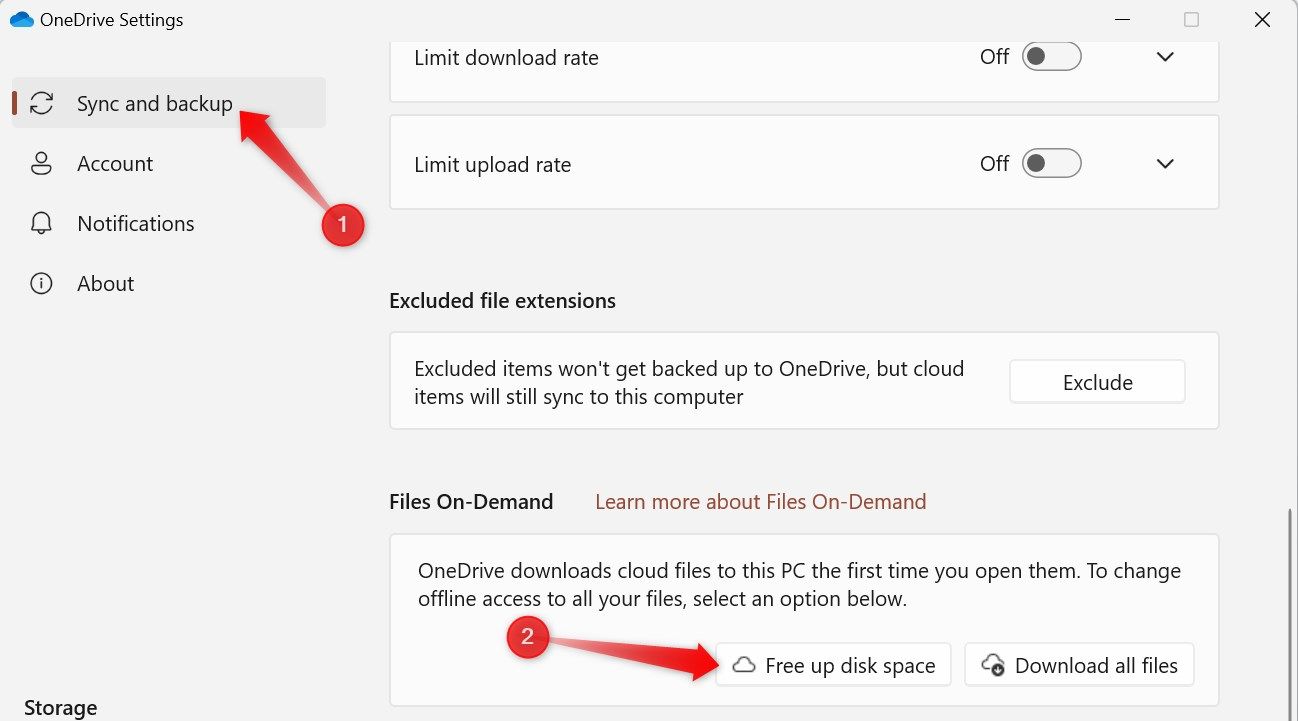
Proceed to the “Sync and Backup” tab, locate the Files On-Demand section, and click on “Free Up Disk Space.” This action will set all files to online-only, clearing local storage space on your drive.
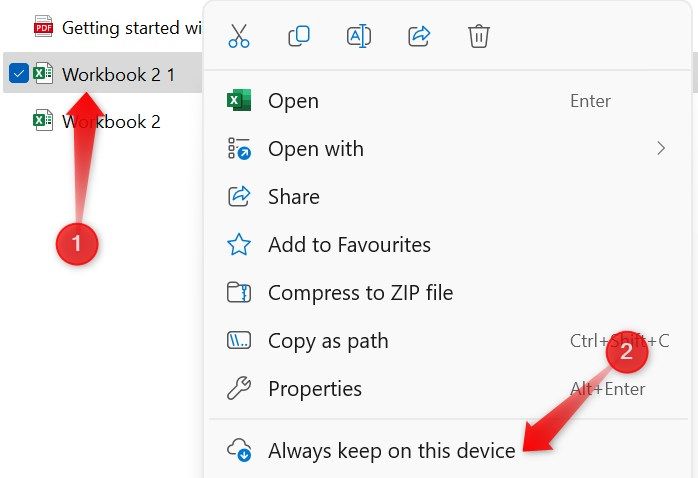
An internet connection will be required to access these online-only files. If you wish to download specific files again to your computer, right-click on them and select “Always Keep On This Device.”
4. Share Files With Link Expiration and Password Protect Them
The Links Expiration feature in OneDrive allows you to share files and folders for a specific duration. Once the designated time passes, recipients lose access to the shared content. Additionally, you can improve the security of your shared data by password-protecting the link and sharing the password selectively with a few members.
Do note, however, that these features are exclusively available to Microsoft 365 premium users; those using the free OneDrive service won’t have access.
To apply link expiration and enable password protection, click the “Share” button beside the desired file.
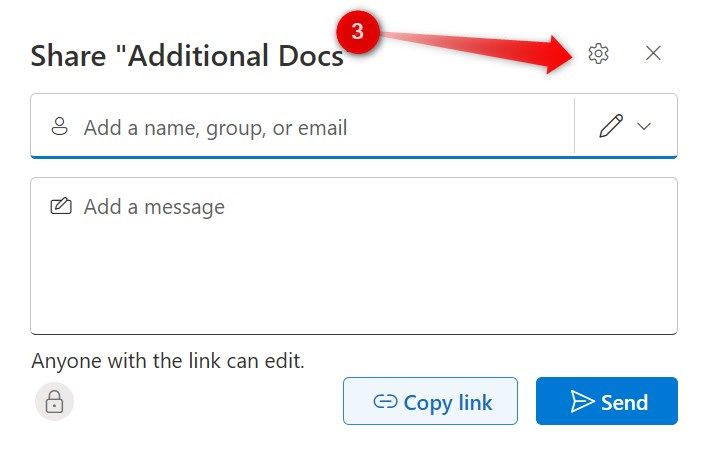
Then, open Link Settings by clicking the gear icon.
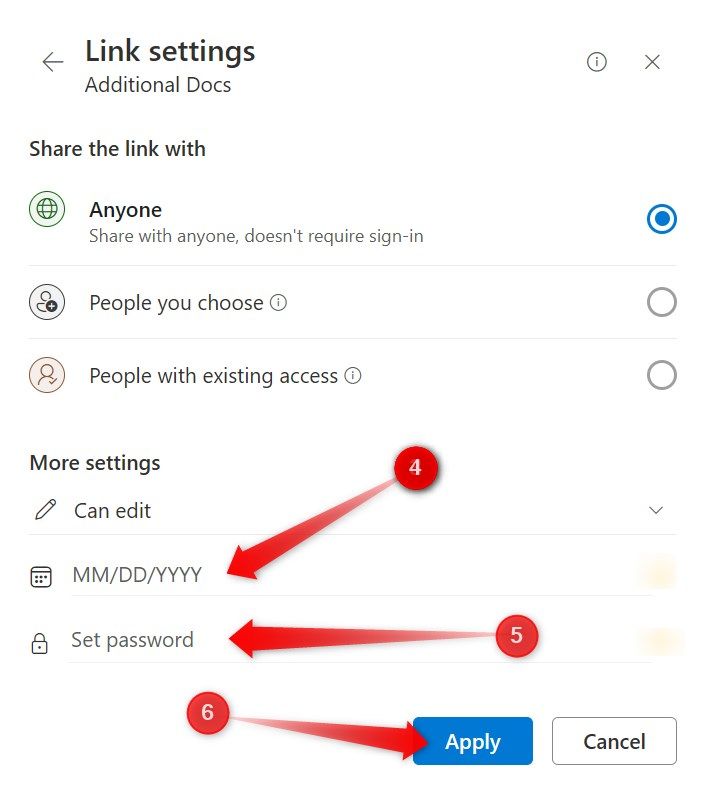
Within the Link Settings window, navigate to the More Settings section, specify the expiration date, create a strong password, and finally, click “Apply.”
5. Check and Restore the Old Version of a File
OneDrive’s Version History feature allows you to view and open previous versions of a file. If you unintentionally make changes to a document that’s synced to OneDrive, and the Office application doesn’t allow you to revert these changes, you can download an earlier, unaltered version from OneDrive’s version history.
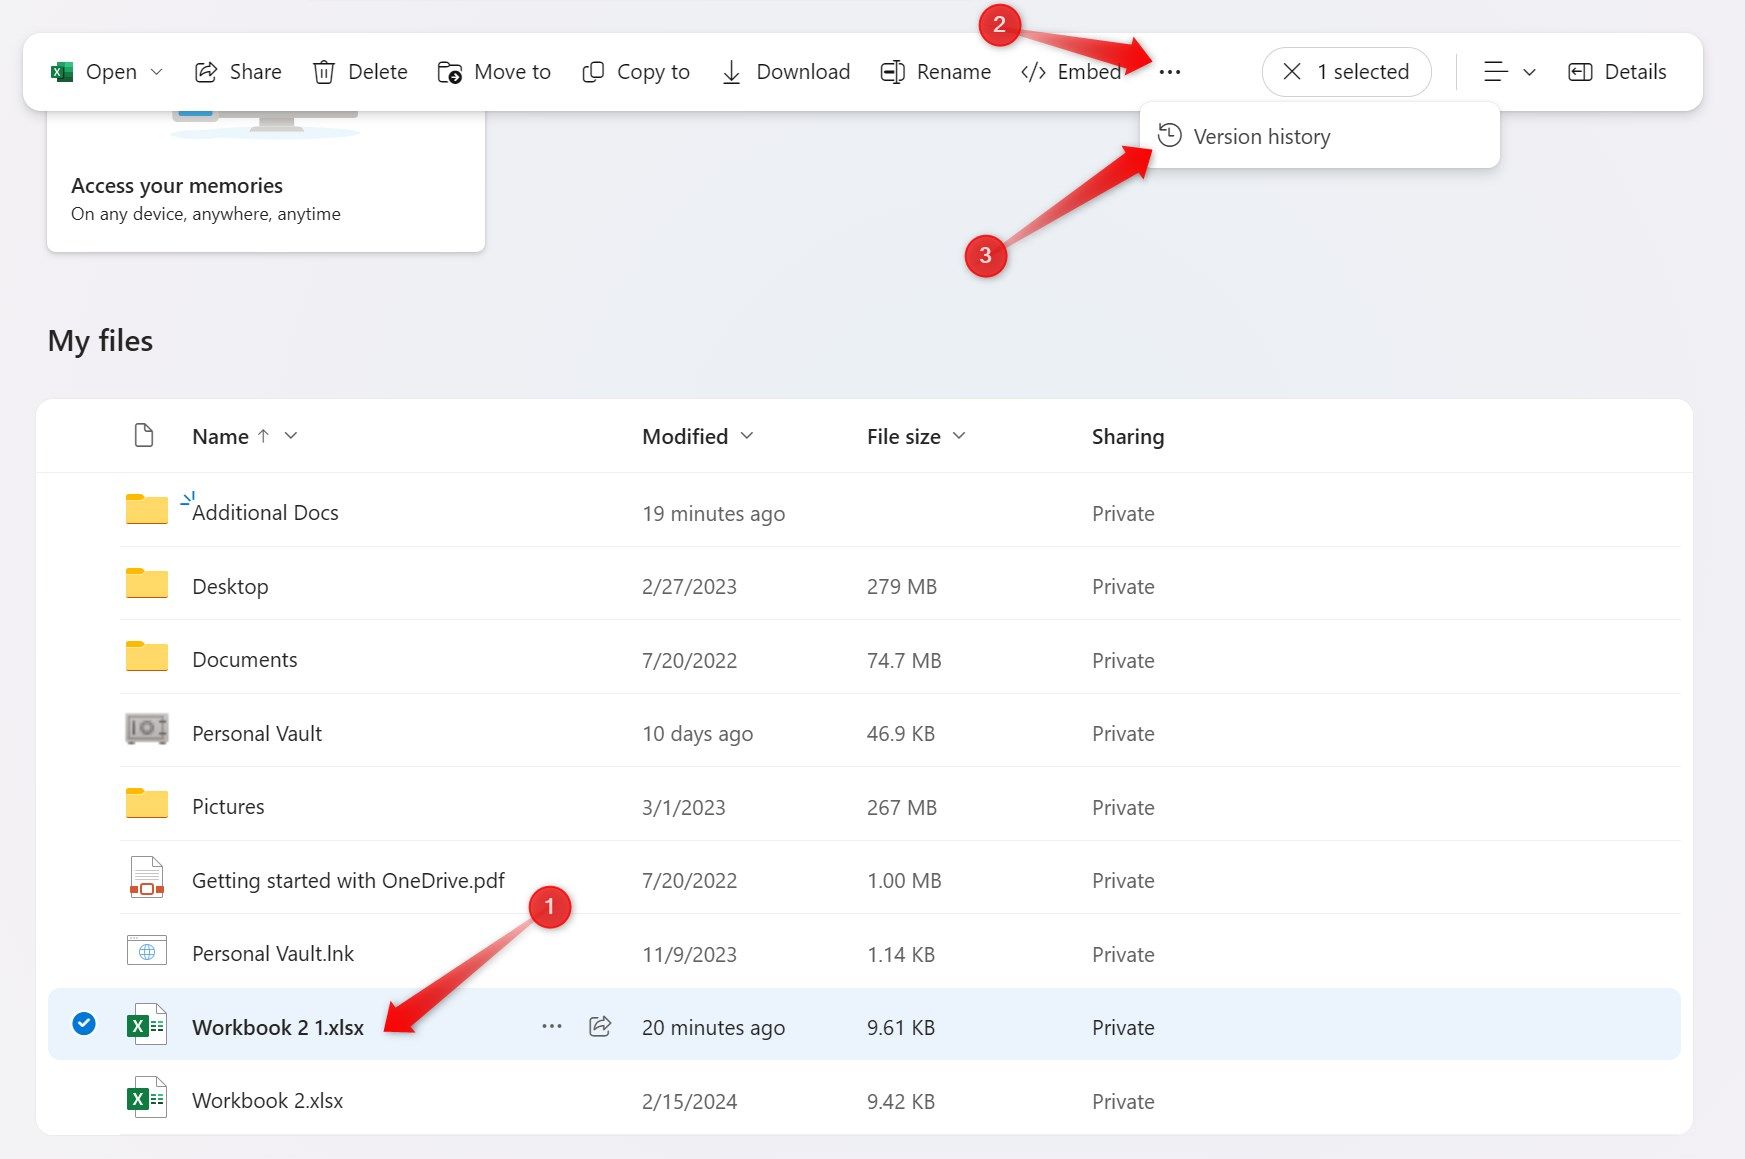
To open older versions of a file in OneDrive, select the file and go to “Version History” in the top menu bar. If you don’t see this option, click the three horizontal dots and select “Version History.” OneDrive will then display the available versions of the selected file.
To open a specific version, click the three vertical dots and choose “Open File.”
6. Create Real Time Backup of Your Files
If you often lose hours of work due to power outages or Office application crashes, consider using the AutoSave feature. This feature automatically saves your files to OneDrive, ensuring that changes are continually saved in real time. Thus, in the event of an accidental crash, your data remains secure with a backup saved in OneDrive.
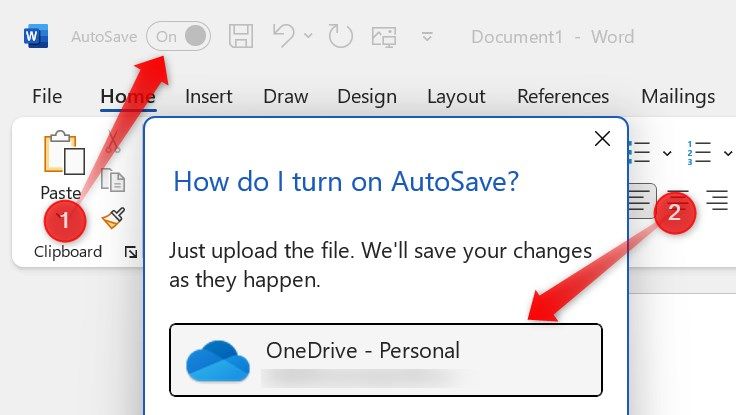
To enable real-time backup in OneDrive, toggle the AutoSave feature in the top-left corner of your Office applications before you begin working on any file.
When prompted to select a backup location, choose OneDrive, and it will serve as your backup destination while you work on your document.
These features in OneDrive can improve the security of your data, free up your local storage space, and boost productivity. If you haven’t explored these features yet, it’s worth giving them a try—they’re sure to impress you. If you don’t use OneDrive as your main storage solution, check out compelling reasons why you should consider making the switch.


