

Apple Books is an underrated gem for how good books look in it and for how Apple has concentrated on making a tremendous reading experience — but it still has some oddities, plus the problem of a smaller bookstore than its rivals.
This isn’t like Apple TV+ where the service started small but is steadily growing. Instead, it has consistently always been that if you want an ebook, it is certainly on Amazon Kindle, but only probably on Apple Books.
Then Apple Books has the reputation for charging more for books than Amazon does and while that’s not always the case, it still often is. If there is a difference at all, it can be a matter of just a dollar or two, though, and Apple Books is easily the better buy than Kindle just for the sheer presentation of the books and Apple’s care for typography.
Except there is one more thing. Kindle books are locked to Amazon, but they can still be read everywhere — including on iPads, iPhones, and Macs. Apple Books can only be read on Apple devices.
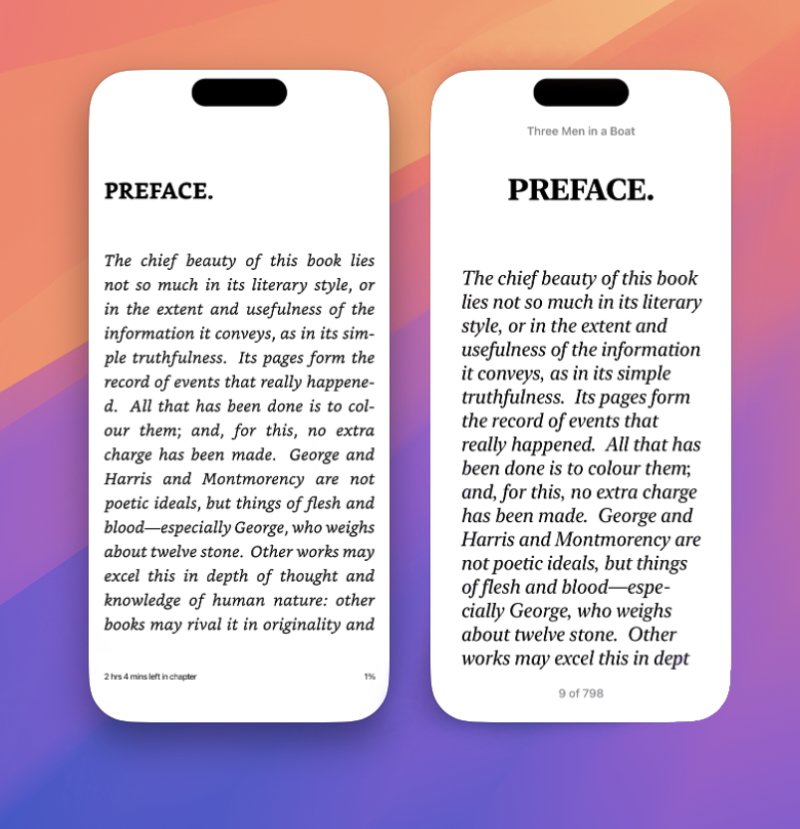
Left: Kindle app on iPhone. Right: Apple Books on iPhone. The difference is clearer when compared to a hardware Kindle, but Apple Books has far better typography
So if you want to build a collection and have it in just one place, if you want to be able to read any ebook you own without wondering where you saved it, there is an advantage to going for Kindle instead of Apple Books.
But if it’s an advantage, it’s also a compromise. Apple Books on any Apple device are vastly more a pleasure to read than on any current Kindle hardware.
It’s also better than the Kindle app on Apple devices, though there the typography comes more under Apple’s control so the difference is less.
Amazon concentrated on getting every book available on Kindle and it so devalued typography that it was years before hardware Kindles had any update to address it.
Apple, on the other hand, concentrated on each individual book and how it looked. Key to the whole Apple Books experience is that when you’re reading a book, you are just reading the book — all of the many options from bookmarking and highlighting are kept out of sight.
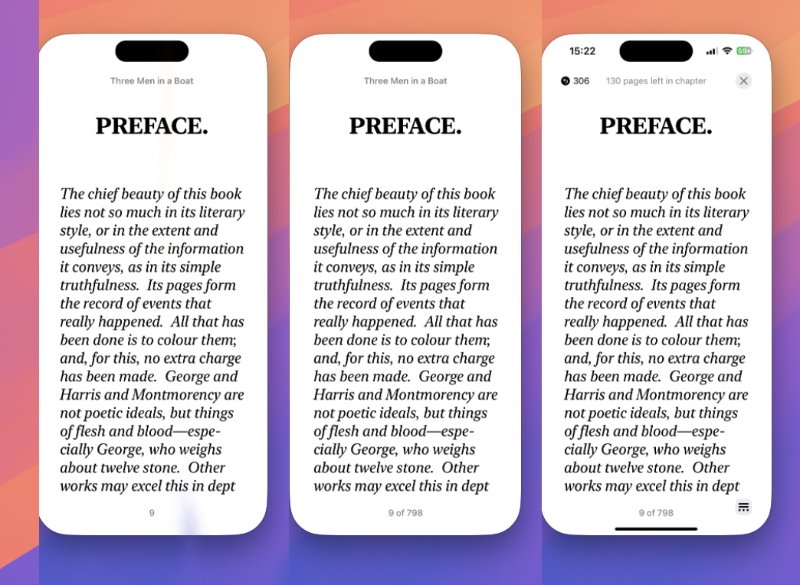
Left: an uninterrupted reading experience. Middle: a little information. Right: full Apple Books controls
That’s central to the whole experience, but it does also mean that you can so very easily miss all the useful extra features that Apple Books offers. Plus until you know how it works, you can be staring at a book page entirely lost for how to get out of it.
How to read in Apple Books
There’s a whole side to Apple Books that is to do with finding and buying books, and much to say about the detail of that. Yet first, you would imagine that reading a book you’ve got would be simple and it is, but only if you know certain things.
Such as one oddity that for some unfathomable reason is shared by both Apple Books and Kindle. If you have a book showing in your library but it doesn’t happen to be downloaded onto the device you’re using, naturally when you tap on the book, the first thing it does is download.
Only, you have made a positive choice that you want to read this book so it should then open, but it doesn’t. You have to wait until it’s downloaded and then tap again, in exactly the way you just did.
If a book you own doesn’t happen to be on your current device, there are a couple of ways to download it
Across all Apple devices, there is a circular icon that shows you both that a book is being downloaded, and how far along that download is. It’s particularly easy to miss on the iPhone, though, so you can be left wondering why nothing appears to have happened when you tapped.
Downloading is quick — even on a slow internet connection, books are not large — so if you just scratch your head for a moment and then tap the book again, it’s been downloaded. But since it’s now downloaded, when you tap it, the book opens.
It all leaves you thinking you must have tapped it wrongly in some way.
Uninterrupted reading
Then when you are in a book, you are just in the book — you see its text, you see nothing of any controls, and the whole screen is taken over by that book. It is very well done, it is very freeing of distractions, and you just get to read, then tap or swipe to get to the next page.
Soon enough, though, you’re going to finish the book, or you’ll have no more time to read just now. You can just come out of Apple Books, knowing that the title will stay on the latest page whether you open the app again on this device or any other you own.
But to come out of the book and stay in Apple Books, to get other titles for instance, you need to bring up the controls. It’s not as if this is hard, but it does take a little getting used to.
For the way to bring up controls on the iPhone or iPad is to tap or click in the center of the page. If you tap for just a beat too long, however, you don’t get controls, you instead highlight a word and get a definition.
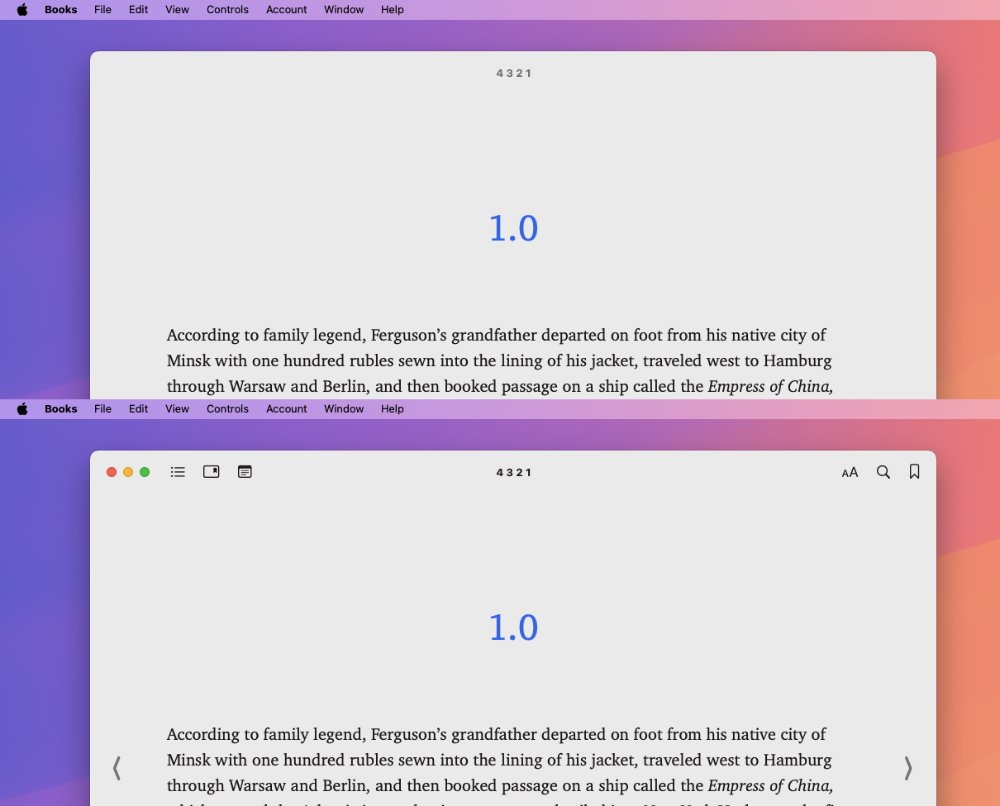
Top: uninterrupted reading in the Mac. Bottom: bringing up all of the Apple Books controls.
It’s different on the Mac, where clicking in the middle of the book screen does nothing at all. On the Mac, you have to move your cursor up toward the top of the book’s window and click.
Controls for reading
In its most recent redesign, Apple Books also minimized the controls you see when you even call up the controls. There is some text information — what page you’re on and, depending on how the publisher has provided the text, also how many pages are left in the chapter or the book.
Otherwise, there is an X close icon at top right, and an icon of two lines over ellipses at bottom right. Tap on that bottom right icon and you get a neat set of initially seven controls.
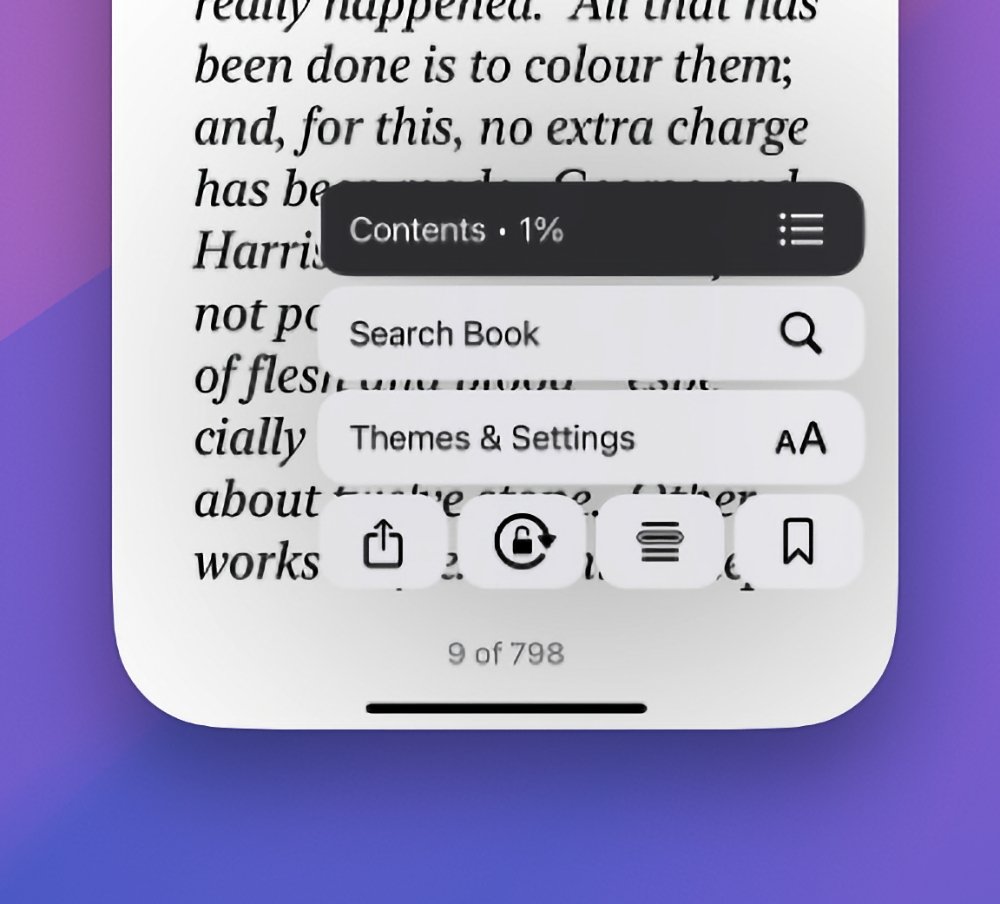
Apple groups its Books controls into one neat selection
- Contents (and a percentage read marker)
- Search Book
- Themes & Settings
- Sharing
- Device screen lock
- Line Guide
- Bookmark
Line Guide is perhaps the least familiar, but may also be the most useful — although it is solely on the iPhone. It’s an accessibility option which dims the text of a book except for a single line.
When you’ve read that line, you tap on the screen and it dims while the next one is highlighted instead.
Line Guide is a reading aid on the iPhone version of Apple Books
To come back out of Line Guide, you tap the Line Guide icon which appears at bottom left. It includes options for controlling the dimming of other lines, plus Turn Off Line Guide.
Of the other controls, which are across all devices, Themes & Settings is the most comprehensive, ranging from font and background, to how pages look as you turn them.
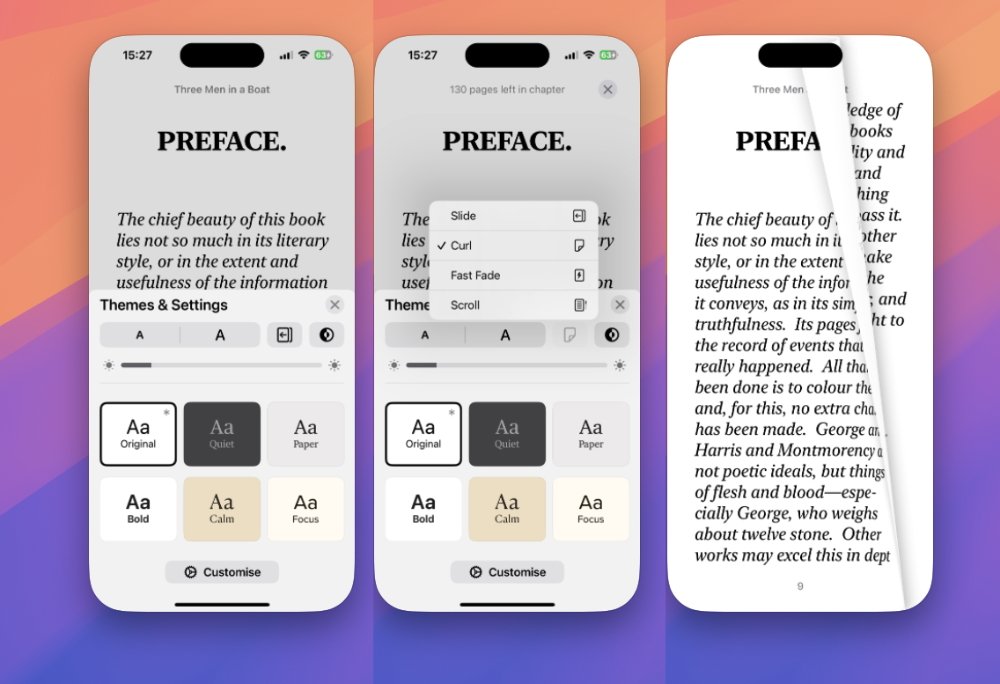
The many settings options include restoring the old curling page animation
Tapping on Themes & Settings takes you to a panel that is headed by font size controls. These two buttons marked with a small and a large A let you step up or down through different sizes of text.
Next to those Aa icons is the page turn one, though the way it looks changes depending on your selection. By default, Apple Books now just Slides from one page to the next, but you can change that.
Maybe the most common option is Curl. This is how Apple Books used to always work, right from when it was first released in 2010 as iBooks.
As you swipe to go to the next page, Curl animates the turning of the current page. You can also slowly swipe and control that animation, even turning the page back and forth.
It’s a particularly well-done piece of Apple design, but you can also get bored of it very quickly. So Curl is no longer the default, and Themes & Settings also offers Slide, Fast Fade, and even just Scroll.
With that last, you no longer get any page turning at all. Instead, the entire book becomes one long, continuous flow of text and you simply keep scrolling down it.
More themes
This Themes & Settings section also contains an option for light or dark mode. This is particularly good for when you’re reading at night and your iPhone or iPad screen seems incredibly bright.
You can choose to specifically be in light or dark mode, or you can have Apple Books change alongside your device’s light/dark setting. Or perhaps most usefully, there is a Match Surroundings option that will adjust light and dark depending on the ambient lighting conditions where you are.
Alongside this, you can have one-tap access to six major variations of Apple Books, such as a Calm setting that puts light black text on a sepia background. Plus there is an overall brightness slider.
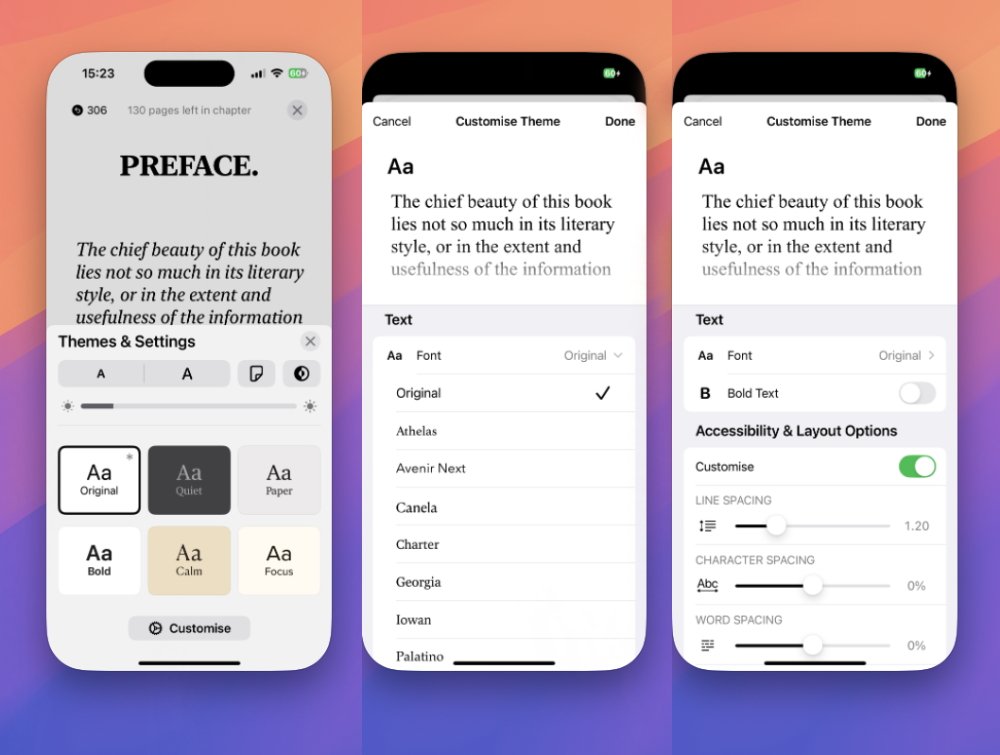
Then there is also, though, a Customize option. This opens up a choice of fonts — it isn’t every font on your device, but it is around a dozen of them.
Settings options also include accessibility features
These same options are also on the Mac if you tap on the Aa icon toward the top right of the screen.
Just as on the iPhone and iPad, doing that also presents yet another level of adjustable features. Having tapped or clicked on Customize, there is a section called Accessibility & Layout Options, which has its own further Customize control.
Choose that and you can now set your preferred line spacing, character spacing, word spacing, and margins. There’s also the option to have text be justified right and left, so have straight or jagged edges on the right.
The odds are that while it is startling how much control you can have in Apple Books, most people will not alter any of these options. That might be because the controls are a little hidden, but it could be because the default settings have been well chosen.
Study aids
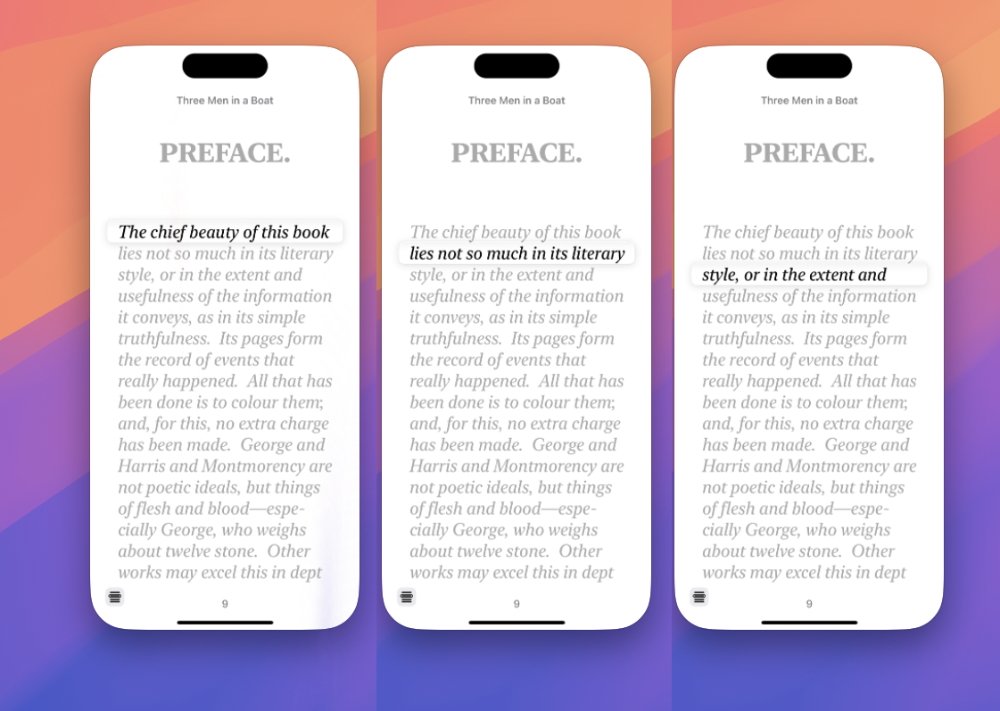
Speaking of hidden options, Apple Books has the ability for you to mark passages, but it doesn’t tell you how.
To do it, you first press and hold on the iPhone or iPad screen, then quickly swipe left or right to select a section of text. Once you do that, a popup menu offers you at least these options:
- Highlight
- Add Note
- Translate
- Search
- Copy
- Share
- Speak
If you have only selected one word, you get those plus Look Up, the dictionary option. Curiously, if you do just highlight one word, at first nothing happens other than it is highlighted.
To get the popup menu on a single word, you have to highlight it, then tap again in the middle of the highlight. It’s like you’re asking nicely.
Of the controls you then get, search is an curious one. What it does is search the current book for any occurrence of what you have highlighted.
If that highlight is more than a word, then the odds are that the search will find only the page you’re already on. But you can use it to search for, say, character names, or one or two particular words you think may be repeated in the book.
The very first option in the popup menu, though, is Highlight. It does just what you think — it marks a passage so that you can easily find it later — but it isn’t quite the same as you may know from Kindle.
That’s a good thing, too. What Kindle does in every book, by default, is show you where other people have highlighted passages.
It’s called “Popular Highlights” and there must be people who want to know when a stranger has underlined a passage about dogs, but fortunately Apple doesn’t think so. You can make all the highlighting you like, you are the only one who’ll ever see it.
Or rather, you won’t bother other people, and they won’t bother you, unless you positively choose to take a highlight and Share it with them directly.
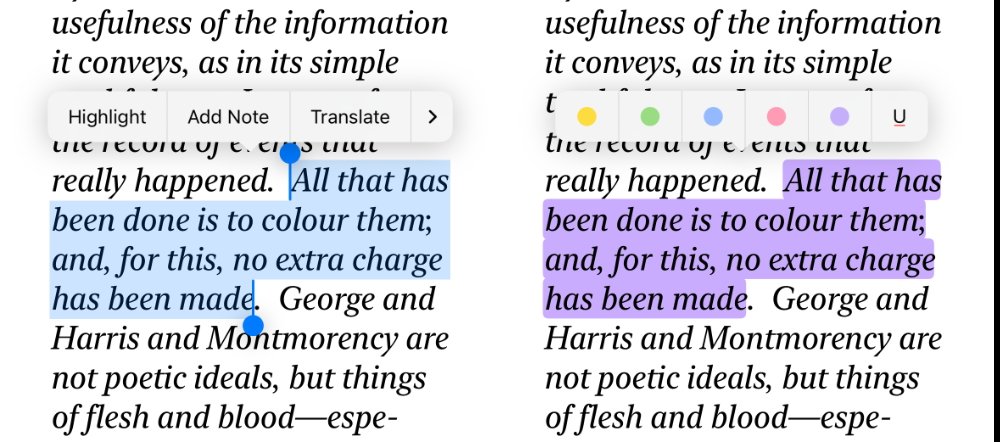
Select some text and you can then highlight it
Highlighting
To make a highlight for yourself on iPhone or iPad, tap on Highlight and you get the option for one of five colors, or an underline. On the Mac, drag over a passage to select it, then right-click to get a pop-up menu offering the colors, underlining, translation, searching, copying, Sharing, speech, or Add Note.
Pick a color, and that selected passage will forever be in that — until you select it again, and from the popup menu choose Remove Highlight.
Highlighting puts your chosen color behind the text. The text remains black, but the background for that passage is changed to your chosen color.
If you leave any section highlighted, then you will clearly see it as you go through the book again. However, you can also see all of your highlights in one place, and then jump from there to the specific page.
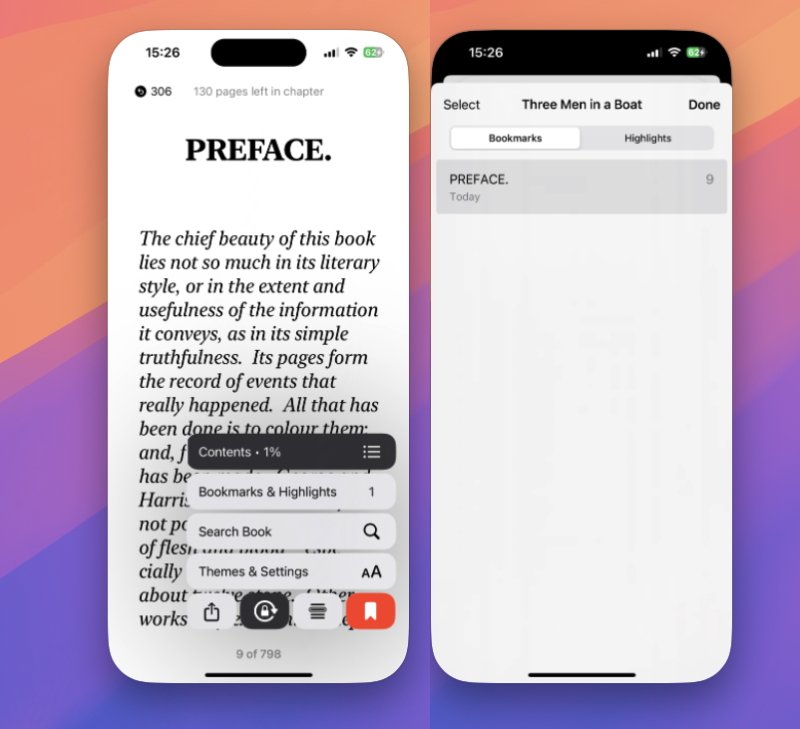
Tap a control to bookmark a page and you also get a new Bookmarks section.
Once anything is highlighted or bookmarked, the book controls change. Where there was Search Book before, there is now an extra control called Bookmarks & Highlights.
That new control also shows a number next to it, which is the count of how many highlights or bookmarks you’ve made.
Tap on the control and it defaults to showing you any bookmarks you’ve made. But you can tap at the top to switch to highlights.
Then it lists the highlight, what page it’s on, and when you added the highlight. Tap on the line and you go straight to the highlighted text in context.
Reading PDFs
All of this about highlighting, bookmarking, and searching, for instance, applies to anything you read in Apple Books — except PDFs. Apple Books is a reasonable PDF reader, and especially so on the iPhone or iPad where it’s perhaps even the best free viewer.
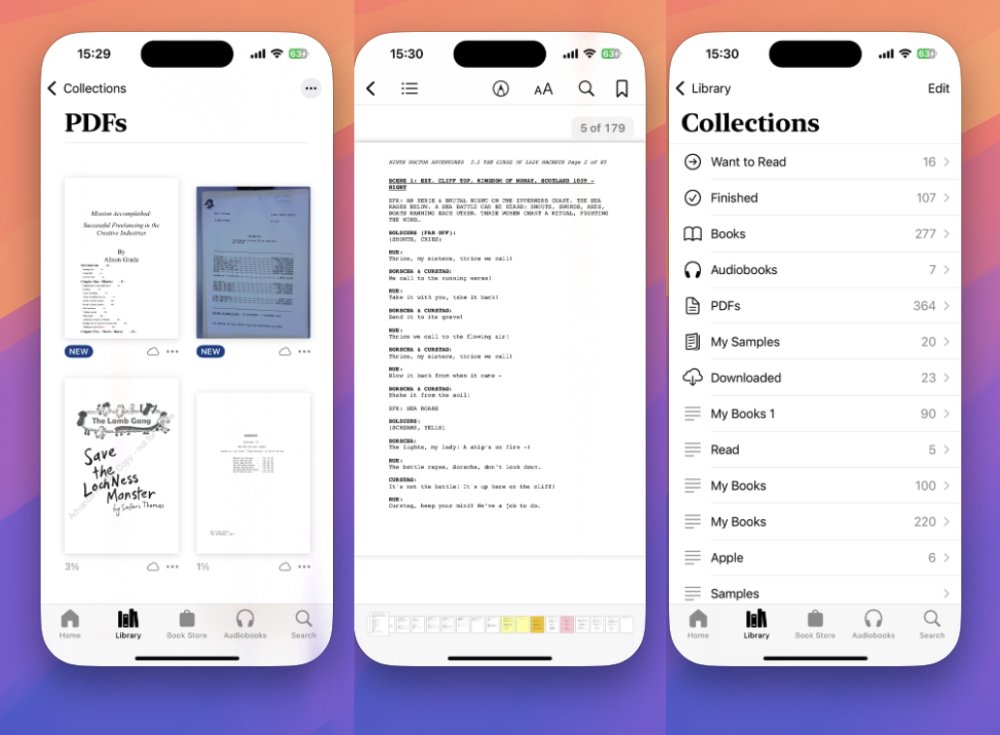
Apple Books on iPhone is an adequate PDF reader, plus you can sort them into Collections
But there are differences that apply to PDFs compared to every other type of document or book you can read in Apple Books. On the iPhone and iPad, you cannot, for example, change the font size.
On the Mac, you can’t exactly do that either, but you can zoom in or out — except you’re not doing it in Apple Books. While Books on the Mac used to let you read PDFs, now if you open one, the Mac sends that PDF over to the Preview app.
So on the Mac, Apple Books is just a holder, a transport mechanism, for syncing PDFs across your devices.
If you read a lot of PDFs, Apple Books feels like it gets clogged up with them and since PDFs typically don’t have covers, your library is filled with a lot of hard-to-distinguish documents. Apple does separate PDFs into their own section, away from all other books, but there aren’t a lot of organization options.
What you can do is create Collections. Select a couple or thirty PDFs, right click on the Mac and choose Add to Collection.
On iPhone or iPad, tap the ellipses icon at top right and choose Select. Then tap on any PDFs you want, and at the bottom of the screen tap the Add to button that appears.
When you tap that, you get a rather pointless list that shows you sections like Books, Audiobooks, and Want to Read, all of which they’re greyed out because they are unavailable. What is available is a New Collection button at the bottom.
It’s fairly basic way of grouping together related titles, but it’s handy with PDFs — and it works with all books, too, wherever you get them from.
What you can’t read
There is a peculiar thing with Apple Books on the Mac. You can drag practically any type of document onto its icon in your Dock, and it appears to accept it.
On the Mac, Dock icons darken to show you that this dragged document is something that app can open. Then when you let go, with Apple Books the document appears to go into the icon, and the app launches.

Apple Books in the Mac’s Dock will darken as you drag a book to it — but unless it’s an ePub format, good luck ever finding it
Unless the document is in epub format however, good luck. Presumably it’s in there somewhere, but you won’t find it in your library and it won’t automatically open the way a dragged book does.
On the iPhone and iPad, the equivalent to dragging is to open the document and Share it. But in Pages, for instance, Share does not include the option for sending to Books.
So this peculiarity is limited to the Mac.
What you can read
Apple Books uses the epub format, so any document in that form can be read by the Books app. You just have to drag it to the Books icon on the Mac, or Share it from something like the Files app on iPhone and iPad.
Unless you go around creating epub documents yourself, though, or you are somehow working with an archive of them created somewhere, the overwhelming majority of books you read will be ones from the Apple Bookstore.
That usually means buying them, but there are a very great many free books, such as public domain classics. The way you get any one of those is the same as buying a title, but the free books are also an illustration of a problem with the Bookstore.
Apple could not possibly find one more pixel of a way of recommending books. There are curated lists of staff favorites, there are top tens in different genres, there are promotional collections such as Coming Soon.
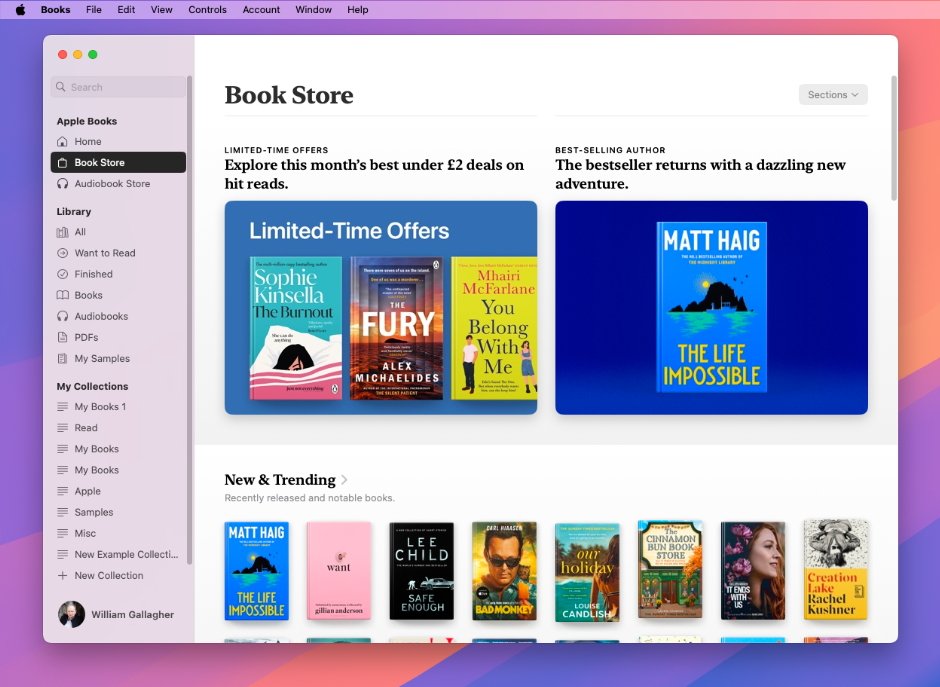
The Apple Bookstore is replete with recommendations, but its search feature is lacking
Recommendations
There is so much recommendation that it’s hard to just go in to see everything that’s available. For instance, the shortest route to finding all the free books starts with tapping on Bookstore at the bottom of the screen on iPhone or iPad, or clicking on it in the sidebar on the Mac.
From there, you need to scroll past “Limited Time Offers” and other promotions, until you reach “Top Free” — if “Top Free” is even there. Sometimes it is, sometimes it isn’t, whereas there is always a “Top Paid” section.
When there is a “Top Free” section, you can click on that to get the full top ten list, and it will include a button to show you all free books.
Unfortunately, when there isn’t a “Top Free” section, you’re screwed. There is no other way to browse only the free books.
What you have to do is search for specific titles, and that’s true whether you’re hoping to find a free one, or you’re just after a particular author. To do that search, you tap on the Search icon at bottom right of the iPhone or iPad screen, or in the sidebar on the Mac.
Searching in Apple Books
This is more noticeable on the Mac, but when you do a search, you’re not actually searching the Bookstore. Instead, you are searching your whole library plus the bookstore.
That’s good because it means search results always surface what’s in your library above what Apple can try to sell you.
And on the iPhone or iPad, this isn’t a big deal because while you are leaving the Bookstore to start the search, it’s just a matter of tapping on the Search icon in the bottom row. The screen switches from the Bookstore to the search, and it’s fine.
But on the Mac, search is in the sidebar. So you’ve gone into the Bookstore and your focus is on all it’s trying to sell you, and to search you have mentally step back out to find that search button.
Then searching in Apple Books, in any device, is not brilliant. Start typing an author’s name and Apple Books will autocomplete it, which is good, but then show you an unordered list of all possible titles by that person.
Frustratingly, search in Apple Books is inconsistent.
For example, if you search for “JK Rowling” then you get the Harry Potter books, as you’d expect, plus her novel, “The Casual Vacancy.” But if you instead search for “J. K. Rowling,” with periods, you get all of that plus the excellent “Cormoran Strike” novels she famously writes under the pseudonym of Robert Galbraith.
Whatever you search for, and however you spell it, you tend to get a long and initially unfiltered list of results. You do have some limited options for sorting that into something more manageable.
On the iPhone, there is a row of options you can tap to show All, Books, and Audiobooks. For some reason it varies — a search on iOS Apple Books could also give you a Series button, while the iPad may add Genres.
The Mac has the same list of options as the iPad, but it’s under a dropdown list called Filter by.
Search limitations
At this point, there is no option to sort by publication date. You can’t, at this stage, just find out the latest title by an author you like.
Search will group series together on the iPad and Mac, even if you haven’t chosen to filter by series. When it’s done that, or you have chosen Series on the iPhone, you can tap on a series to get a Bookstore page devoted to it.
That page includes an ellipses icon toward the top right, on all devices. In that you can sort by release date.
It’s an unsatisfactory system because as well as sorting by release date, you can also sort by what are just called Ascending or Descending. There’s nothing to say what is being sorted in these directions, but you would imagine it’s the reading order of the books — and that’s most often the same as the release date.
Except Apple Books will also show different editions, and arrange those in different places depending on how you sort.
To find the real latest book, you’re probably better off Googling it, checking the author’s page, or looking it up in Amazon. But at least Apple Books will normally pop “Book 1,” “Book 2,” and so on above the title.
That just doesn’t fully help when you’ve scrolled to Book 10 and don’t know whether that’s the latest one, or that Book 11 has been sorted somewhere further down the list.
Once you find a book in the Bookstore
Click or tap on a specific book and you get a kind of pop-up card about it. What’s on the card depends to an extent on the book’s publisher, but typically you get at least:
- Series number, if there is one
- Title
- Author
- Star rating (and number of ratings)
- Price to buy
- “Want to Read” and “Sample” buttons
- A Share icon
- Promotion for the audiobook version
- Publisher’s description
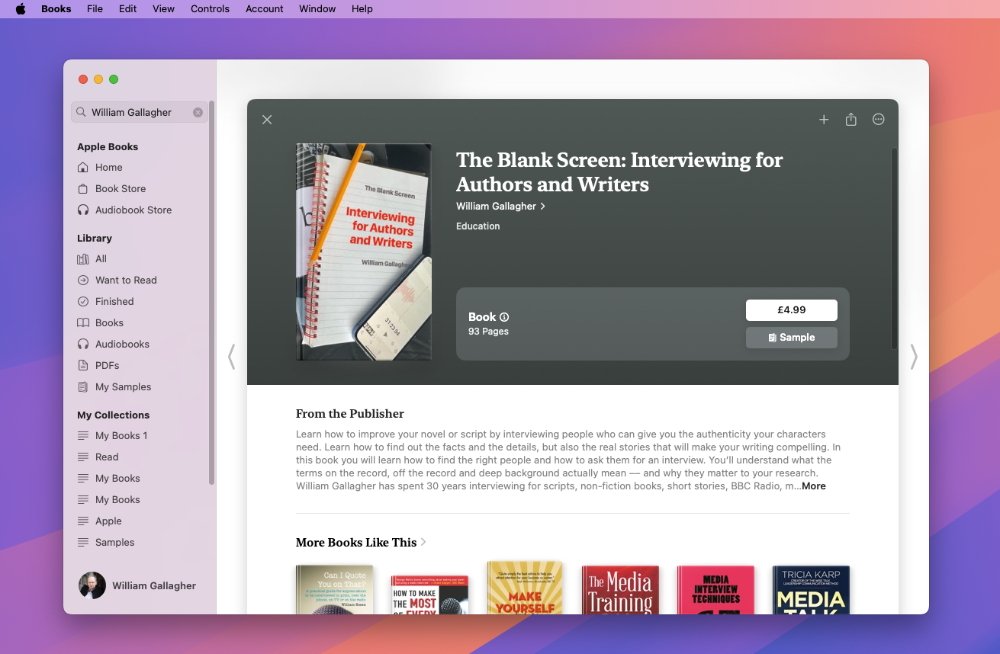
Once you find a book in the store, you can buy it, get a sample, or just scroll through a lot of detail
Very often, the book card will also contain a review from Publisher’s Weekly, and surprisingly often also one from Apple Books staff too. There’s usually a section for user reviews as well.
After all of those there is always a lot of detail about page count (in the printed version), plus language, year of publication, and so on.
If you know you want the book, you can just ignore everything and click on the price.
When you’re not so sure, though, you have the option to click on Want to Read, or Sample. On the Mac, you get both, while on the iPhone there’s just Buy and Sample on the card, with Add to Want to Read under an ellipses icon.
Want to Read and Sample are practically the same option. They both download the start of a book for you try out, but Want to Read also adds it to a collection of the same name.
Only, if you tend to scroll through your library’s All section — instead of through a collection you’ve named, or one such as Finished — you see the sample. It isn’t just saved into that Want to Read collection, so the result is that your library still gets clogged up with samples.
But give Apple some credit here because at least it understands how sample books work. A sample is the first chapter or two — the amount you get in the sample is decided by the publisher — and if you like it, you can then buy the whole thing.
You can buy the whole book at any point, but you are especially prompted to when you reach the end of the sample.
So you buy it and what Apple does is replace the sample in your library with the whole book. It also remembers where you read up to in the sample, so you can now just tap on the book and carry on reading from where you are.
Amazon Kindle sometimes does this too. But for reasons passing understanding, often it won’t and instead your Kindle library has both the full book and the sample.
Apple Books is built by readers
The fact that Amazon Kindle sometimes does this thing with keeping the sample around and sometimes not, is clearly a bug. But it’s also an indication that perhaps the developers aren’t readers and so haven’t even noticed the problem.
Apple Books developers could well be non-readers too, but it always feels as if they are deeply into books. Getting that sample business right feels like they know how this should work because they are readers too.
And then there is just the overall fact that any Apple Book will look better to the eye, will present a better reading experience, than Kindle or so far any other e-reader.
Just as some people can’t bear iPhone screens without ProMotion and others simply cannot see it, this is all subjective. But if you do care about typography, if you do appreciate a better reading experience, Apple Books is the one to beat.


