Apple’s modern Mac lineup is one of the market’s most power-efficient and powerful range of computers, but it’s normal for older models to show signs of aging by slowing down. Like old age, it comes to us all eventually.
While the best remedy is to upgrade your Mac to a newer, more performant model, there are some other things you can do to help in the meantime. Here are 10 tweaks that can make your slowing Mac feel faster.
1
Get Into the Habit of Restarting Your Mac
Your Mac could slow down for numerous reasons, including memory usage, resource-heavy (or unresponsive) applications, minor software glitches, outdated versions of macOS, or hardware issues (including those related to the battery).
While it is difficult to pinpoint the issue from the get-go, you can start troubleshooting the problem with one of the oldest yet most effective ways: a soft reboot. When shutting down, macOS clears out all the active processes from memory, cuts power to the hardware, and reboots into a state where all the systems are supposed to function with maximum efficiency and speed.
To restart your Mac, click on the Apple menu in the top left corner of the screen and select Restart.
Unlike Windows users, many Mac users are used to just sleeping and waking their computers for weeks or months at a time without ever thinking about a reboot. Even though this is a valid way to use your computer, you could be leaving performance on the table.
Use this method for a quick performance boost whenever needed. However, developing a habit of restarting your Mac twice every week can help maintain healthy performance levels, especially if you’re using an older model.
2
Limit Resource-Heavy Processes and Background Apps
Older Macs, especially the baseline variants, have only 8GB of RAM, which might be enough for light use. However, the lack of memory shows when you start opening multiple apps or increasing the number of browser tabs.
After a while, as the number of active processes and background apps increases, the baseline Macs start lagging, an issue I’ve encountered several times on my M1 MacBook Air (8GB). To address this, consider closing resource-heavy processes and apps that are running in the background.
Sometimes, when you think you’ve closed an app, it keeps running in the background (denoted by the dot beneath the app’s icon in the Dock). In this case, you can right-click the app’s icon and select “Quit” from the context menu.
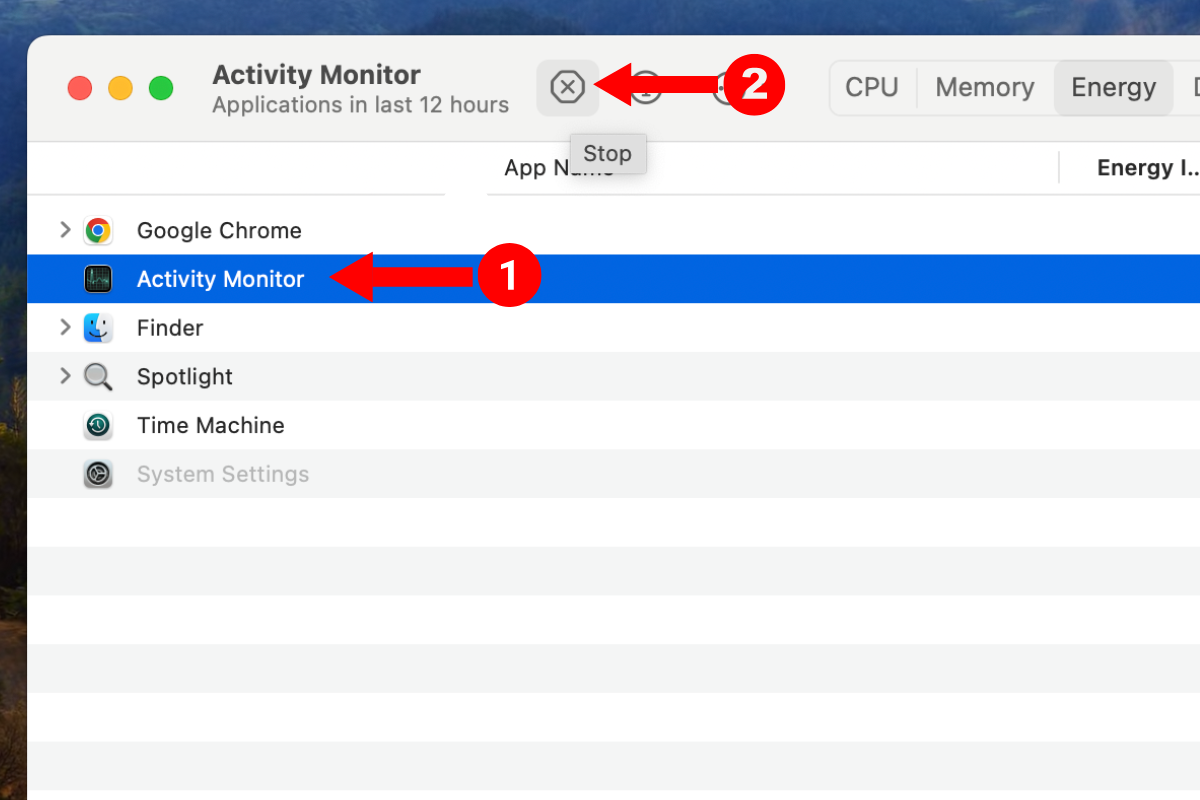
If the app isn’t responding, you can use the Activity Monitor to close it. Use the Spotlight Search or Finder to open Activity Monitor, select the process name, and press the cross button in the upper-left corner.
Other apps live in the menu bar, in the top-right corner of the screen. You can click on these and select “Quit” or open the app fully and find the Quit option there instead.
3
Disable Unnecessary Startup Programs
An effective tweak to make your Mac faster is to prune unwanted startup programs (the ones that load automatically upon booting up your Mac).
While startup programs can be very convenient for Mac owners who use the same set of apps as a routine, they occupy your Mac’s RAM right from when you log in. They can also take up a fair bit of processing power, as they all struggle to load at the same time, extending how long it takes for you to get to work.
Hence, it’s better to prune the startup programs. Go to Settings > General > Login Items, select the apps you can manage without, and press the minus sign at the bottom.
While in this menu, consider disabling the “Allow in the Background” feature. The feature allows apps to perform tasks such as checking for updates or syncing data in the background, even when the app isn’t open, which occupies certain system resources.
4
Optimize Browser Usage
Here’s another tweak to help you speed up your Mac: optimize your browser usage. If you’re using a baseline Mac with 8GB of RAM or less, consider switching to Safari, as it is optimized to work with fewer resources since Apple tailors the browser to its own hardware.
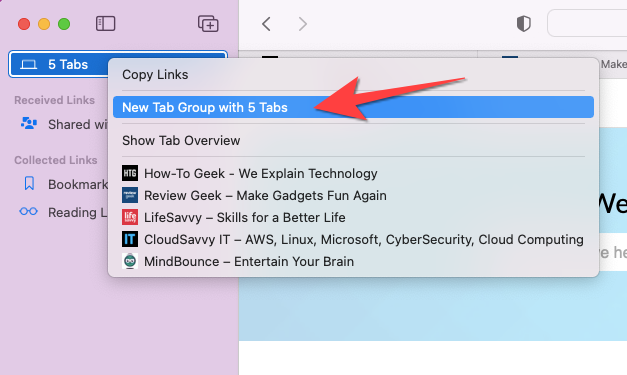
If you already use Safari, use the Tab Groups feature to organize related tabs. Once you’re done with the tabs, close the entire group to free up the system resources.
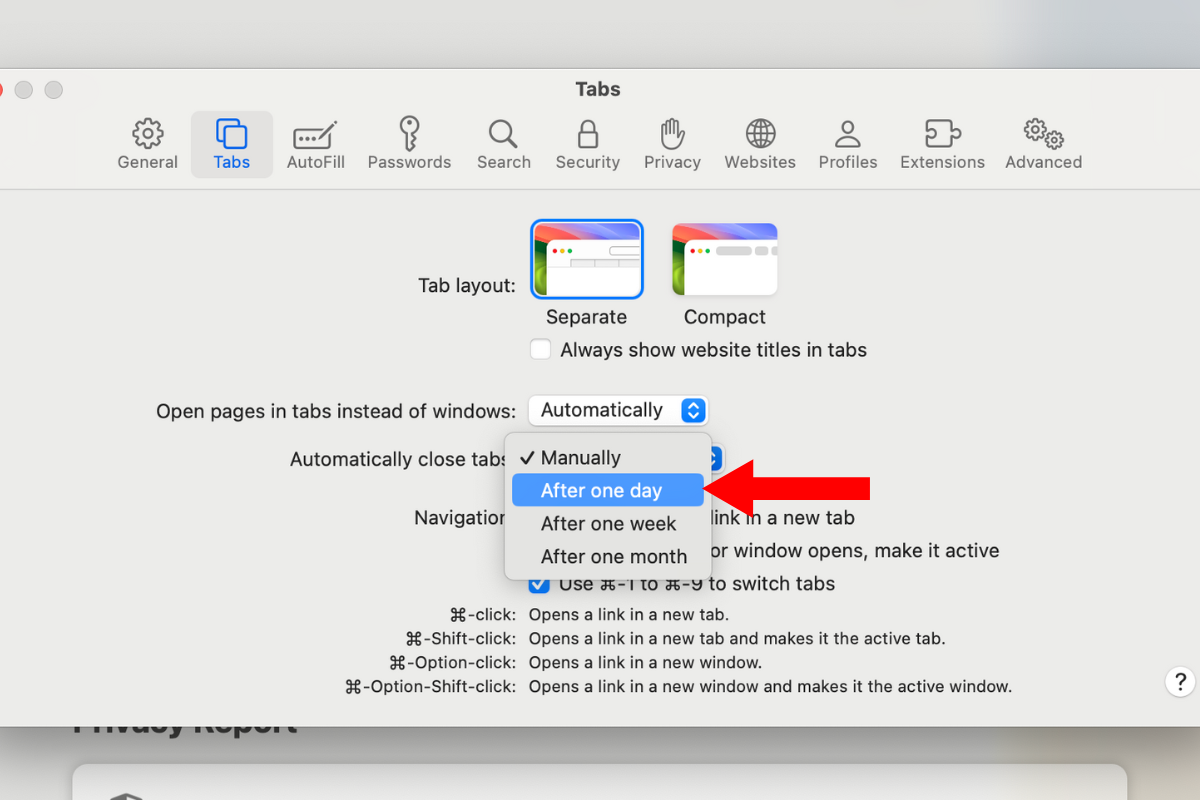
If you forget to close tabs manually, head to Safari > Settings > Tabs, and in the “Automatically close tabs” menu, select “after one day.” This way, Safari will remove tabs you haven’t used in a day, clearing up the RAM for other tasks.
5
Reduce Transparency and Animations
Whether it is transparent UI elements or animations like the Genie that make minimizing a window look fun, such visual effects require some work from your Mac’s GPU and the CPU.
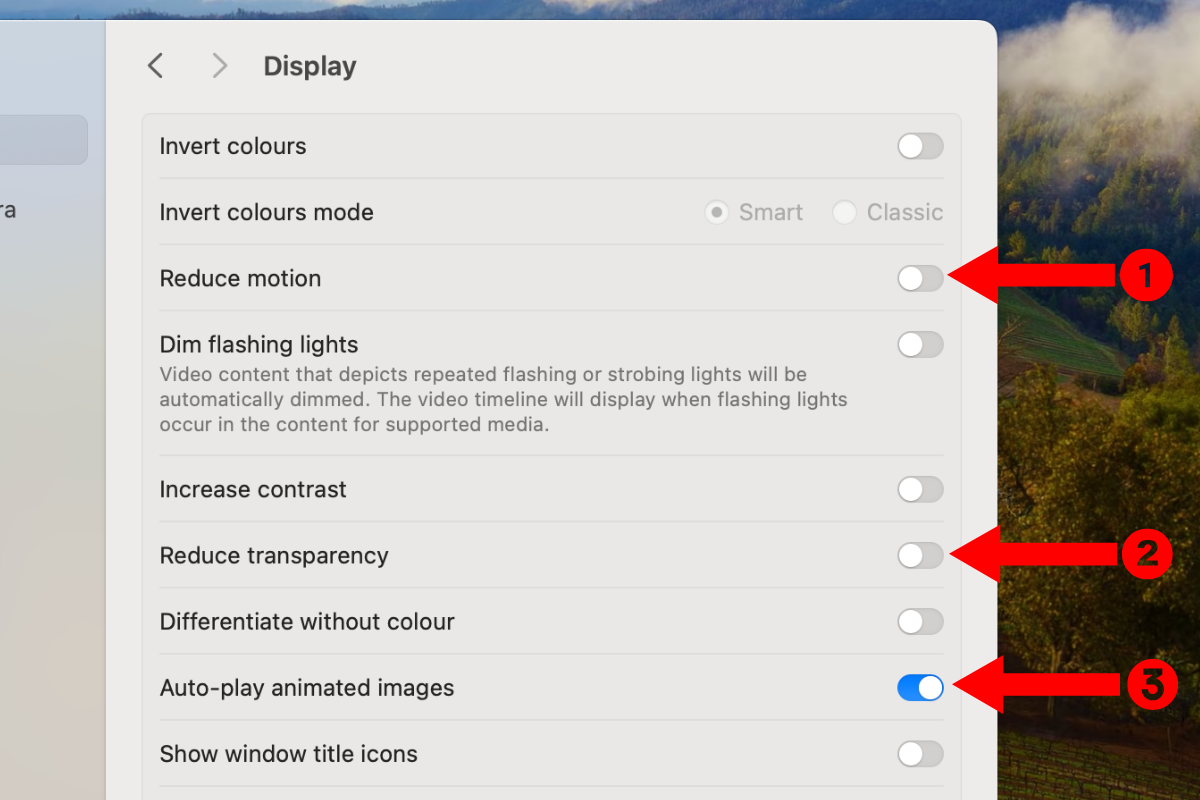
While newer Macs can handle the fancy visual effects without a flinch, older Macs with a less powerful chipset and fewer RAM might struggle to keep up with the effects and the active processes simultaneously. To end your Mac’s struggle, consider changing the following accessibility settings related to the display: enable “Reduce Motion,” “Reduce Transparency,” and disable “Auto-play animation images.”
This can help even on newer Macs by simply providing the illusion that your Mac is operating more smoothly.
6
Reindex Spotlight for Smoother Search
Spotlight indexes all the files and data on your Mac, allowing it to locate items quickly. However, with time, as you add, delete, and modify files, or due to software glitches or system crashes, the Spotlight index may get corrupted, leading to slower searches and higher CPU usage.
If you’re having problems with the Spotlight search (slow results or no responses), rebuilding the index can help solve the problem.
In a nutshell, you’ll have to go to the Siri & Spotlight menu, select Search Privacy (or Spotlight Privacy), drag a disk or folder into the privacy section, and then remove it for the reindexing to begin.
Related
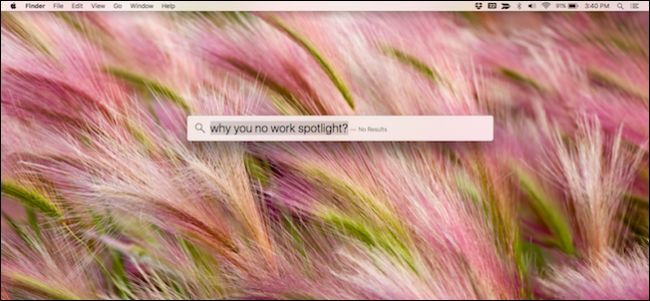
How to Fix Spotlight Problems by Rebuilding the Index
Is Spotlight being a little wonky on your Mac? Is it constantly indexing your drive, or become corrupted so it can’t search? With just a few quick steps, you can rebuild your Spotlight index and put your search woes to rest.
7
Enable Automatic macOS Updates
Apple keeps pushing macOS updates with bug fixes and performance-related improvements. More often than not, these updates also include security-related patches, which are even more critical.
Since it can be difficult to keep tabs on the releases, I’d advise you to enable automatic updates for your Mac. It’s a minor tweak but helps maintain your device’s performance.
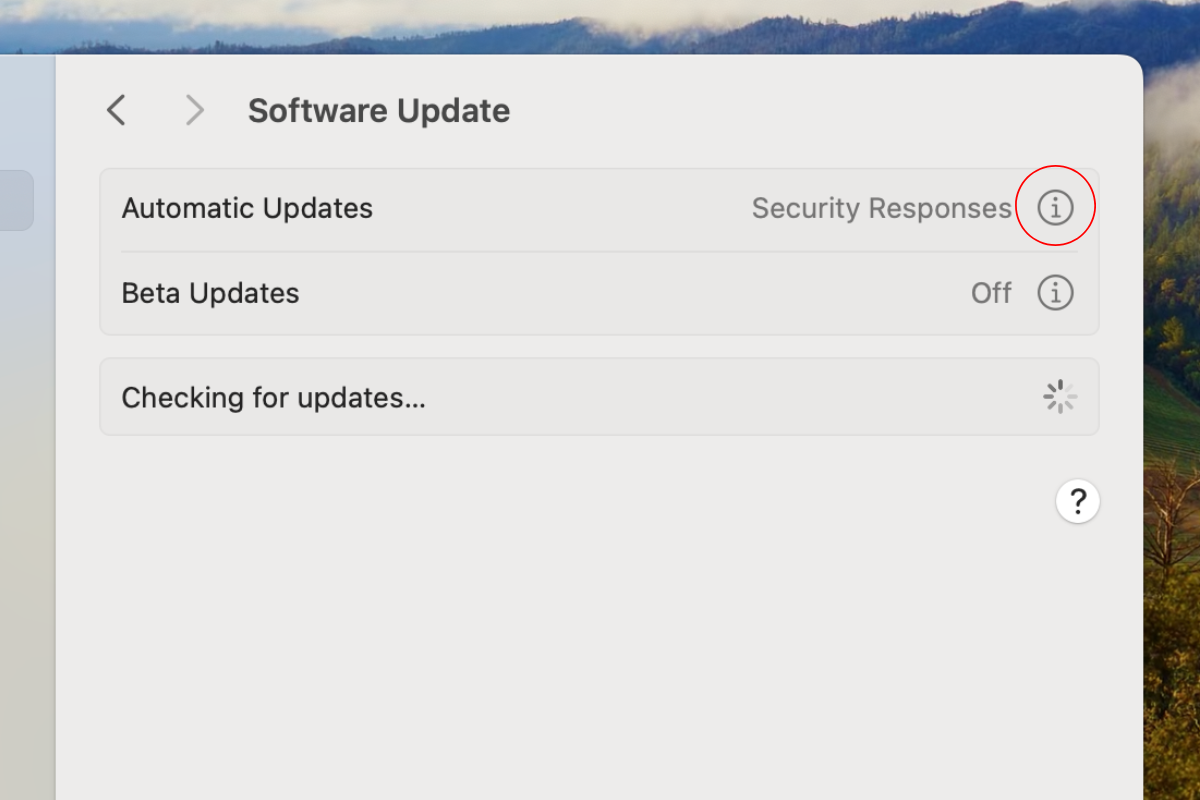
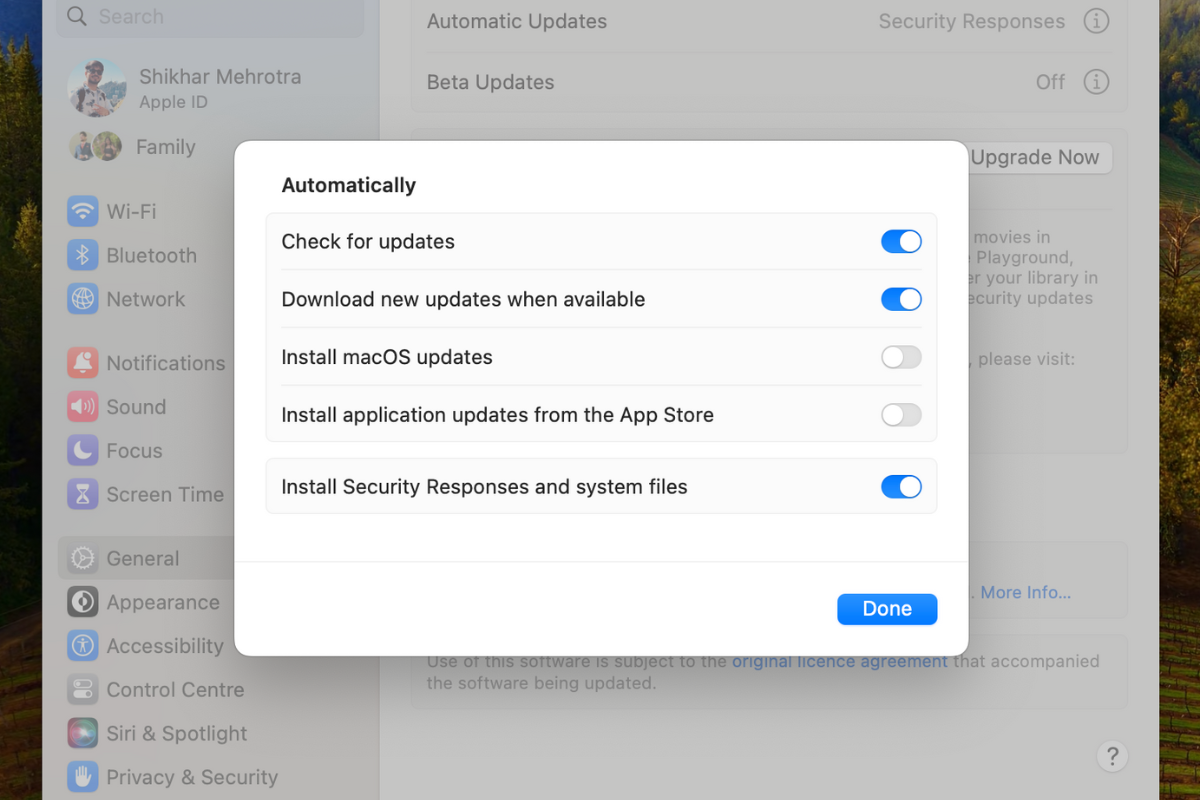
To do so, head to Settings > General > Software Update, and click on the “i” button next to “Automatic updates.”
In the following menu, make sure that the following options are enabled: “Check for updates,” “Download new updates when available,” and “Install macOS updates.”
8
Optimize Your Mac’s Storage
Everything you do on your Mac—storing files, installing and running apps, downloading updates, and all the temporary files associated with day-to-day tasks—requires free space. In the absence of free storage, your Mac starts slowing down.
If your computer is running out of storage, freeing up some space (at least 10%) can restore the optimal performance. No method fits everyone; hence, you can adopt one of the many storage optimization techniques.
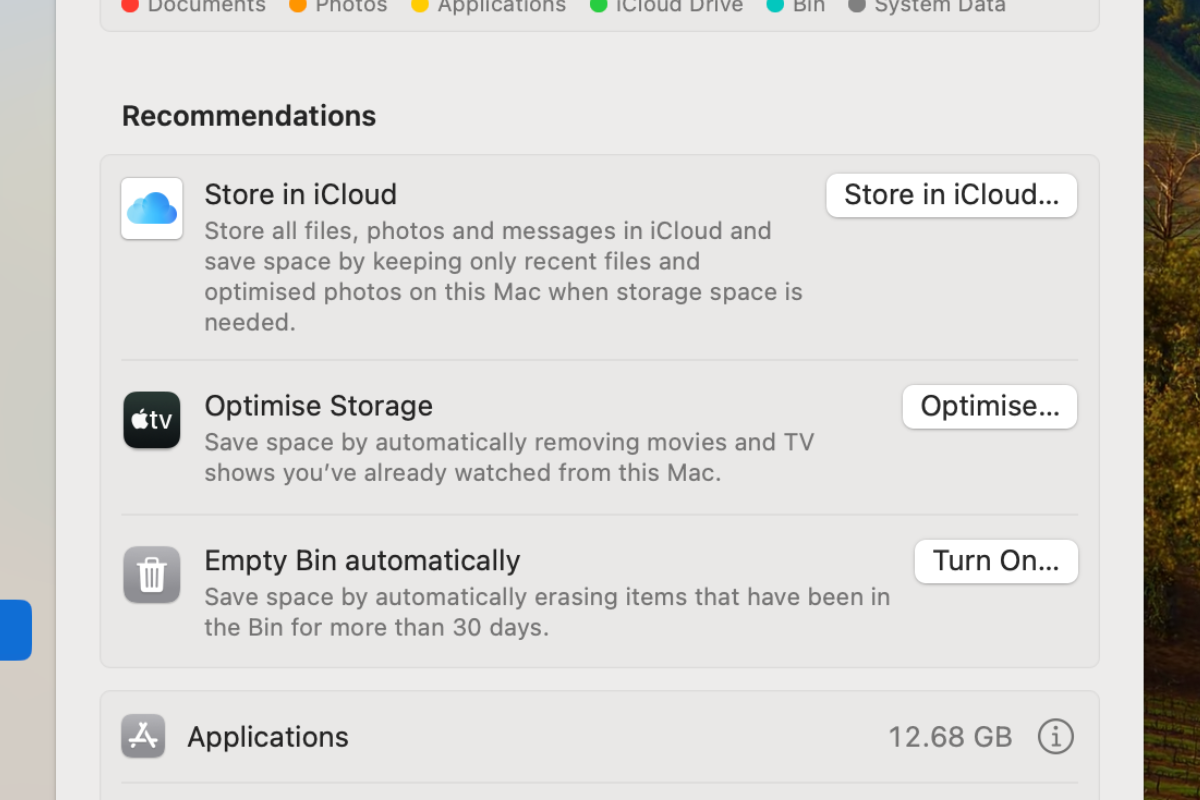
I use an M1 MacBook Air (256GB) variant, and once every four to five months, I move a good 40-50GB of files (including images, videos, PDFs, and everything else in the download section) to an external SSD. On the other hand, if you’re an active iCloud+ subscriber, head to Settings > General > Storage, and under “Recommendations,” enable the “Store in Cloud” option.
It stores all the files, photos, and messages in iCloud and keeps only the recent files on your Mac. Once uploaded, you can access the files on the go via iCloud Drive.
In the same menu, you can also review and enable the “Optimize Storage” option, which saves space by removing Apple TV movies and other TV shows you’ve already watched.
If you forget about cleaning the trash bin (like me), consider enabling “Empty Trash automatically.” The feature frees up storage space by permanently deleting items in the trash for over 30 days. You can also save space by enabling “Optimize Mac Storage” in the Photos app settings. The feature uploads the full-size images to iCloud while keeping a smaller, compressed version of the pictures on the device.
9
Disable FileVault Encryption
Macs with Apple Silicon and those with the Apple T2 Security Chip have dedicated hardware to facilitate the AES-XTS data encryption system, making the effect of FileVault encryption negligible.
However, on older devices, especially those with performance issues, disabling the feature can help free up valuable CPU resources, increase the read/write speed (otherwise going to encryption/decryption on the go), and result in faster boot times.
This does come with the disadvantage of reduced security, but if you’re prioritizing performance, it can help. To disable FileVault, head to Settings > Privacy & Security > FileVault, and select “Turn Off,” followed by “Turn off Encryption.”
10
Replace Your MacBook’s Battery
This one applies to all the MacBook owners out there. If you’re experiencing significantly reduced battery life, sudden or unexpected shutdowns, or even worse, it only works when plugged into the charger, consider contacting Apple support and replacing the battery.
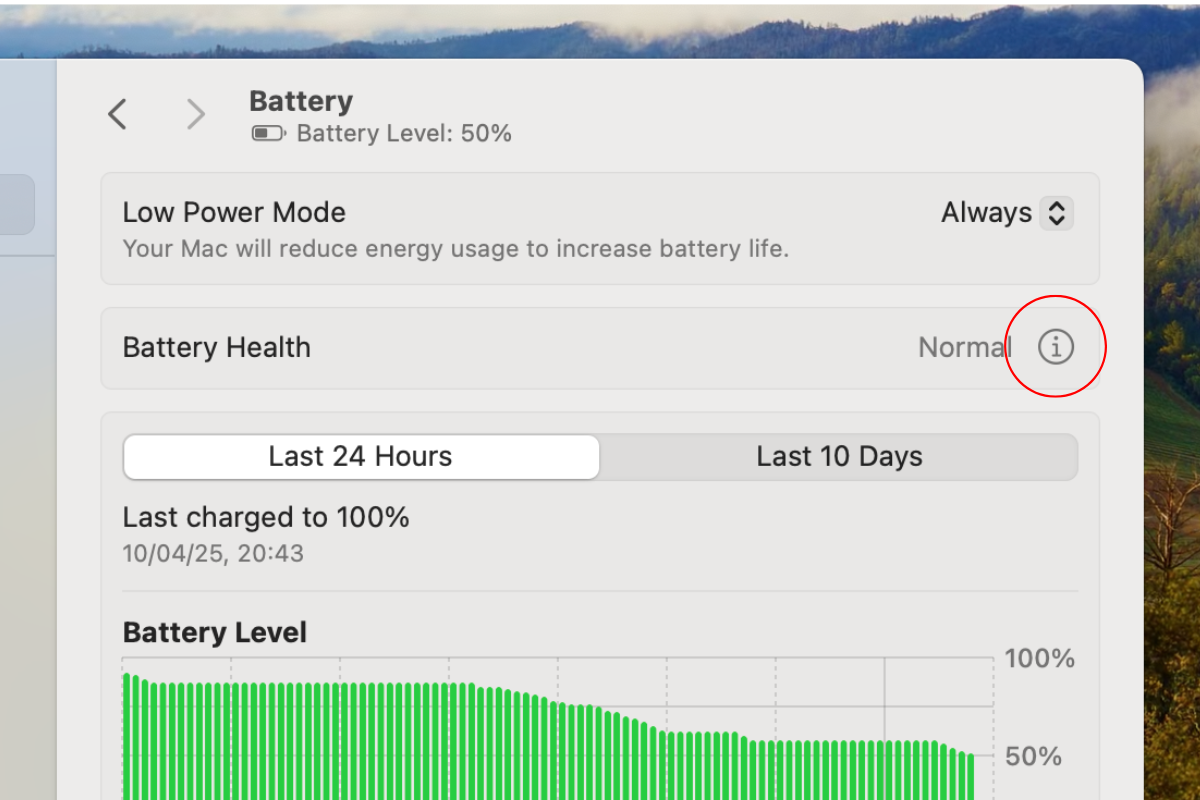
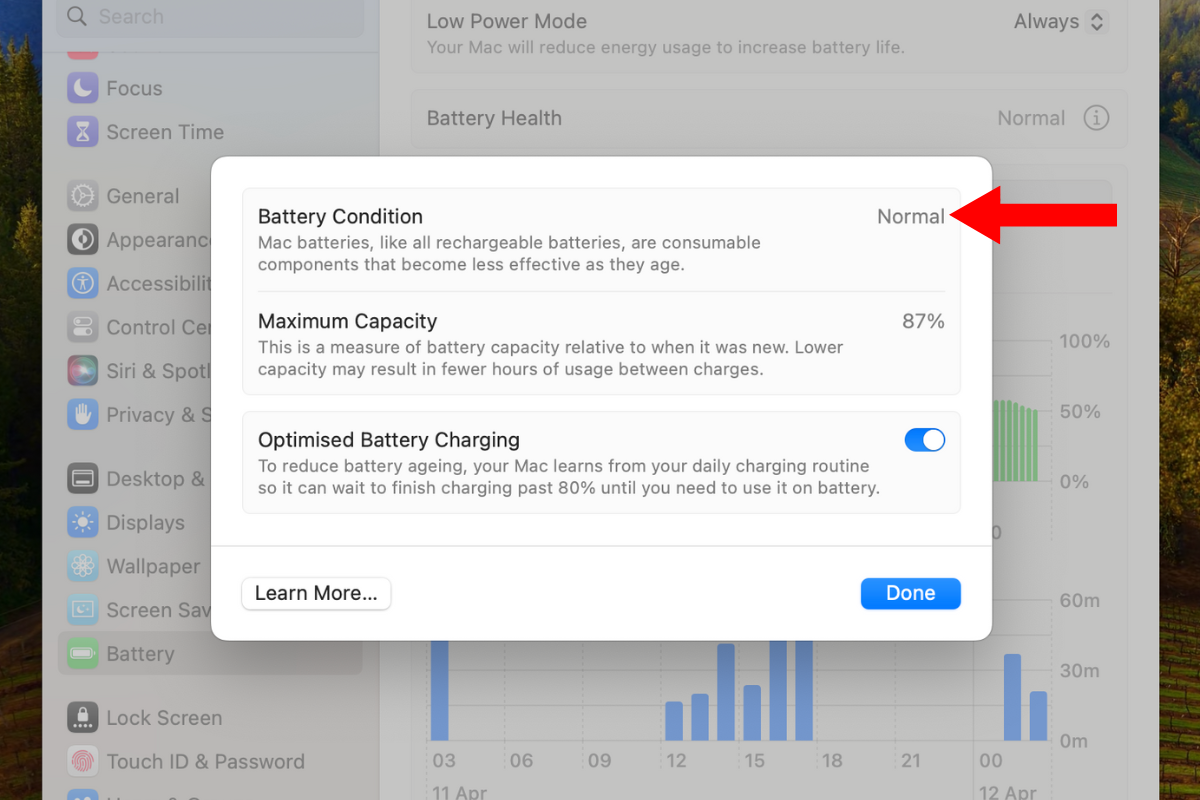
You can also check the battery’s condition yourself. Go to Settings > Battery, and tap the “i” button beside Battery Health.
In the following menu, check the “Battery Condition” at the top. If there’s an issue with the battery, the field should read “Service recommended.” In this case, contact Apple support and schedule a replacement at your earliest convenience.
Hopefully you can put these tips to good use and speed up a sluggish Mac. If you’ve just purchased your computer, read about the 10 hidden Mac features you should be using.


