AirPods are primarily associated with the iPhone, but they can be used on the Mac–the connection even switches from the iPhone to the Mac automatically. But in macOS Monterey and earlier, users didn’t get to control much of the AirPod’s settings. The Noice Cancellation could be adjusted for the AirPods Pro, and that’s about it.
In macOS Ventura, users will finally get access to the full complement of AirPods settings, just like in iOS. The AirPods settings will appear in Ventura’s System Settings when the AirPods are connected–when they’re disconnected, the AirPods settings disappear.
To get to the settings, connect your AirPods to the Mac. Then open System Settings, and in the left column, scroll down to the section with the settings for input devices, such as the Keyboard and Trackpad. At the top of this section, you’ll find your AirPods.
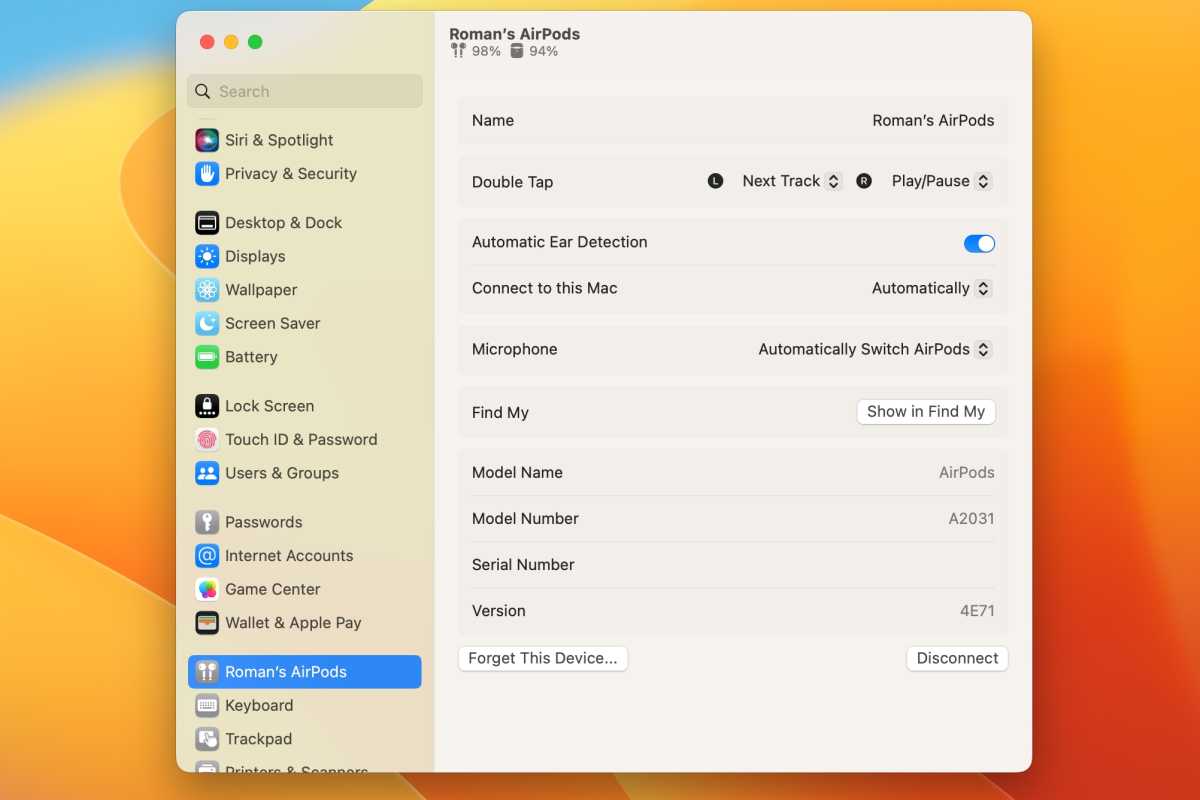
AirPods settings in macOS Ventura
You’ll be able to set what happens when you double-tap an AirPod, turn on/off Automatic Ear Detection, set how the AirPods connect to the Mac, and adjust the microphone setting. You can also click the Show in Find My button to locate your AirPods.

What the AirPods settings in macOS Ventura look like.
Foundry
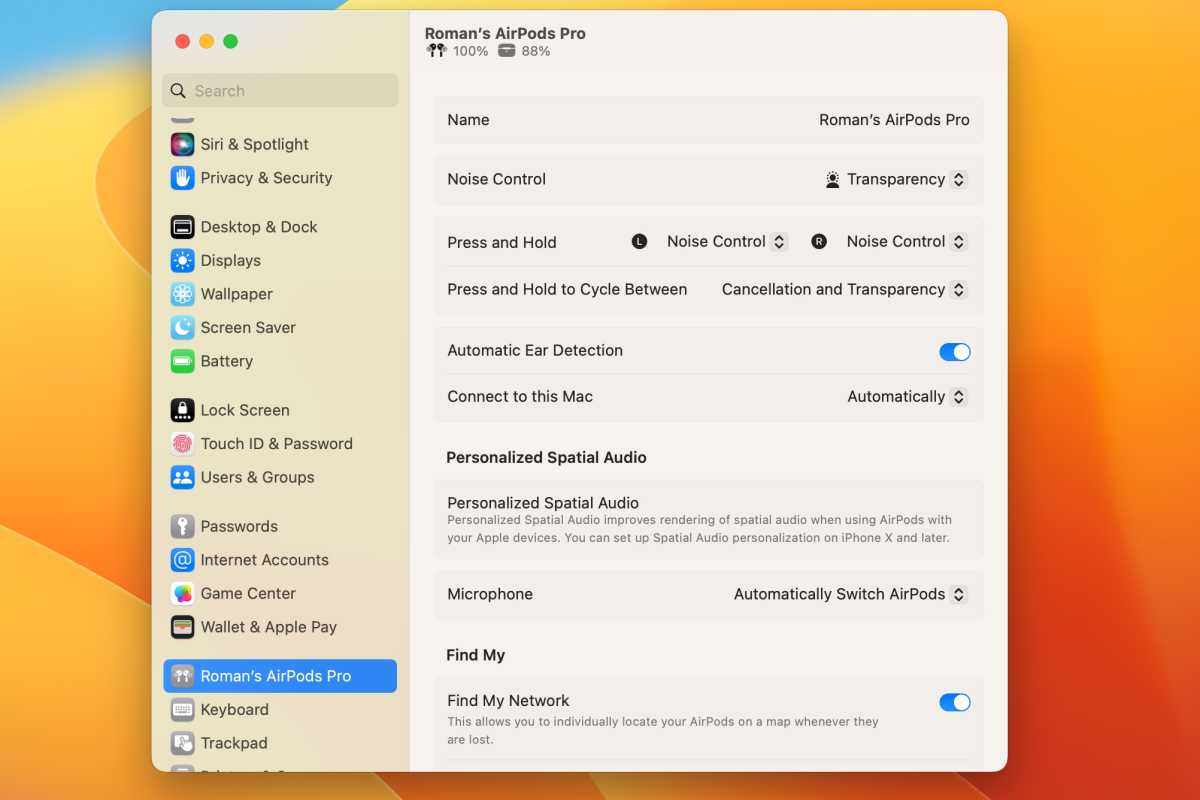
AirPods Pro settings in macOS Ventura
You’ll get all the settings for the regular AirPods, plus controls for Noise Control and Spatial Audio.

What the AirPods settings in macOS Ventura look like.
Foundry


