

There are now two ways to create Memories movies in Photos as of iOS 18.1 or later: one method is the same way you have done it in previous iOS versions, and the new one leverages Apple Intelligence if it’s available on your device.
To use the latter method, you’ll need to have an iPhone that is capable of supporting Apple Intelligence. This means an iPhone 15 Pro, iPhone 15 Pro Max, or any iPhone 16 model.
Making Memories without Apple Intelligence
For those on older devices, we’ll go over how to create Memories movies on Photos using the original method first. As with the Apple Intelligence method, much of the work is automated by Photos itself.
The same methodology you use to create Memories movies in Photos on iOS 18 also applies to iPadOS 18. It all starts by choosing an album you’ve previously created.
Getting started
If you haven’t yet created an album of related photos or videos, do that first. If you already have an existing album you want to add these images to, just tap the existing album from the list.
To create an all-new album, tap the plus sign to create and name a new album. Tap on Albums, then tap Create. Tap New Album, and then give the album a name.
You can then select photos from across your entire photo collection. If you have videos you want to add, you can select those as well.
Adding pictures or video from existing albums to help make your Memories movie.
To select multiple photos or videos at once, tap theSelect button to choose as many as you like. Once you’ve done that, tap the ellipses button and select Add to Album.”
Photos and videos can exist in multiple albums, so you are not moving any photos anywhere. They will all remain in the main Photos Library, and any albums you put them in previously.
Once you have an album of all the photos or videos you want to use to create your Memory, simply tap and hold on that album in Photos. A drop-down menu will appear, and you can select Play Memory Video.
An auto-generated movie will start playing, including music taken from your Apple Music library. We’d suggest watching the auto-generated all the way through first before deciding whether you want to customize it.
The Apple Intelligence way of making Memory movies
If you have an iPhone or iPad that is capable of running Apple Intelligence, you can use it to generate the Memory movie instead — and post Apple Intelligence, Apple sometimes refers to them as Memory movies instead of Memories.
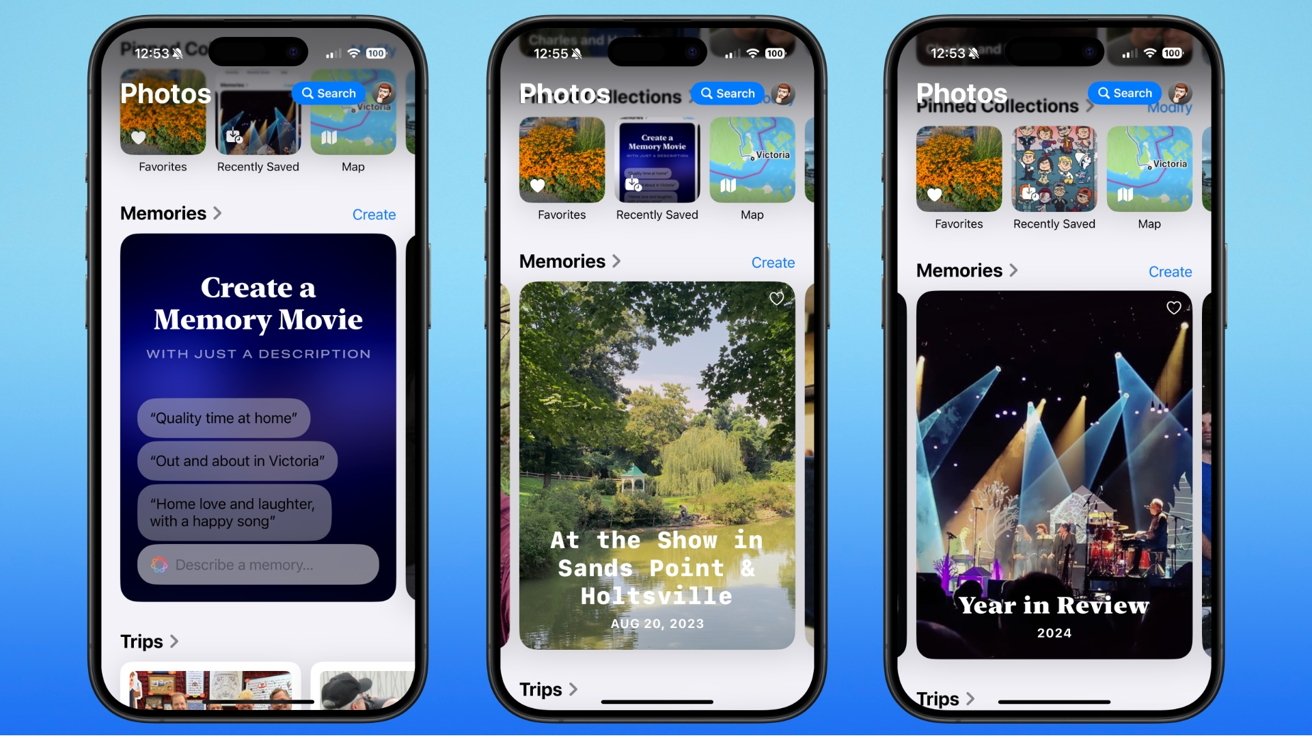
Apple is inconsistent with this, so the first thing you do is scroll down to the Memories section of Photos, where it says Create. This card includes a text prompt area for you to type in a description of the video you want to create.
For example, typing in “family and friends in New York over the years” or “our trip to Geneva” will auto-generate a Memory movie. You can use locations, the names of anyone you’ve identified in Photos, as well as times of year, special occasions, and more.
Once you’ve typed in a description and pressed return, a graphic will appear showing Apple Intelligence assembling the movie using your photos and videos. Keywords you used in your description, along with others in your photos, will also float by at the bottom.
As soon as the movie is completed, it will begin playing. The first image will have the title of the movie, generated by Apple Intelligence from your keywords. While the movie is playing, you can tap to pause the movie, then tap near the bottom to see the photos and videos that were chosen.
Customizing your Memory movie in Photos
To make changes to the auto-generated Memory movie, simply tap the screen while it is playing, and then tap the pause button. Next tap the button on the bottom of the screen to the left — the Memory Mixes button.
This lets you change the running order of the selections in the movie, and offers several options. You can review each one to decide which one you like most.
You can also change the music that was randomly chosen by Photos by pressing the Music button on the right side. This lets you select any track from your existing Music library.
Your completed Memory movies can be seen on the main page of Photos.
The furthest button to the right is for Filters. It allows you to apply filters to the Memory, including black & white film, a faded color, or added warmth among other options.
Once you have chosen these options, you can tap the screen to see the Memory movie with the changes you have made.
Further change options
By default, the title of the Memory movie is auto-generated from the name of the albums or album you have chosen pictures from. To change it, as well as to rearrange or manage the photos and videos in the Memory, tap the ellipses menu at the top right of the Memory.
Here, you can edit the title, reconfigure the memory to put the photos in the order you want, and more. You can also AirPlay the Memory movie to another device from this menu, or hide it to prevent anyone else from seeing it.
You can also add the Memory movie to your Favorites from that menu. When you are finished, tap the back arrow button at top left, and then Done.
Memory movies are stored in the For You tab of Photos, so you can view them at any time.
If you wish to edit the movie again later, you can tap the ellipses menu at the top to change the title and images used. You can also choose to replace the music picked to accompany the movie.
Tap Done when you’ve made your changes, and the movie can be played again to see your changes. The Memory movie will be available to view at any time in Photos, unless you choose to delete it.


