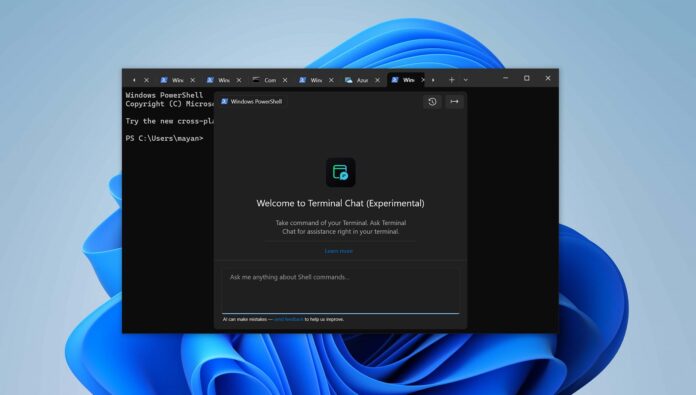
AI is everywhere, really. Microsoft really meant it when it said it was bringing AI to all of its apps and services to make people more productive. I just reported about a new Copilot UI in Microsoft Word, and now there’s another app, “Windows Terminal,” getting full-fledged ChatGPT and Github Copilot integration. It’s now available on Windows 11 and Windows 10.
Microsoft first teased the “AI Chat” integration in Windows Terminal in September, and it seems to have shipped in a new update for Windows Terminal (Canary) on October 29. I tried it out today, and it works as expected. You can literally chat within the Windows Terminal and ask for commands when you’re clueless or when you’re trying to fix bugs.
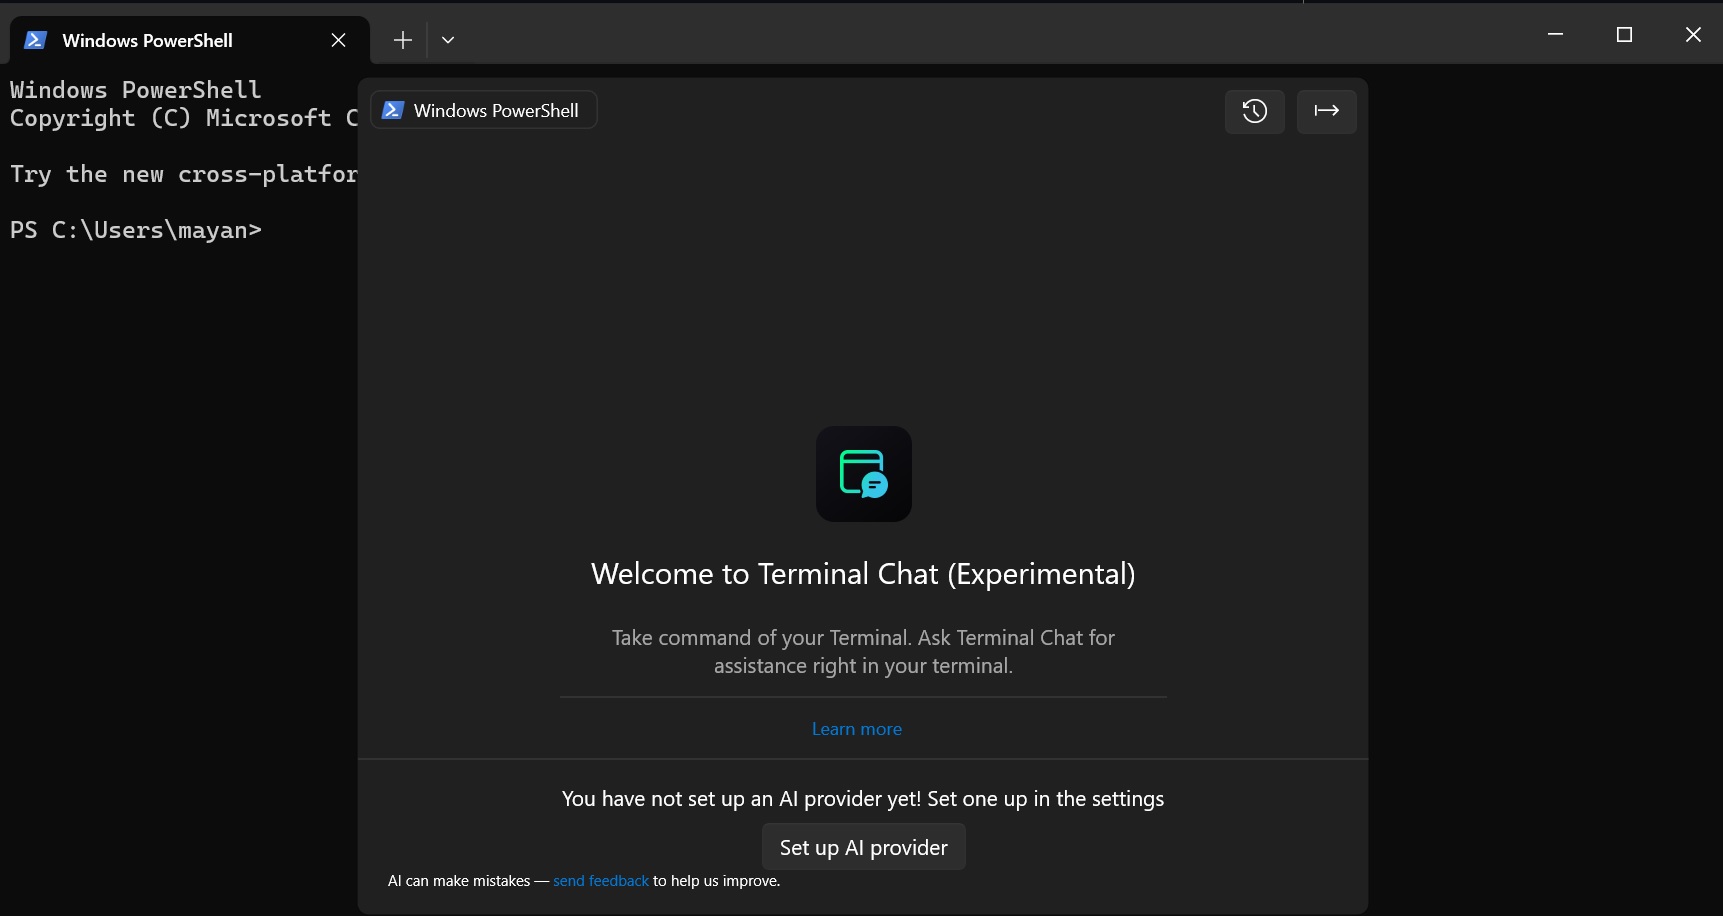
I’m going to share more examples and use cases of AI in ChatGPT, but let’s first take a look at how the integration works. First and foremost, it’s not free. You need to come up with your API key. It could be your Github Copilot API, Azure’s OpenAI API or OpenAI’s own API.
Once you’ve connected terminal Chat to an AI service, when you type a question in the Terminal Chat window, it sends your request to the AI, which processes the query and offers a quick suggestion. Microsoft says it does not save your chat history, and the integration is designed to work with all shells, including:
- Command Prompt.
- PowerShell.
- WSL Ubuntu
- Azure Cloud Shell
And more.
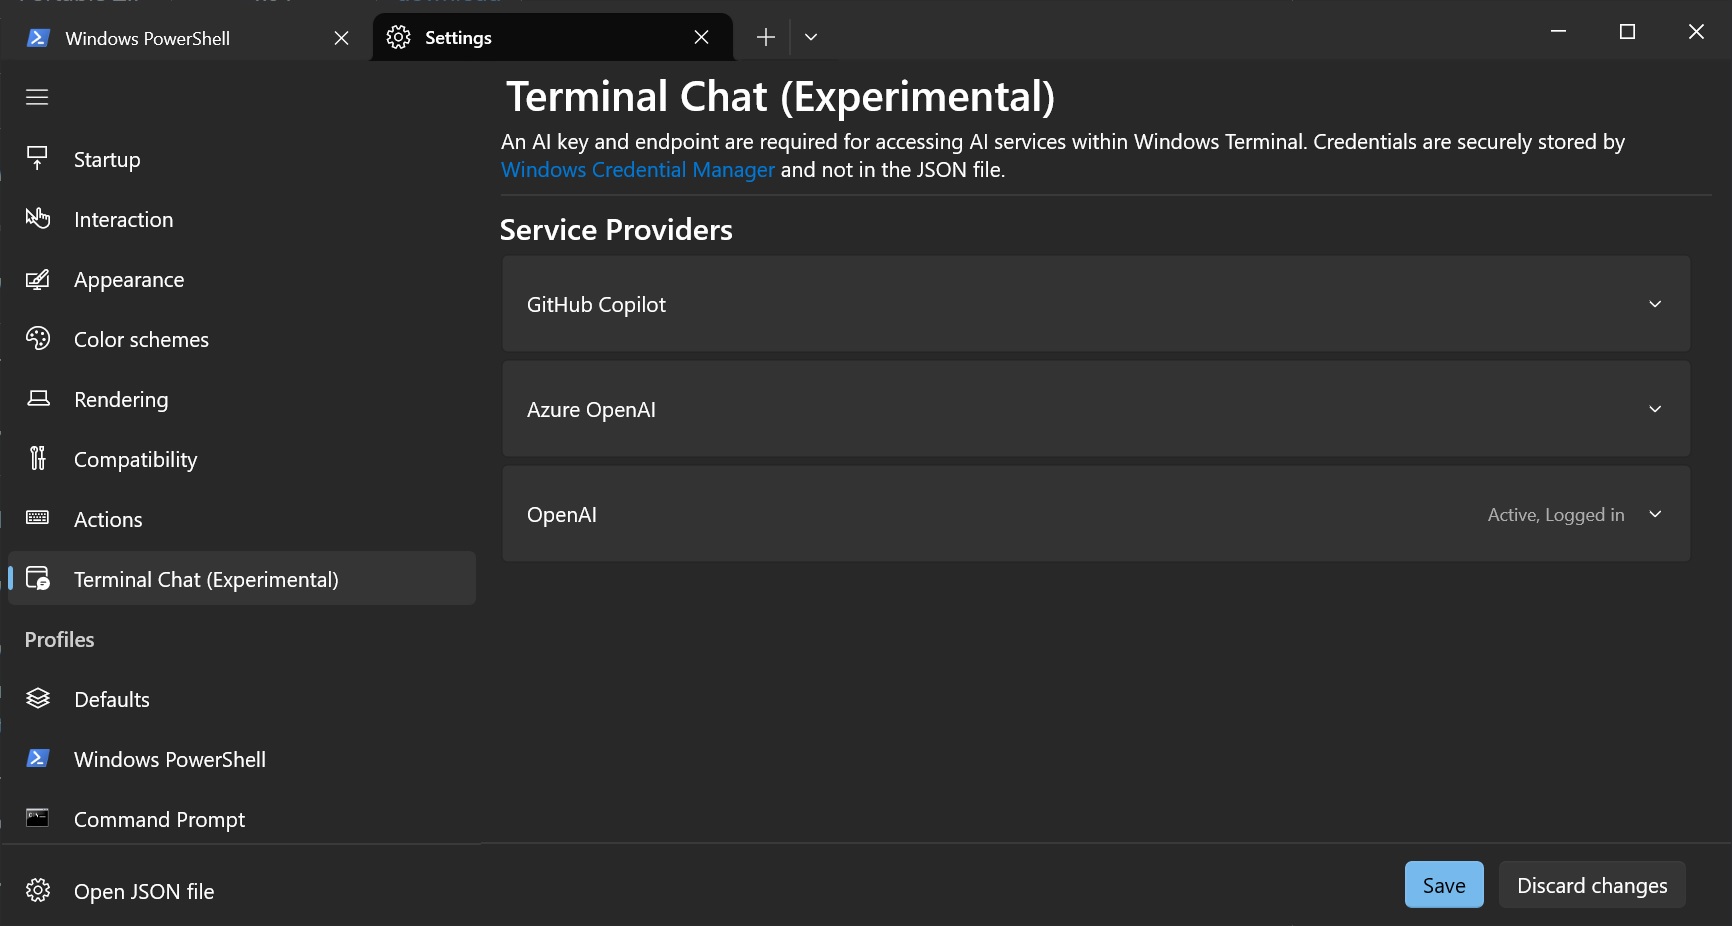
To set up AI in Windows Terminal, you can follow the steps that I tried on my device:
- Open Settings in Windows Terminal.
- Select the Terminal Chat (Experimental) tab.
- Choose an AI Service Provider: Github Copilot, OpenAI by Azure and OpenAI.
- After selecting the AI provider, add the API key.
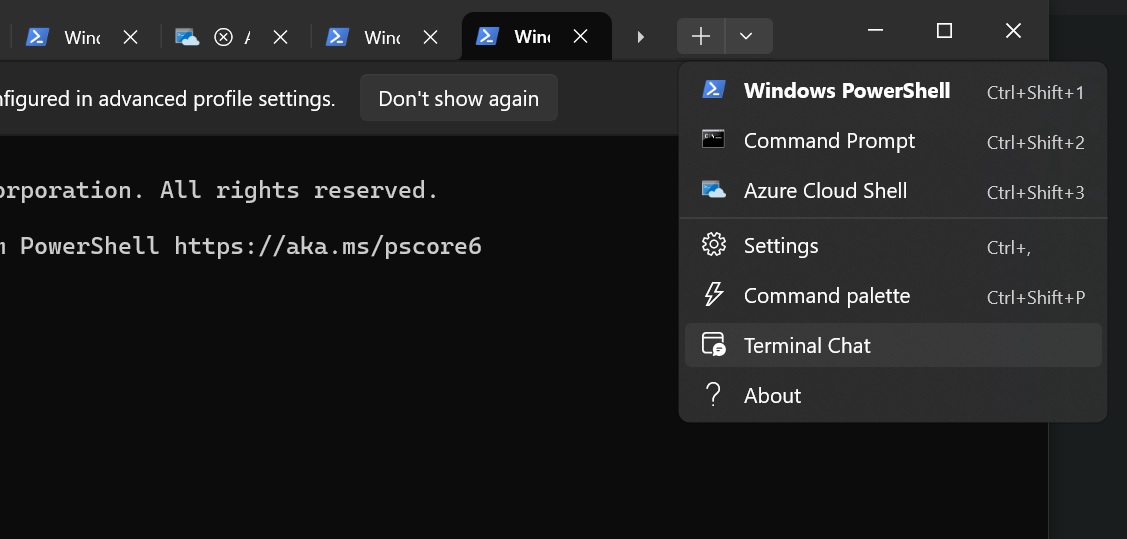
- Once done, Terminal Chat allows you to interact with your preferred AI model directly within your terminal. Just open a regular tab in Terminal and click “Terminal Chat.”
Hands on with AI inside Windows Terminal
I’m using ChatGPI API directly from OpenAI because it does not require me to set up the endpoint in Terminal. You’ll need to add an AI endpoint in Terminal when you’re using Azure API, but that’s not the case when you connect a Github Copilot subscription to Windows Terminal or directly obtain the API from OpenAI.
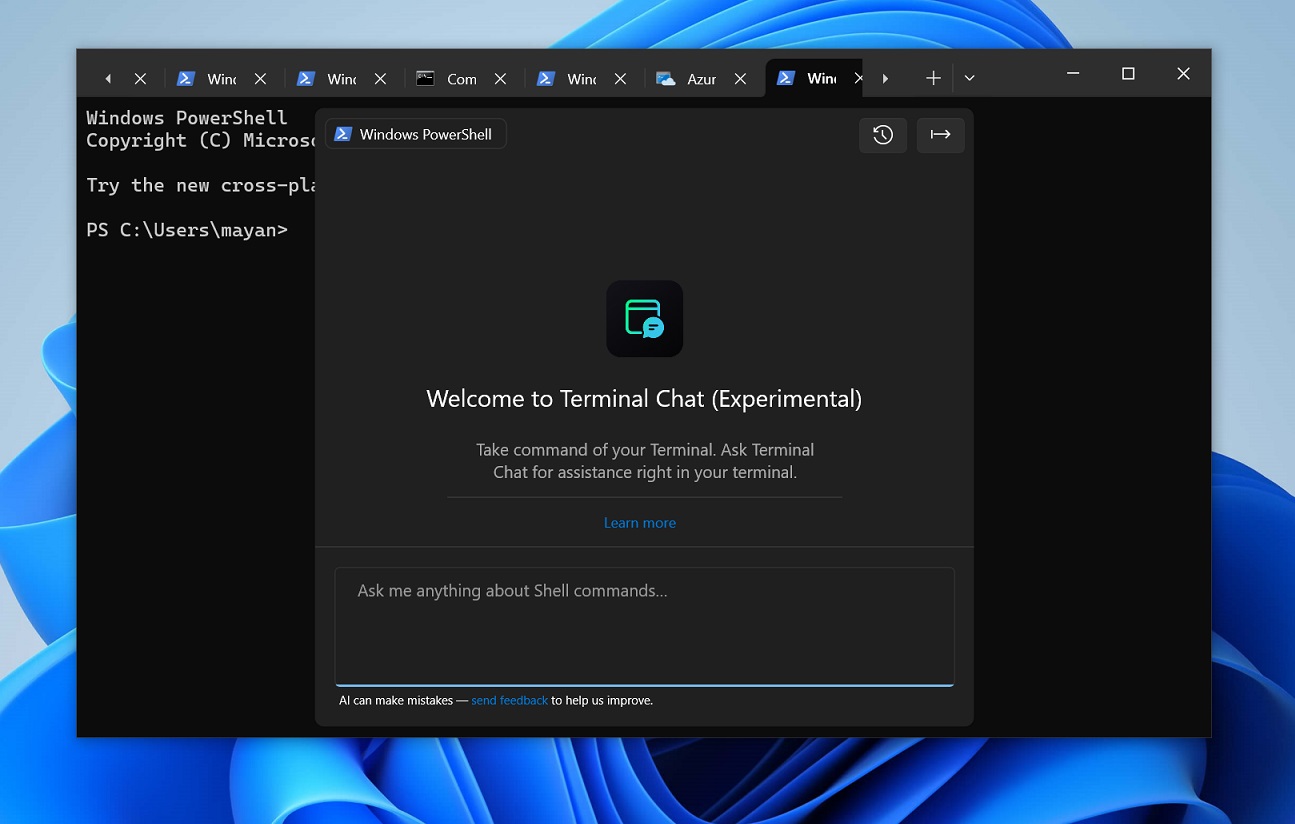
After adding my ChatGPT API key to Terminal, I opened a new tab and selected “Terminal Chat.” This opens a new Terminal Chat window with a chatbox, delete history button, and export button.
It’s similar to the default ChatGPT interface, but it the interface is compact to meet the needs of the Windows Terminal environment.
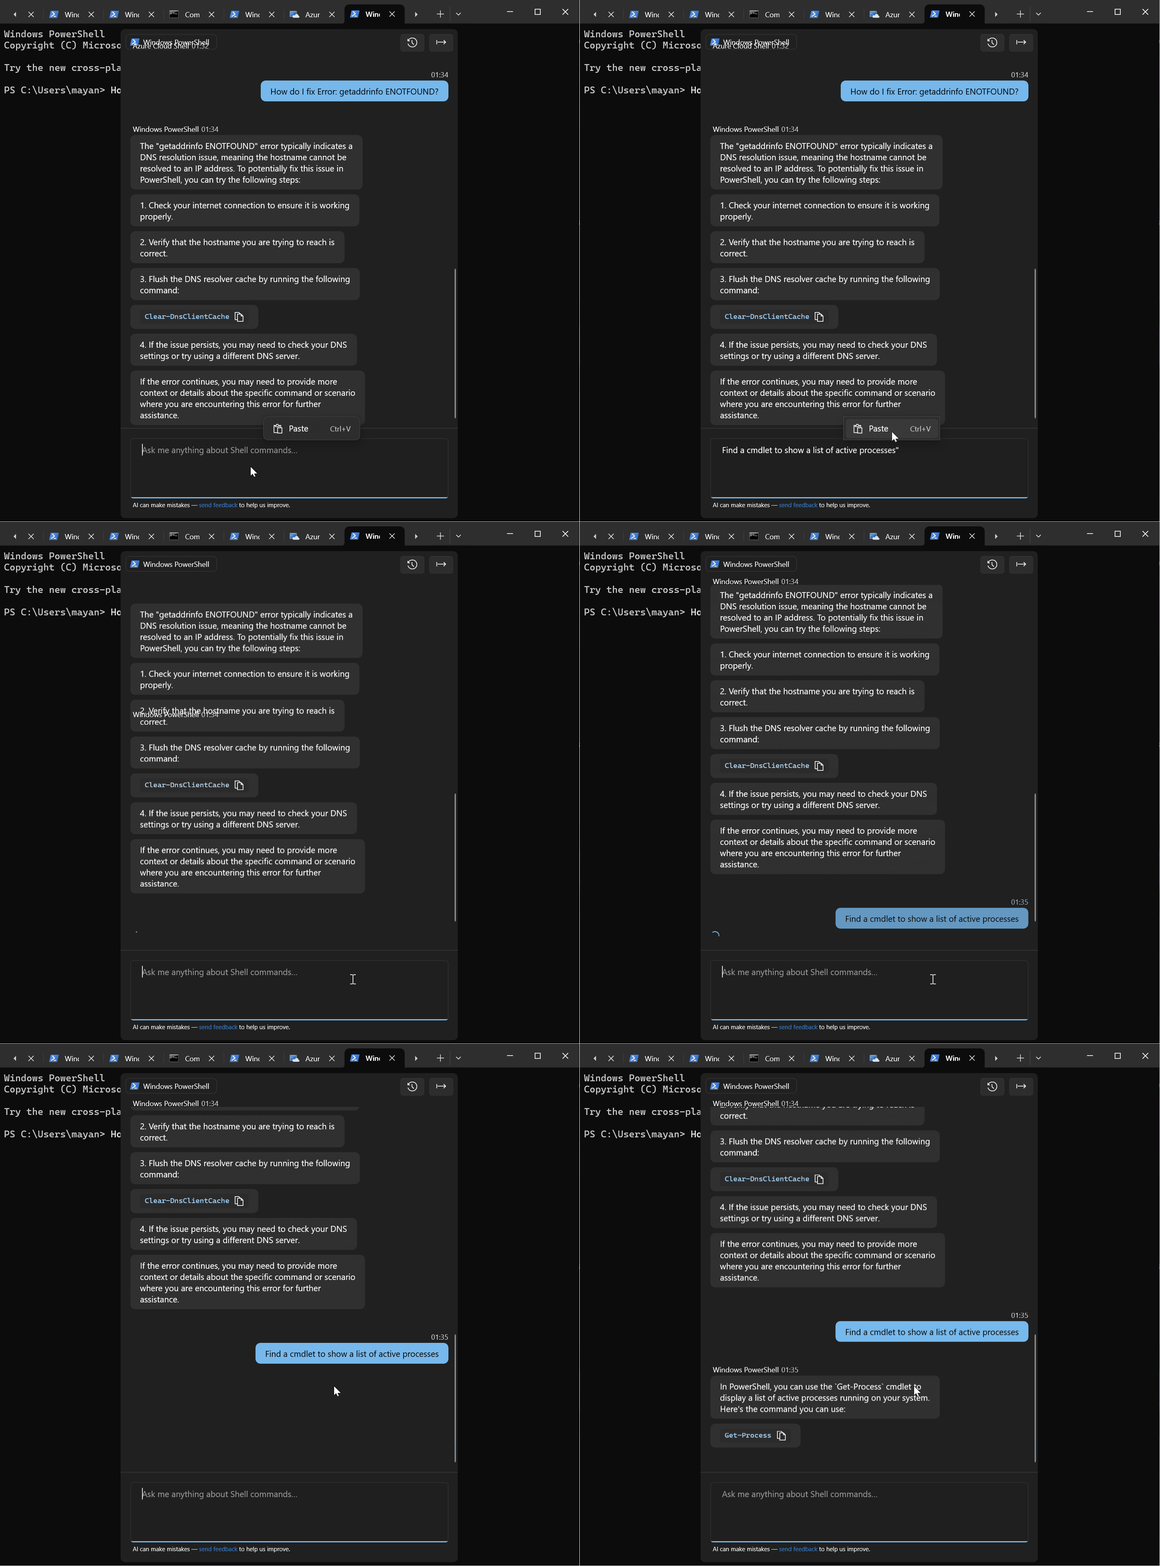
Windows Latest noticed that the Terminal AI is context-aware, which means it is aware if you’ve opened the AI inside a PowerShell terminal. This is reflected in the top left corner with the name and icon of the primary shell inside the Terminal. For example, if you ope new tab of Command Prompt, Terminal AI will remember it.
I believe this helps with prompt engineering because Microsoft has configured different system prompt for each shells.
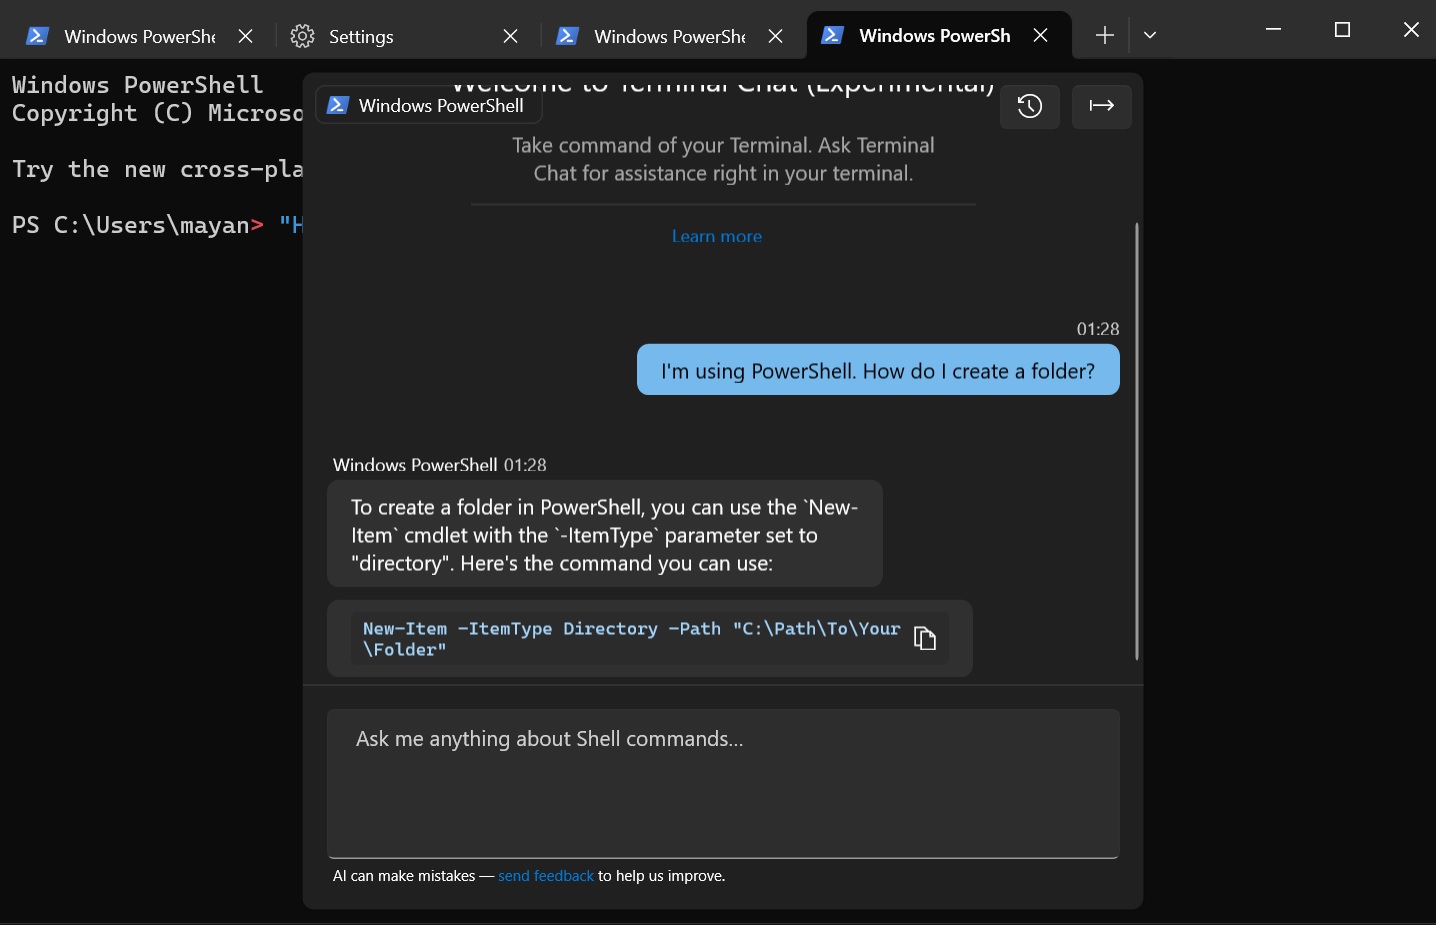
In my tests, I played with Terminal AI for a number questions. I started with most basic ones. For example, I asked Terminal AI “How do I create a folder?” In PowerShell. Terminal Chat replied back with suggestion to use New-Item -ItemType Directory, which is correctly.
It also offered a copy button to copy the command so I could directly paste it into the Shell.
In a Linux environment like WSL, it suggested mkdir. Why? Because it’s context aware. I don’t need to tell AI that I’m using PowerShell or WSL.
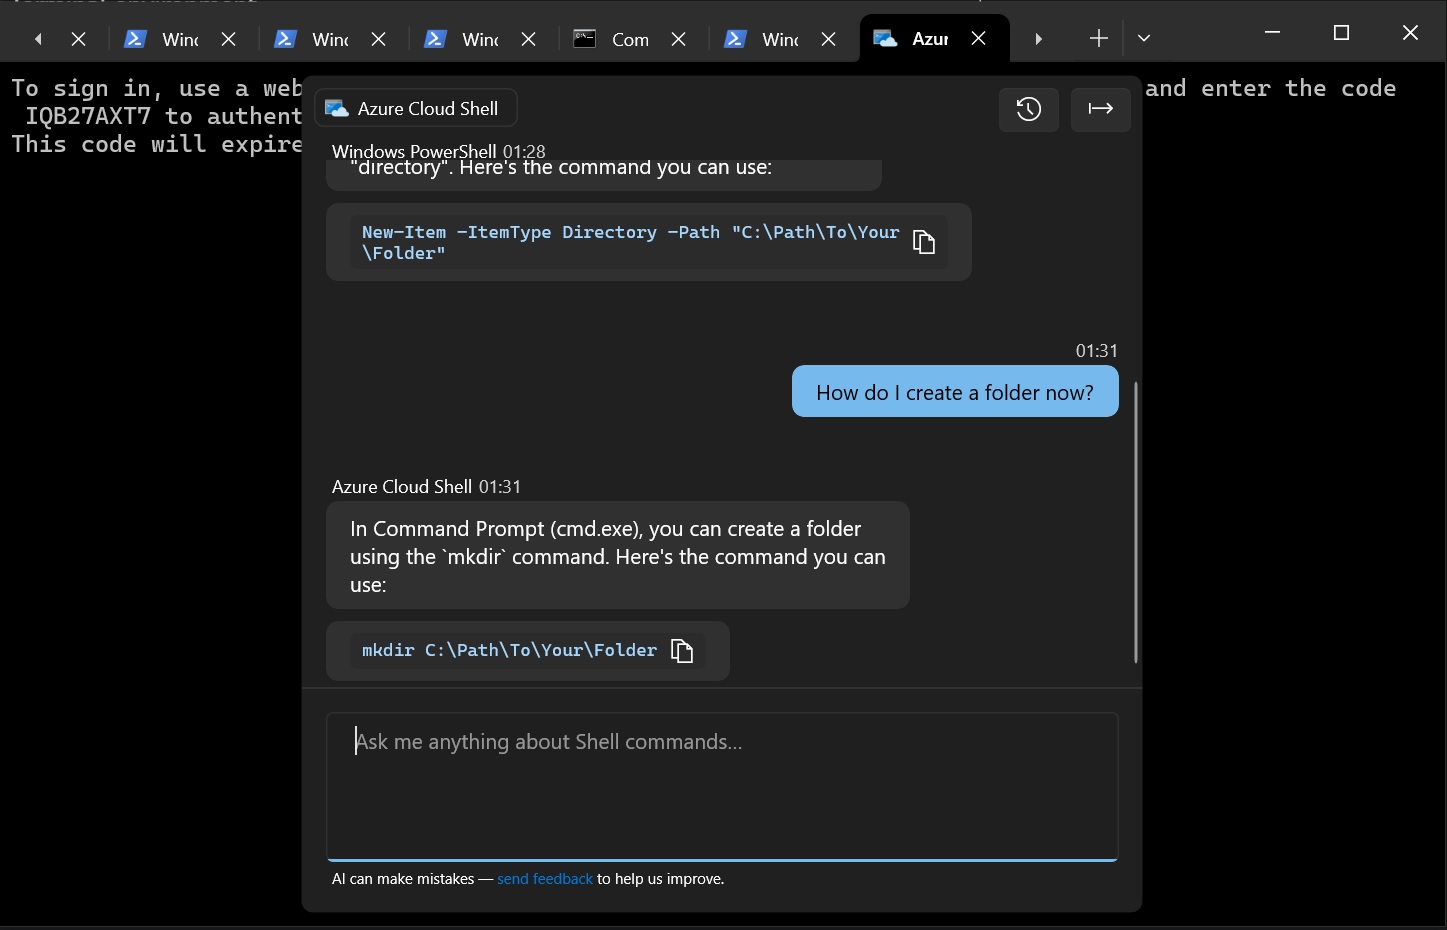
I also tried asking the same question in an Azure shell. Terminal AI instantly noticed that I’ve switched the shell from PowerShell to Azure.
It understands what I’m doing based on the context (either the selected Shell in the previous step).
There are no limitations on how you can use Terminal AI. It works as long as it’s related to Terminal or shell.
As I shared in the above screenshot, you can ask it how to perform actions like creating a folder, and it will suggest the correct command for your shell, whether it’s PowerShell or Linux. It also translates commands between systems, like showing that ls in Linux is Get-ChildItem in PowerShell.
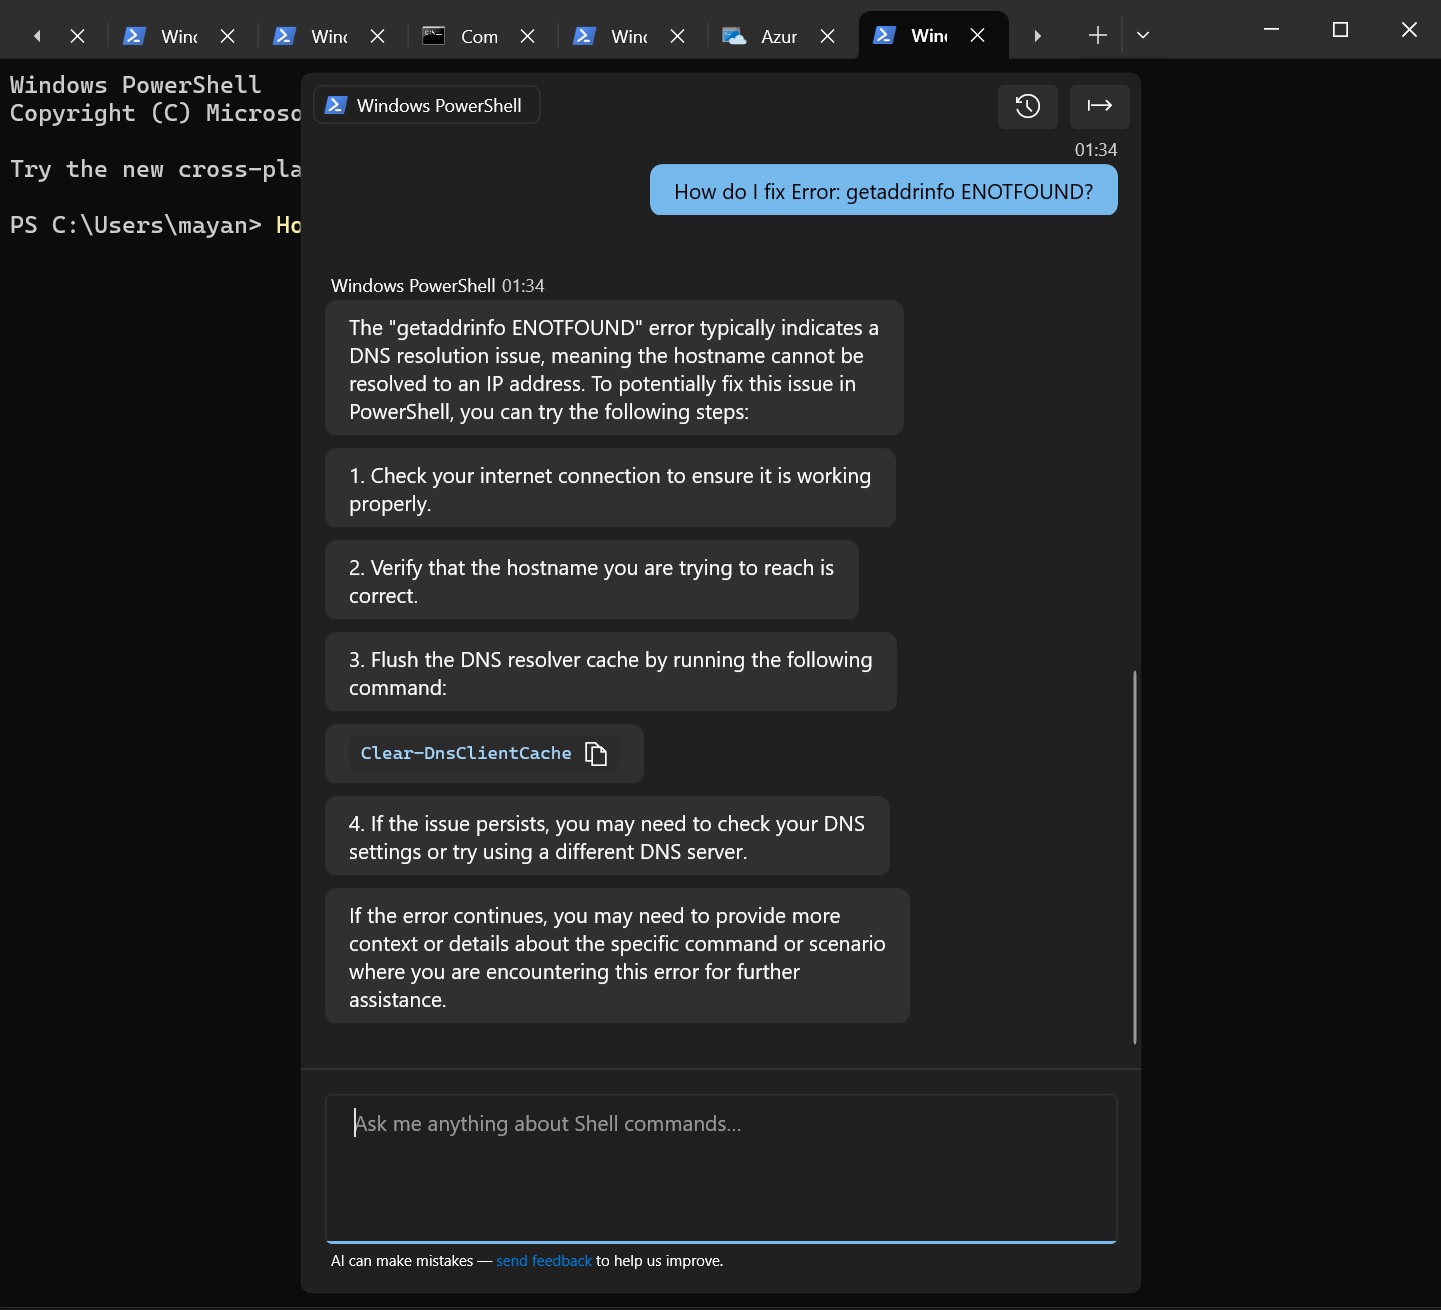
If you run into an error, you can paste it into Terminal Chat, and it will explain what went wrong and how to fix it.
It’s also great for getting quick code snippets for text editors like nano or vim. For PowerShell users, it can explain cmdlets like Get-Process.
While clicking the suggestion, the AI suggested code will be copied to the terminal, but it won’t run automatically.
Terminal AI will not save anything after you close the session, but there’s an option to export the conversation to a .txt file. You can also clear the chat manually before closing the Terminal shell.
It doesn’t yet have a built-in UI to highlight the history, and I don’t think it’ll be coming anytime soon.
The new experimental AI feature is available only in Windows Terminal (Canary), and you can download it from Github. Do you like the idea? Let us know in the comments below.


