

One of the most frustrating things about working in Microsoft Word is dealing with pictures. They always seem to mess up the document’s structure, are nearly impossible to reposition, and often behave inconsistently. That’s why I’ve found a better way to handle images in Microsoft Word.
Working With Pictures in Word Can Be a Challenge
First and foremost, Microsoft Word is a text editor and document creation program, not publishing software. For this reason, it prioritizes dealing with text ahead of dealing with pictures, which is why, after all these years, Microsoft Word forums are still clogged with people complaining about how it handles photos.
Lots of respondents in these forums often say that you can right-click an image, and choose from the Wrap Text options.

Although this is, indeed, one way to make pictures slightly more obedient, it’s unclear what each option actually means, and the program still manages to glitch every once in a while.
What’s more, even if you do master the text-wrapping properties, you’ll probably still stumble upon other difficulties when you dare to move or resize the photo. And the tools (and their effectiveness) can differ in older versions of the program.
The Answer to All My Picture Problems: Invisible Tables
Compared to dealing with pictures, working with tables in Microsoft Word is a breeze. They move easily, you can resize them to fit the width of the page, and you can change the table’s paragraph settings so that they behave reliably and exactly as you want. Also, tables stay in place relative to the text, so you can rest assured that they won’t jump around as you edit your work.
That’s why I always place my images inside tables in Microsoft Word—and when I’m done, I simply remove the table’s borders.
First, place your cursor where you want the image to go. Then, in the Insert tab on the ribbon, click “Table,” and choose a 1 x 1 structure.

Related
The Best Tips for Creating and Using Tables in Microsoft Word
Don’t get frustrated by Word’s infamous tables!
Now, with your single-row-single-column table added, and the cursor placed within, click “Pictures” in the Insert tab on the ribbon, and locate and insert your image.

Now that the picture is inserted within a table cell, there are several steps to take to customize how it looks and behaves.

Add Spacing After the Picture
In the example above, there isn’t a gap between the bottom of the image and the next line of text, so this is the first thing that needs to be addressed to improve how it looks. To do this, hover your cursor over the table, and click the crosshairs button that appears in the top-left corner to select the whole table and its contents. Then, in the Home tab on the ribbon, click the “Paragraph Settings” dialog box launcher.
Now, in the Indents And Spacing tab of the Paragraph dialog box, match the Spacing After measurement with the font size used for your document’s body text. Doing this helps ensure the spacing between the images and each paragraph is consistent. In my case, my normal style text is 11 pt, so that’s what I’ll type into the Spacing After field. Then, click “OK.”

Notice that a line space now separates the image from the text that follows.

You might be wondering why you can’t just press Enter at the start of the paragraph beneath the table to create the extra space. The reason to avoid this is that by pressing Enter, you’re creating an empty paragraph marker, which could affect your document’s structural integrity down the line.
Wrap Text Around the Picture
The next alteration I want to make to my image is to change how it behaves within the text. Specifically, I want the picture to be around half the width of the text paragraphs, and the text to wrap around it. If you want to do the same, select the image and use a corner handle to shrink it to the desired size while maintaining its proportions.

Next, click and drag the edge of the table so that it neatly surrounds the image’s new size.

Now, you need to adjust the table’s text-wrapping properties. To do this, hover over the table and, this time, right-click the crosshairs button in the top-left corner. Then, select “Table Properties.”

In the Table tab of the Table Properties dialog box, select “Around” in the Text Wrapping options, and click “OK.”

Now, the text is neatly wrapped around the image, and because the picture is encased in a table, there’s an adequate gap between the right edge of the picture and the text sitting next to it. You could also make this gap larger or smaller by simply readjusting the positioning of the right edge of the table cell.

Move and Align the Picture
Once your image is the right size, you can simply click and drag the crosshairs icon in the top-left corner of the table to reposition it to wherever works best for you. Yes, you can do this with images that aren’t contained within tables, too, but getting the precise position is much more straightforward using this method.
In the example below, I’ve moved the table to the right of my page, and right-aligned the picture in the Table Layout tab on the ribbon so that it aligns more closely with the right edge of the justified text.

Add a Caption to the Picture
Next, let’s say you wanted to add a caption beneath a picture in your Word document. Once again, this is where using a table can save the day.
Yes, you can right-click an image and select “Insert Caption,” but in my experience as an academic proofreader and legal document producer, this method results in grave inconsistencies and awkward formatting issues.
Instead, with your image already added to a single-cell table, in the Table Layout tab, click “Insert Row Below.”

Now, in the new row you just added, type the caption.

There are two more steps I recommend you take at this stage.
First, you want to ensure that the two cells of the table (the upper cell containing the image and the lower cell containing the caption) stay together. In other words, if you don’t make the following adjustments, the caption cell could move to the next page, with the image cell staying on the previous one. To prevent this from happening, select the picture, and in the Home tab on the ribbon, click the “Paragraph Settings” dialog box launcher icon.
Now, open the “Lines And Page Breaks” tab of the Paragraph dialog box, check “Keep With Next,” and click “OK.” This means that the image you selected is effectively glued to the text in the row below, so they’ll never be split up by a natural page break in your document.

If you want the image and its caption to stay with the paragraph underneath the table, apply the Keep With Next setting to the caption, too.
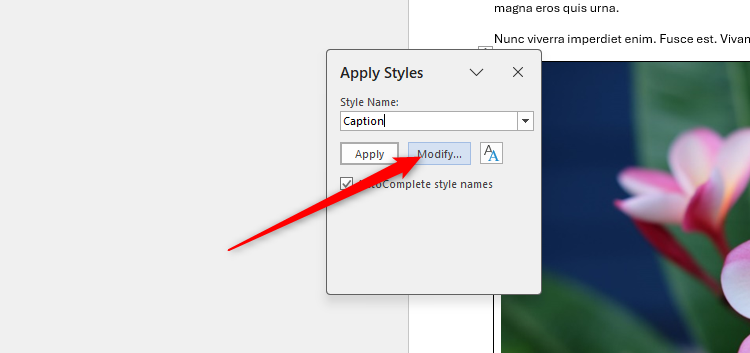
The final step you should take is to change the caption’s style. With your cursor anywhere in the caption’s text, press Ctrl+Shift+S to launch the Apply Styles dialog box, and in the Style Name field, type the first few letters of the word “Caption.”


Related
Once the word “Caption” is autocompleted, click “Modify.”
Next, change the font formatting so the caption is presented differently from your normal style. Personally, I like my captions to be italicized and dark blue with center alignment. Also, click “Format” in the bottom-left corner of the Modify Style dialog box to adjust other settings, like making sure there’s a space after the caption text.

When you’re done, click “OK” to see this new style applied to the caption you typed earlier.

You can now apply this style formatting to any other captions you add to images in tables in the rest of your document.
If you add a table of figures to your document by clicking References > Insert Table Of Figures, click “Options,” check “Style,” and ensure “Caption” is selected. This means that when Word generates your table of figures, it’ll pick up any text in this style.
Insert a Gallery of Pictures
If you’re not yet convinced that using tables is the best way to organize your pictures in Microsoft Word, I challenge you to insert images next to each other without them behaving erratically! It’s difficult, right? Of course, the answer to this problem is to use a table!
Let’s say you wanted a gallery of six photos across two rows. First, add your 3×2 table through the Table drop-down menu in the Insert tab on the ribbon. If you want to add captions under each image using the method I outlined above, select four rows instead of two.

Then, once you’ve adjusted the Spacing After, and made any other formatting and behavioral changes to your table, simply insert your pictures into each cell. The key is to make sure each image is encased in a separate cell, so that you can make changes to its size, shape, and formatting without affecting any of the other pictures you added.
Use Microsoft Word’s Crop tool in the Picture Format tab on the ribbon to resize the images to the same aspect ratio and, thus, achieve consistency.

Remove the Borders
The final step to making your images look the part is to remove the borders from the table. Click the crosshairs button to select the whole table, and in the Table Design tab on the ribbon, click Borders > No Border.

Now, take a moment to appreciate how the images will look when you print the document.

To see the table’s borders on your screen without them being visible when you print the document, select the table, and click “View Gridlines” in the Table Layout tab on the ribbon.
Having lots of images in a document can significantly increase the size of the file and, thus, slow down its performance. To resolve this, you can compress pictures in Microsoft Word to reduce the space they take up.


