

Why you can trust Windows Central
Our expert reviewers spend hours testing and comparing products and services so you can choose the best for you. Find out more about how we test.
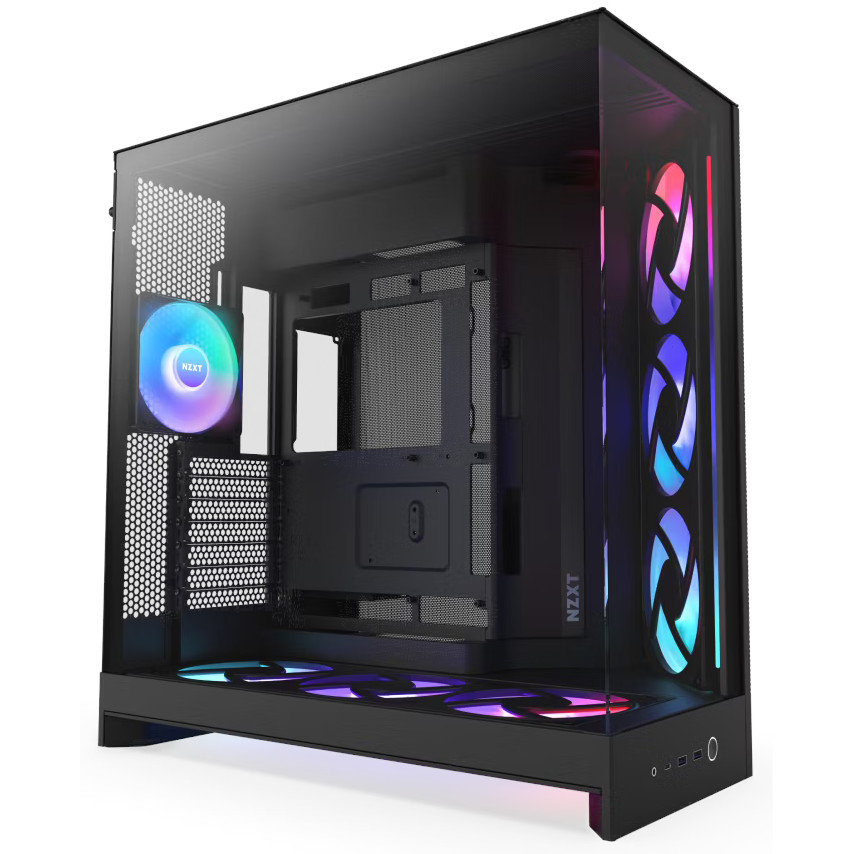
NZXT’s PC cases are some of the most attractive options out there, and the company has redesigned its H9 Flow lineup for 2025.
The three new PC cases include the H9 Flow, H9 Flow RGB, and H9 Flow RGB+, with the biggest differences between the models being the included fans.
I received the new top-end NZXT H9 Flow RGB+ ahead of the launch, allowing me plenty of time to get to know the case.
After transplanting my gaming PC into the new case, I’m here to provide some insight into what it’s like to use, how well it keeps performance hardware cool (and at what volume), and the extra goodies you don’t usually see from the outside.

Cale Hunt
I’ve been building PCs for a couple of decades at this point, and I’m always keen on trying out the latest cases. Because I actually built a gaming PC inside the H9 Flow RGB+, I can offer extra insight on what makes it good and why you might want to avoid it.
This review was made possible thanks to a review sample from NZXT. The company had no input nor saw the contents of this review prior to publication.
NZXT H9 Flow RGB (2025): Cheat Sheet
- What is it? A premium PC case designed for maximum airflow while sporting plenty of glass to show off your build.
- Who is it for? PC enthusiasts who need a huge case with lots of glass and included fans.
- How much does it cost? The standard H9 Flow starts at $169.99, the RGB model jumps to $209.99, and the H9 Flow RGB+ I reviewed costs $289.99.
- What did I like? Easy internal access, easy cable management, tons of airflow.
- What did I not like? No adapters for the NZXT Control Hub, no fine screens for the front fans.
NZXT H9 Flow RGB (2025): Pricing and specifications
NZXT launched its updated H9 Flow cases for 2025 on May 20. They’re available in white and black finishes, and they’re made from steel and tempered glass.
The standard H9 Flow starts at $169.99 and includes one rear exhaust fan and three individual F140Q fans along the angled case section.
The H9 Flow RGB starts at $209.99 and upgrades the front three fans to an F420 RGB Core setup while keeping the same non-RGB rear exhaust fan.
The H9 Flow RGB+, which I’m reviewing here, starts at $289.99. It has the same F420 RGB triple-fan setup along the front, another F420 RGB setup on the bottom, and an F120 RGB Core exhaust fan.
Black and white models are all available at Newegg, but you can also buy directly from NZXT.
Here’s a look at the specs that make up this PC case.
|
Spec |
NZXT Flow H9 RGB+ (2025) |
|---|---|
|
I/O |
2x USB-A 3.2 (Gen 1), 1x USB-C 3.2 (Gen 2×2), 1x 3.5mm audio |
|
Pre-installed fans |
2x F420 RGB Core (with 3 fans each), 1x F120Q (rear) |
|
Radiator support |
Up to 420mm |
|
Fan capacity |
Up to 9x 140mm, 1x 120mm (rear) |
|
Motherboard support |
E-ATX (up to 277mm), ATX, Micro-ATX, Mini-ITX |
|
CPU cooler clearance |
165mm |
|
PSU clearance |
200mm |
|
Rear-connecting motherboard support |
ATX, Micro-ATX |
|
SSD support |
6x 2.5-inch SSDs or 4x 2.5-inch and 2x 3.5-inch SSDs |
|
Expansion slots |
7 |
|
Volume |
76.7L |
|
Dimensions |
19.9 (H) x 18.9 (D) x 12.4 (W) inches (506mm x 481mm x 315mm) |
|
Weight |
27.78 pounds (12.6kg) |
|
Materials |
SGCC steel, tempered glass |
|
Warranty |
2 years |
NZXT H9 Flow RGB+ (2025): How I tested

The best way to test a PC case is to build a full PC inside, and that’s exactly what I did with the new NZXT H9 Flow RGB+ (2025).
I approached the review from the same angle as any regular buyer, and I’ve been sure to include my opinions regarding ease-of-build, internal layout, and extra features.
Beyond that, once I reassembled my PC inside the case, I took a look at supporting software, thermals, airflow, noise, and future expansion possibilities.
There’s no paper analysis here: this is an in-depth look at the new NZXT H9 Flow RGB+ case.
NZXT H9 Flow RGB+ (2025): What I like
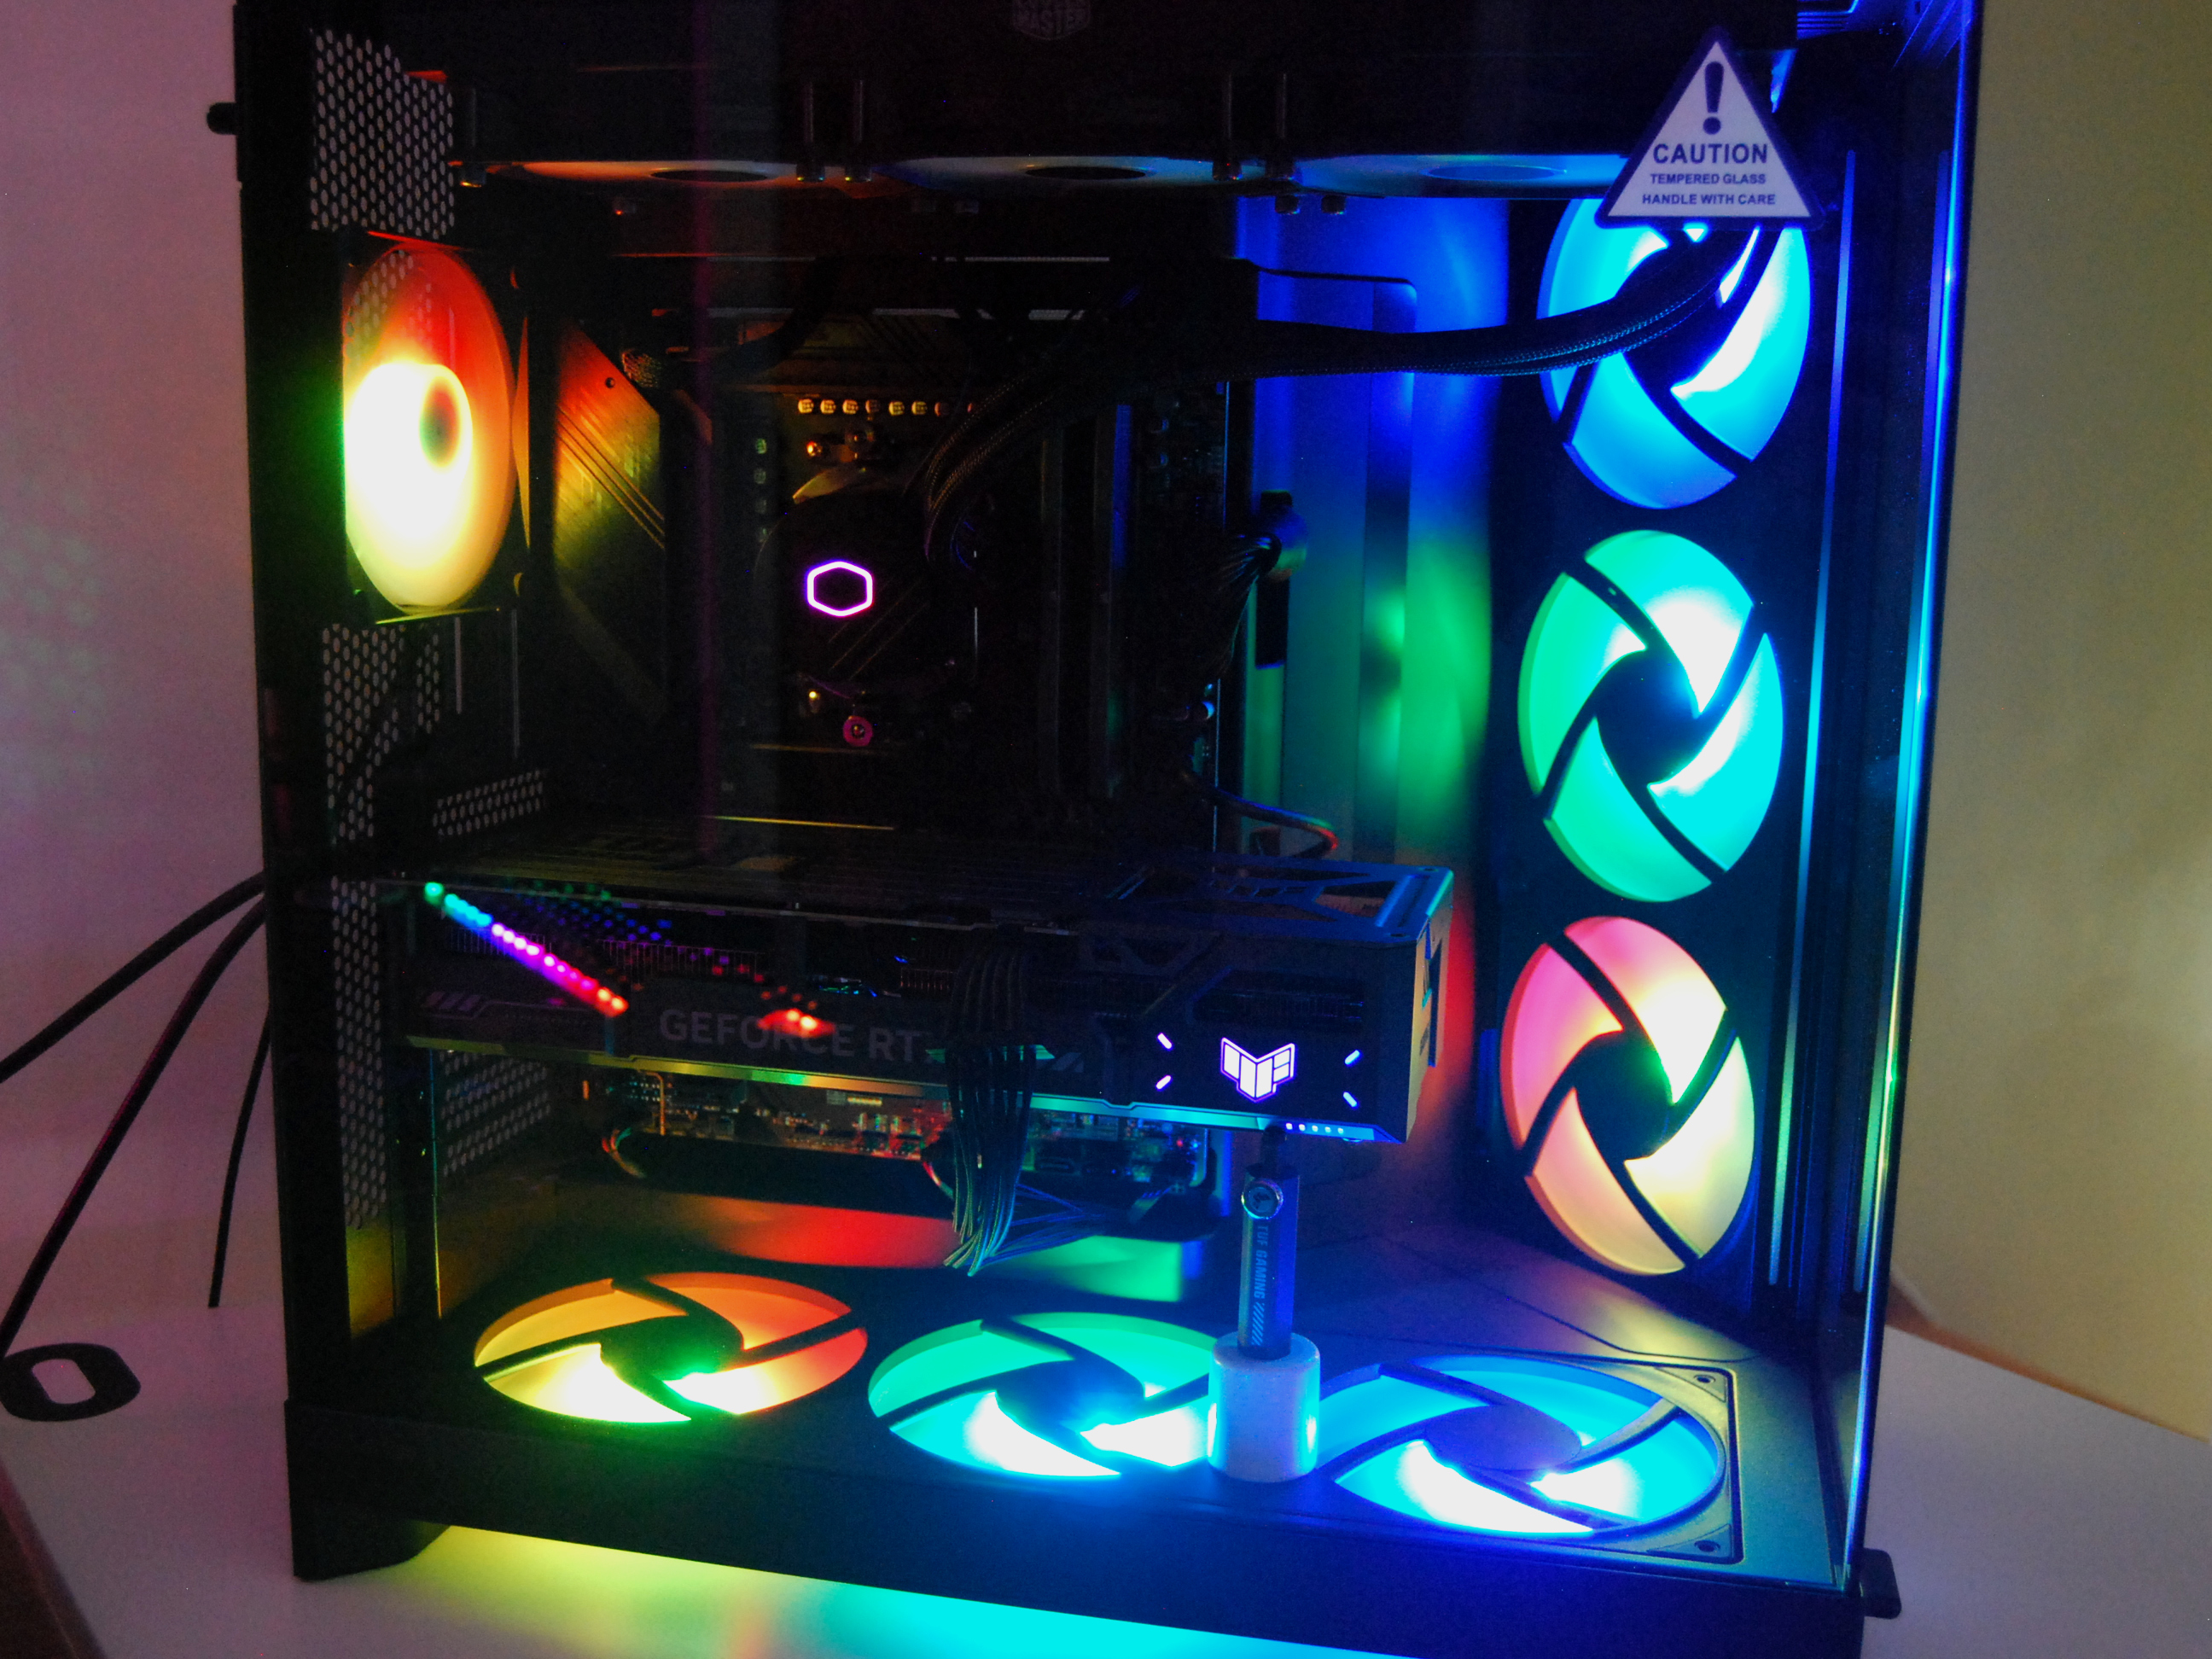
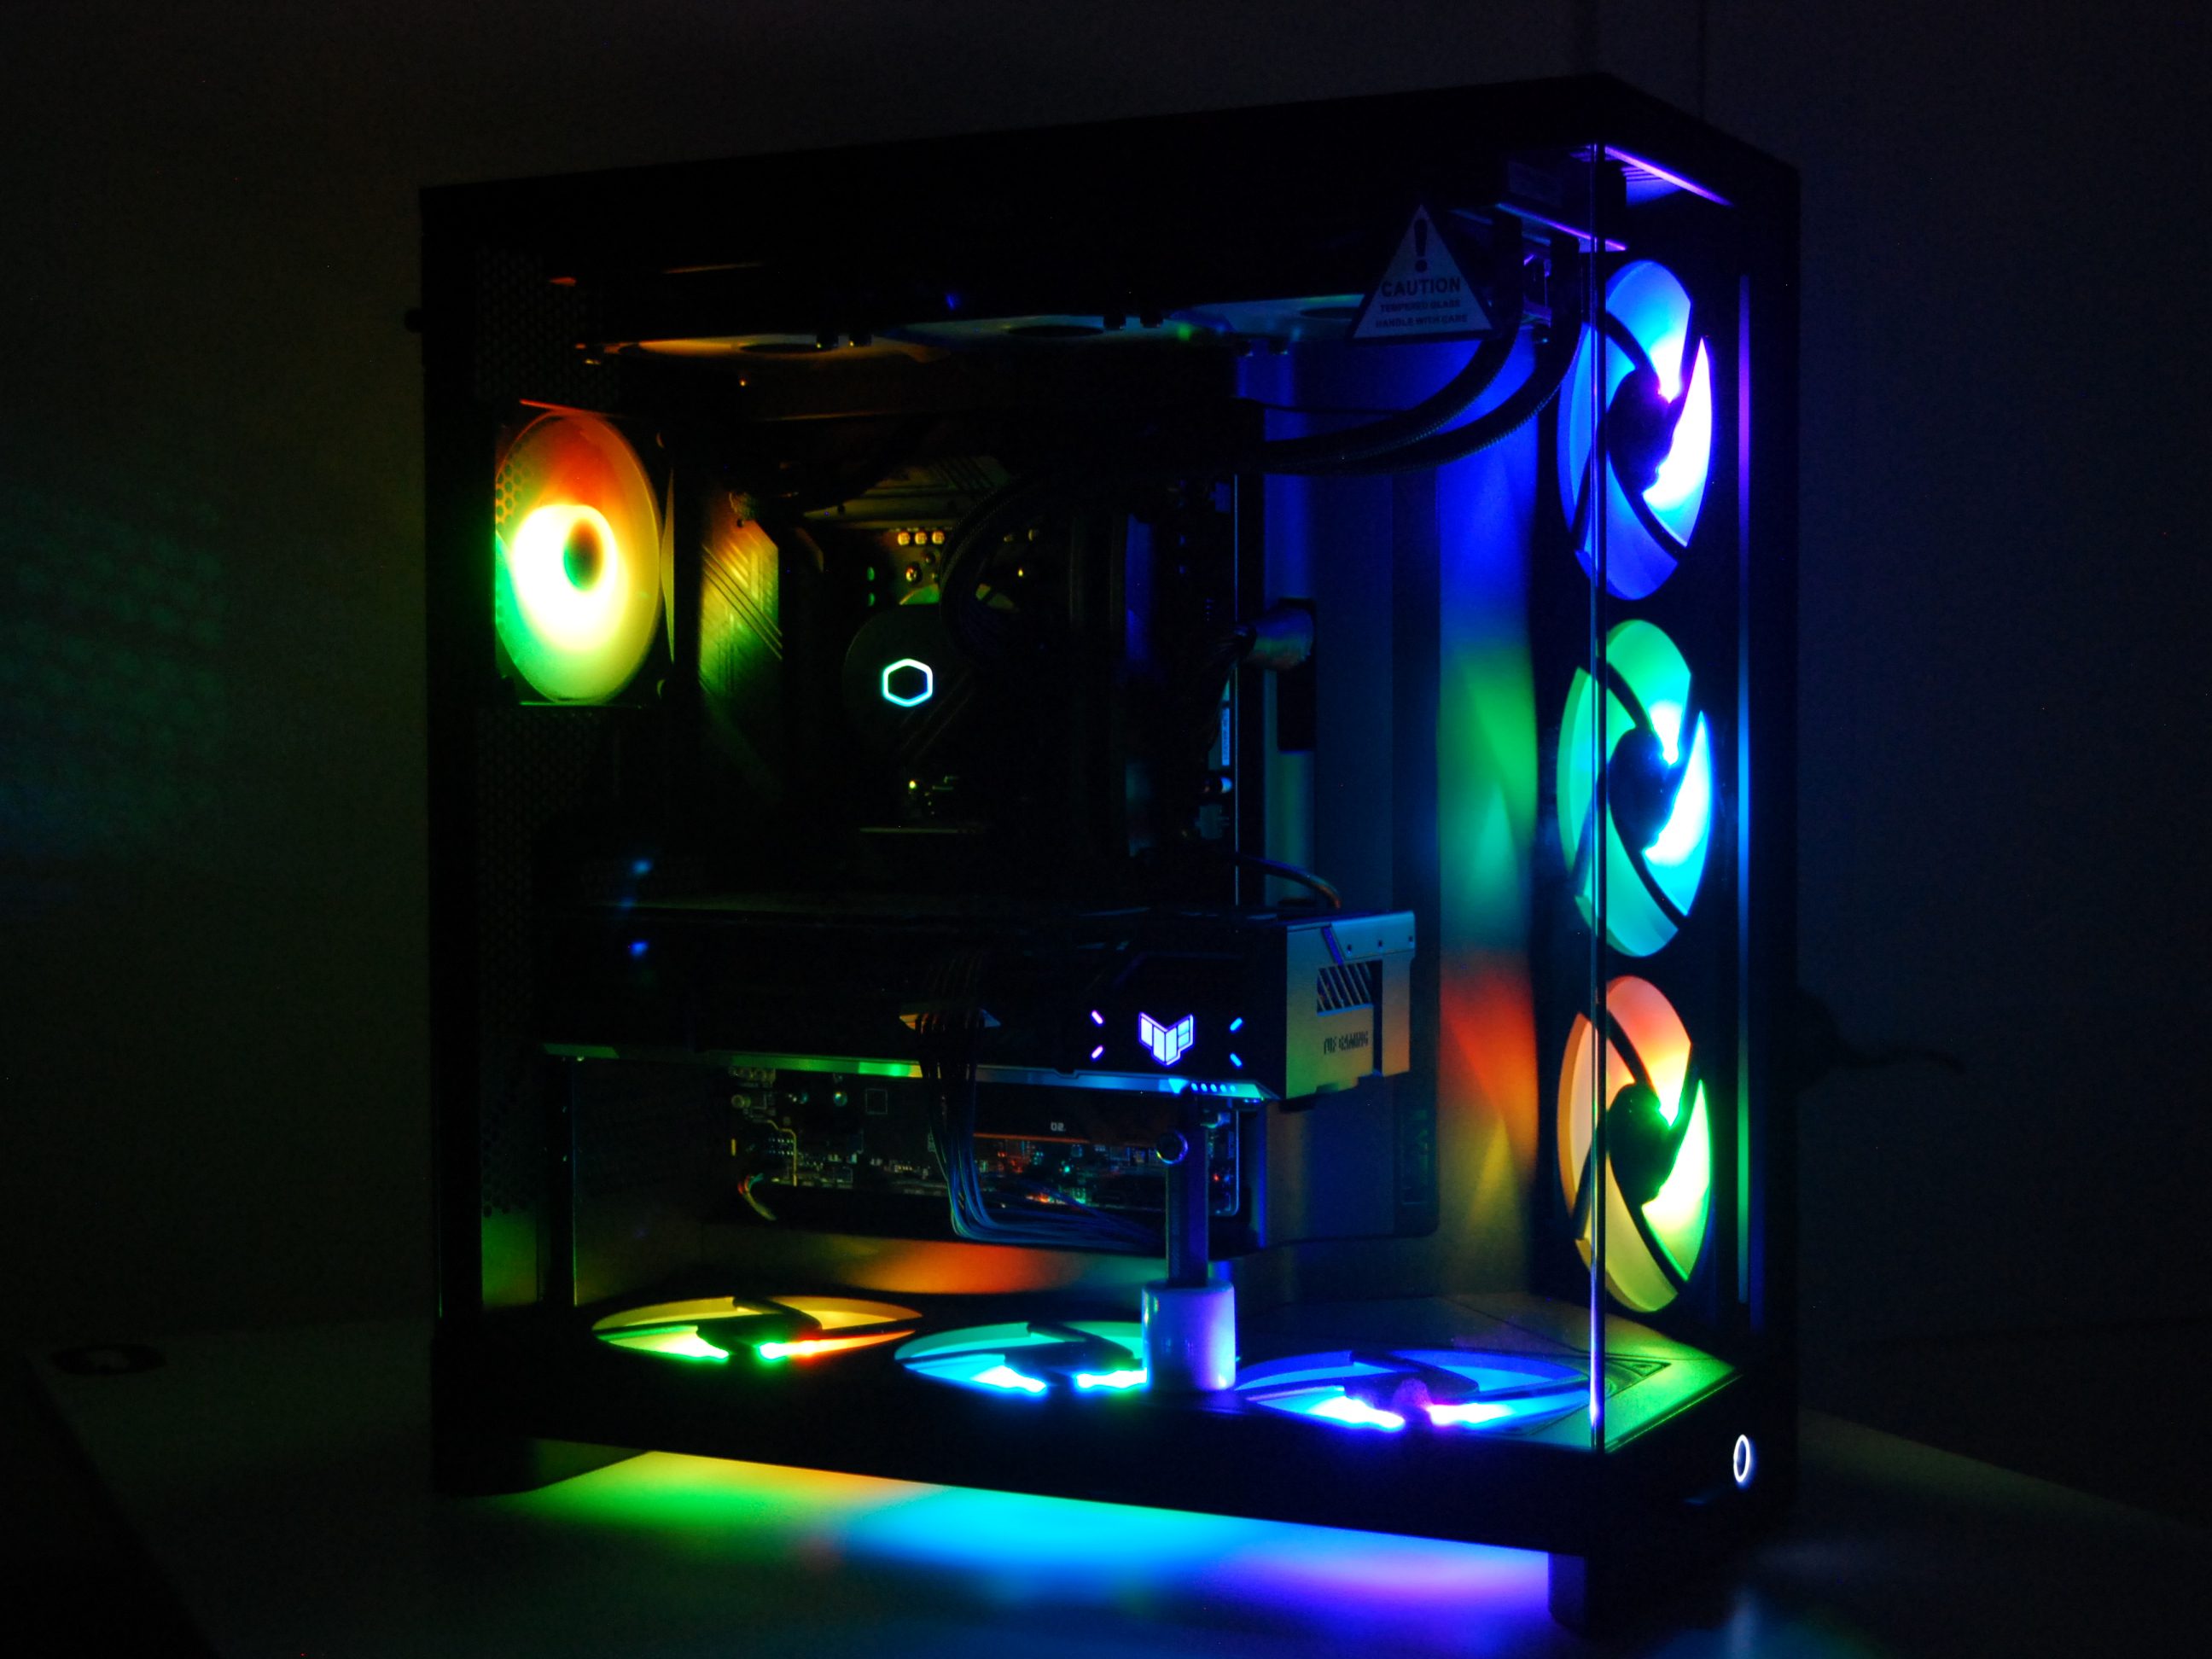
Image 1 of 4
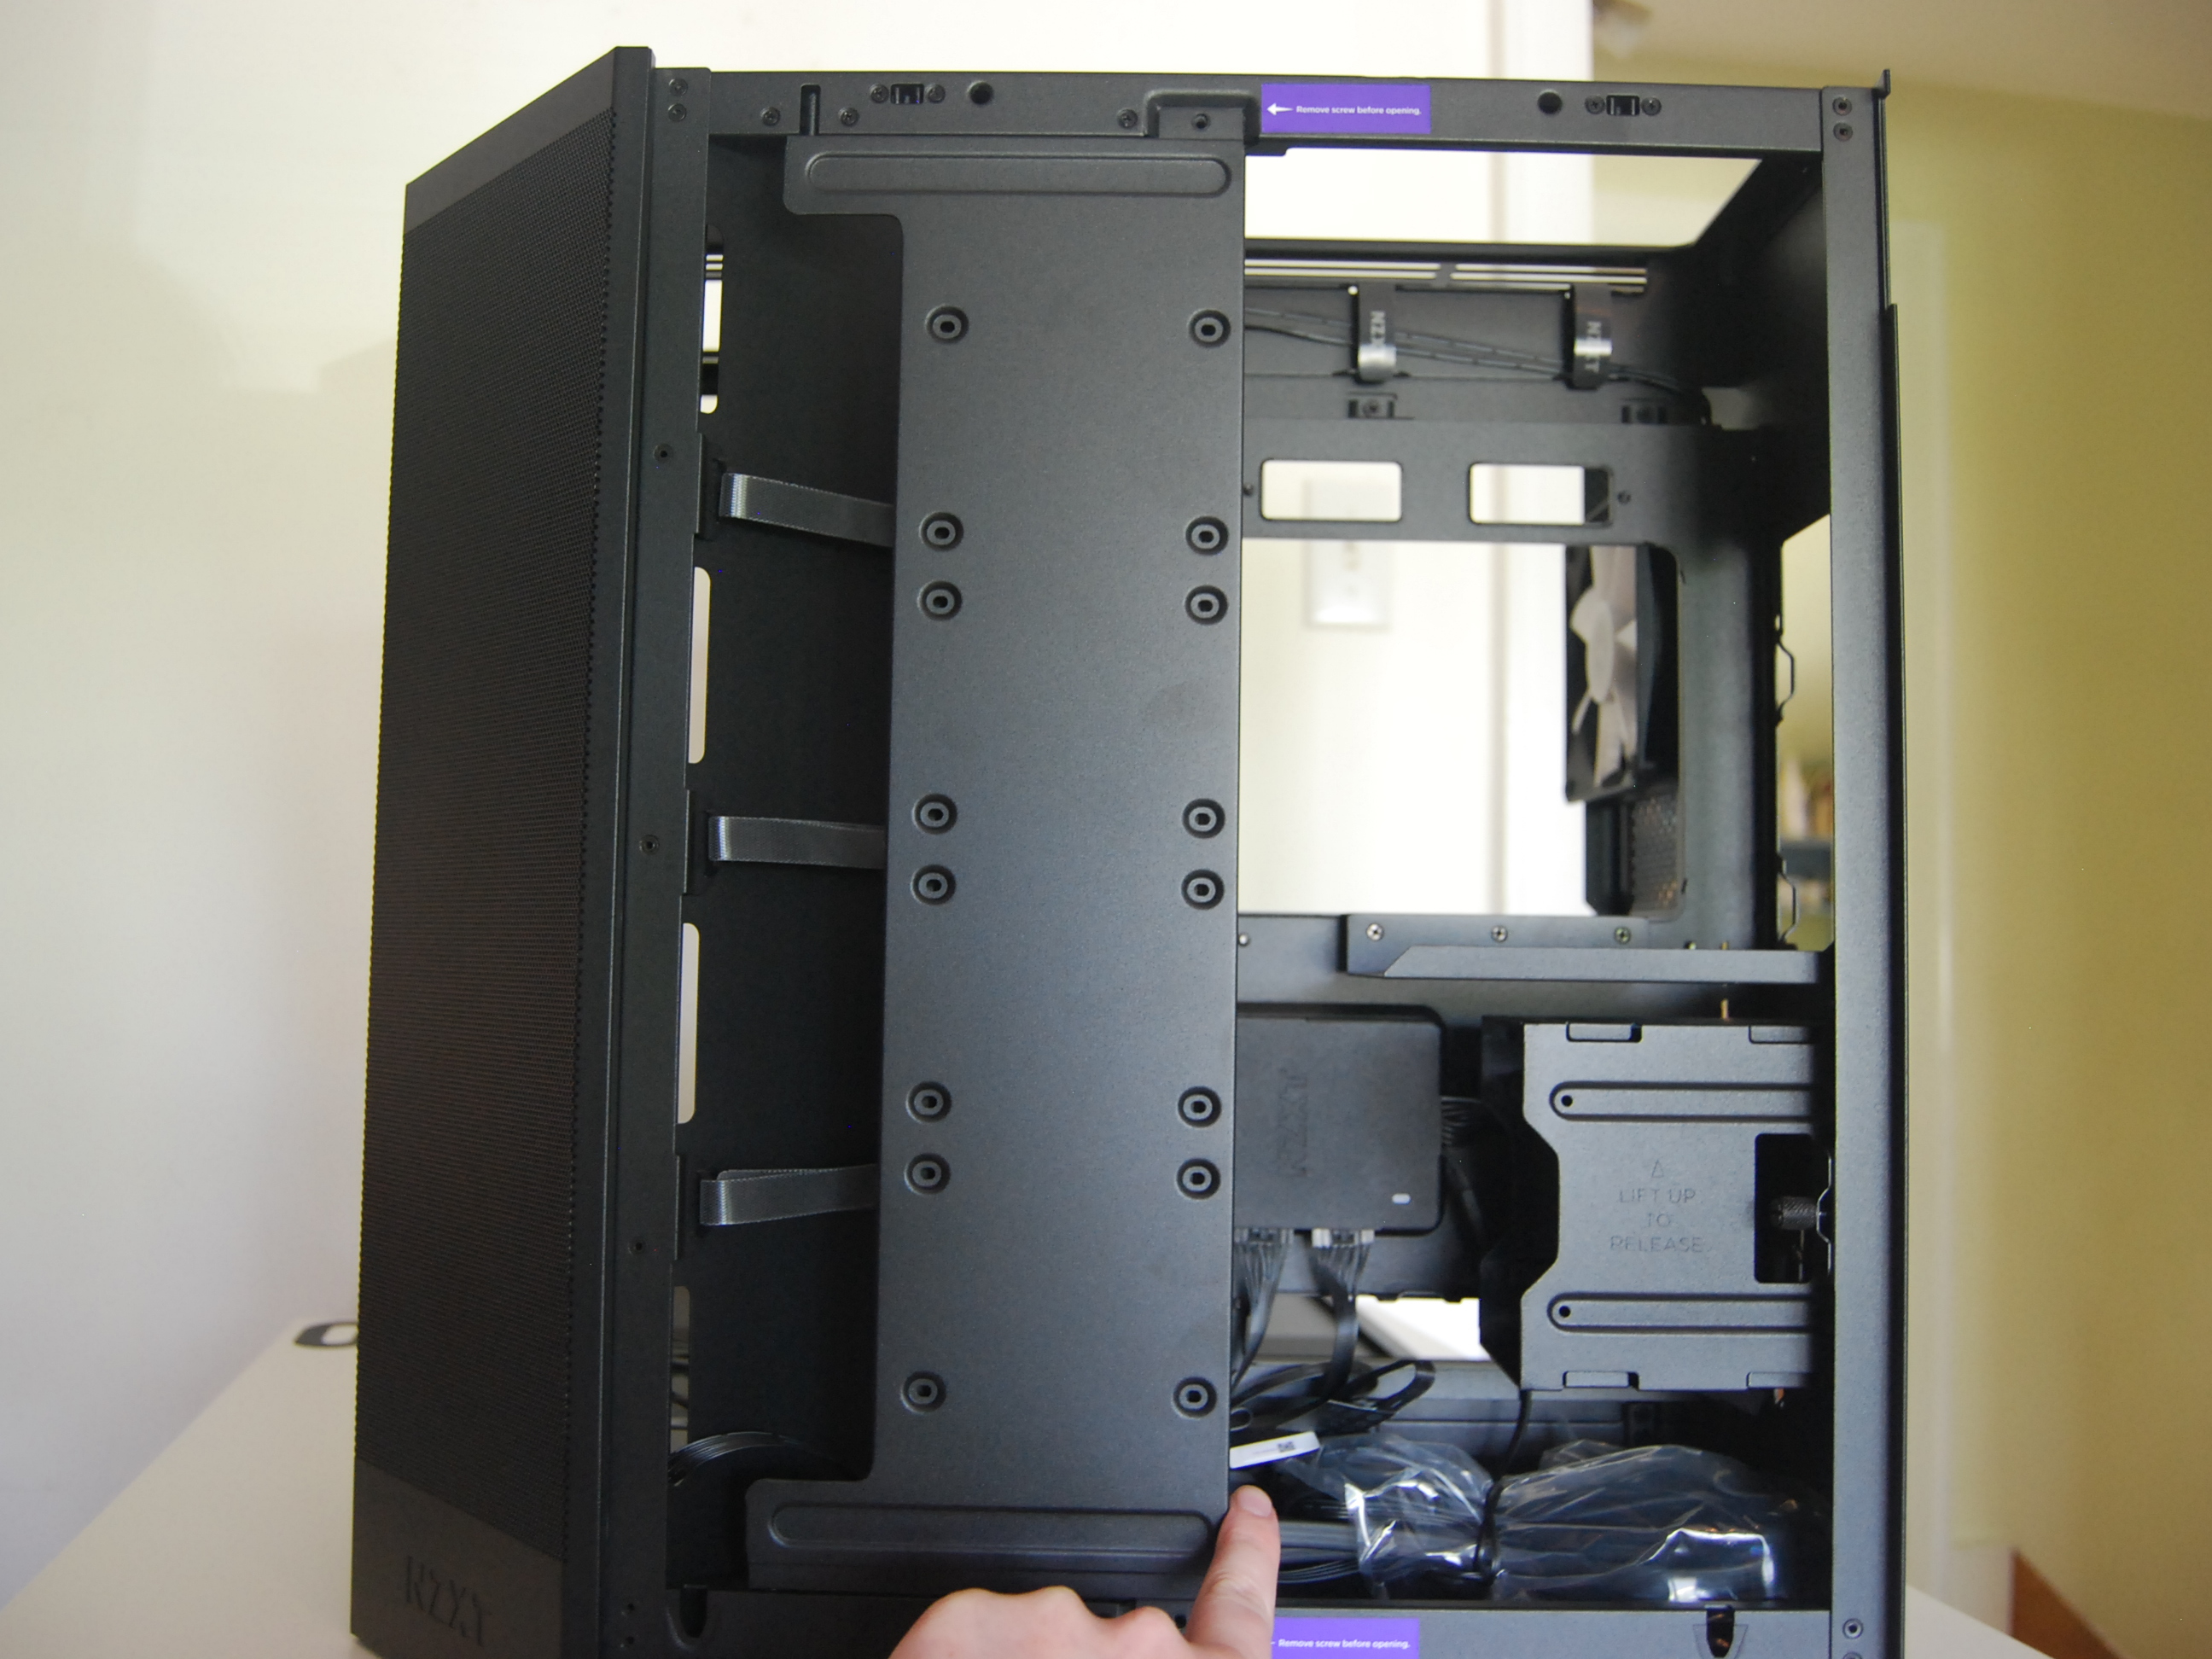
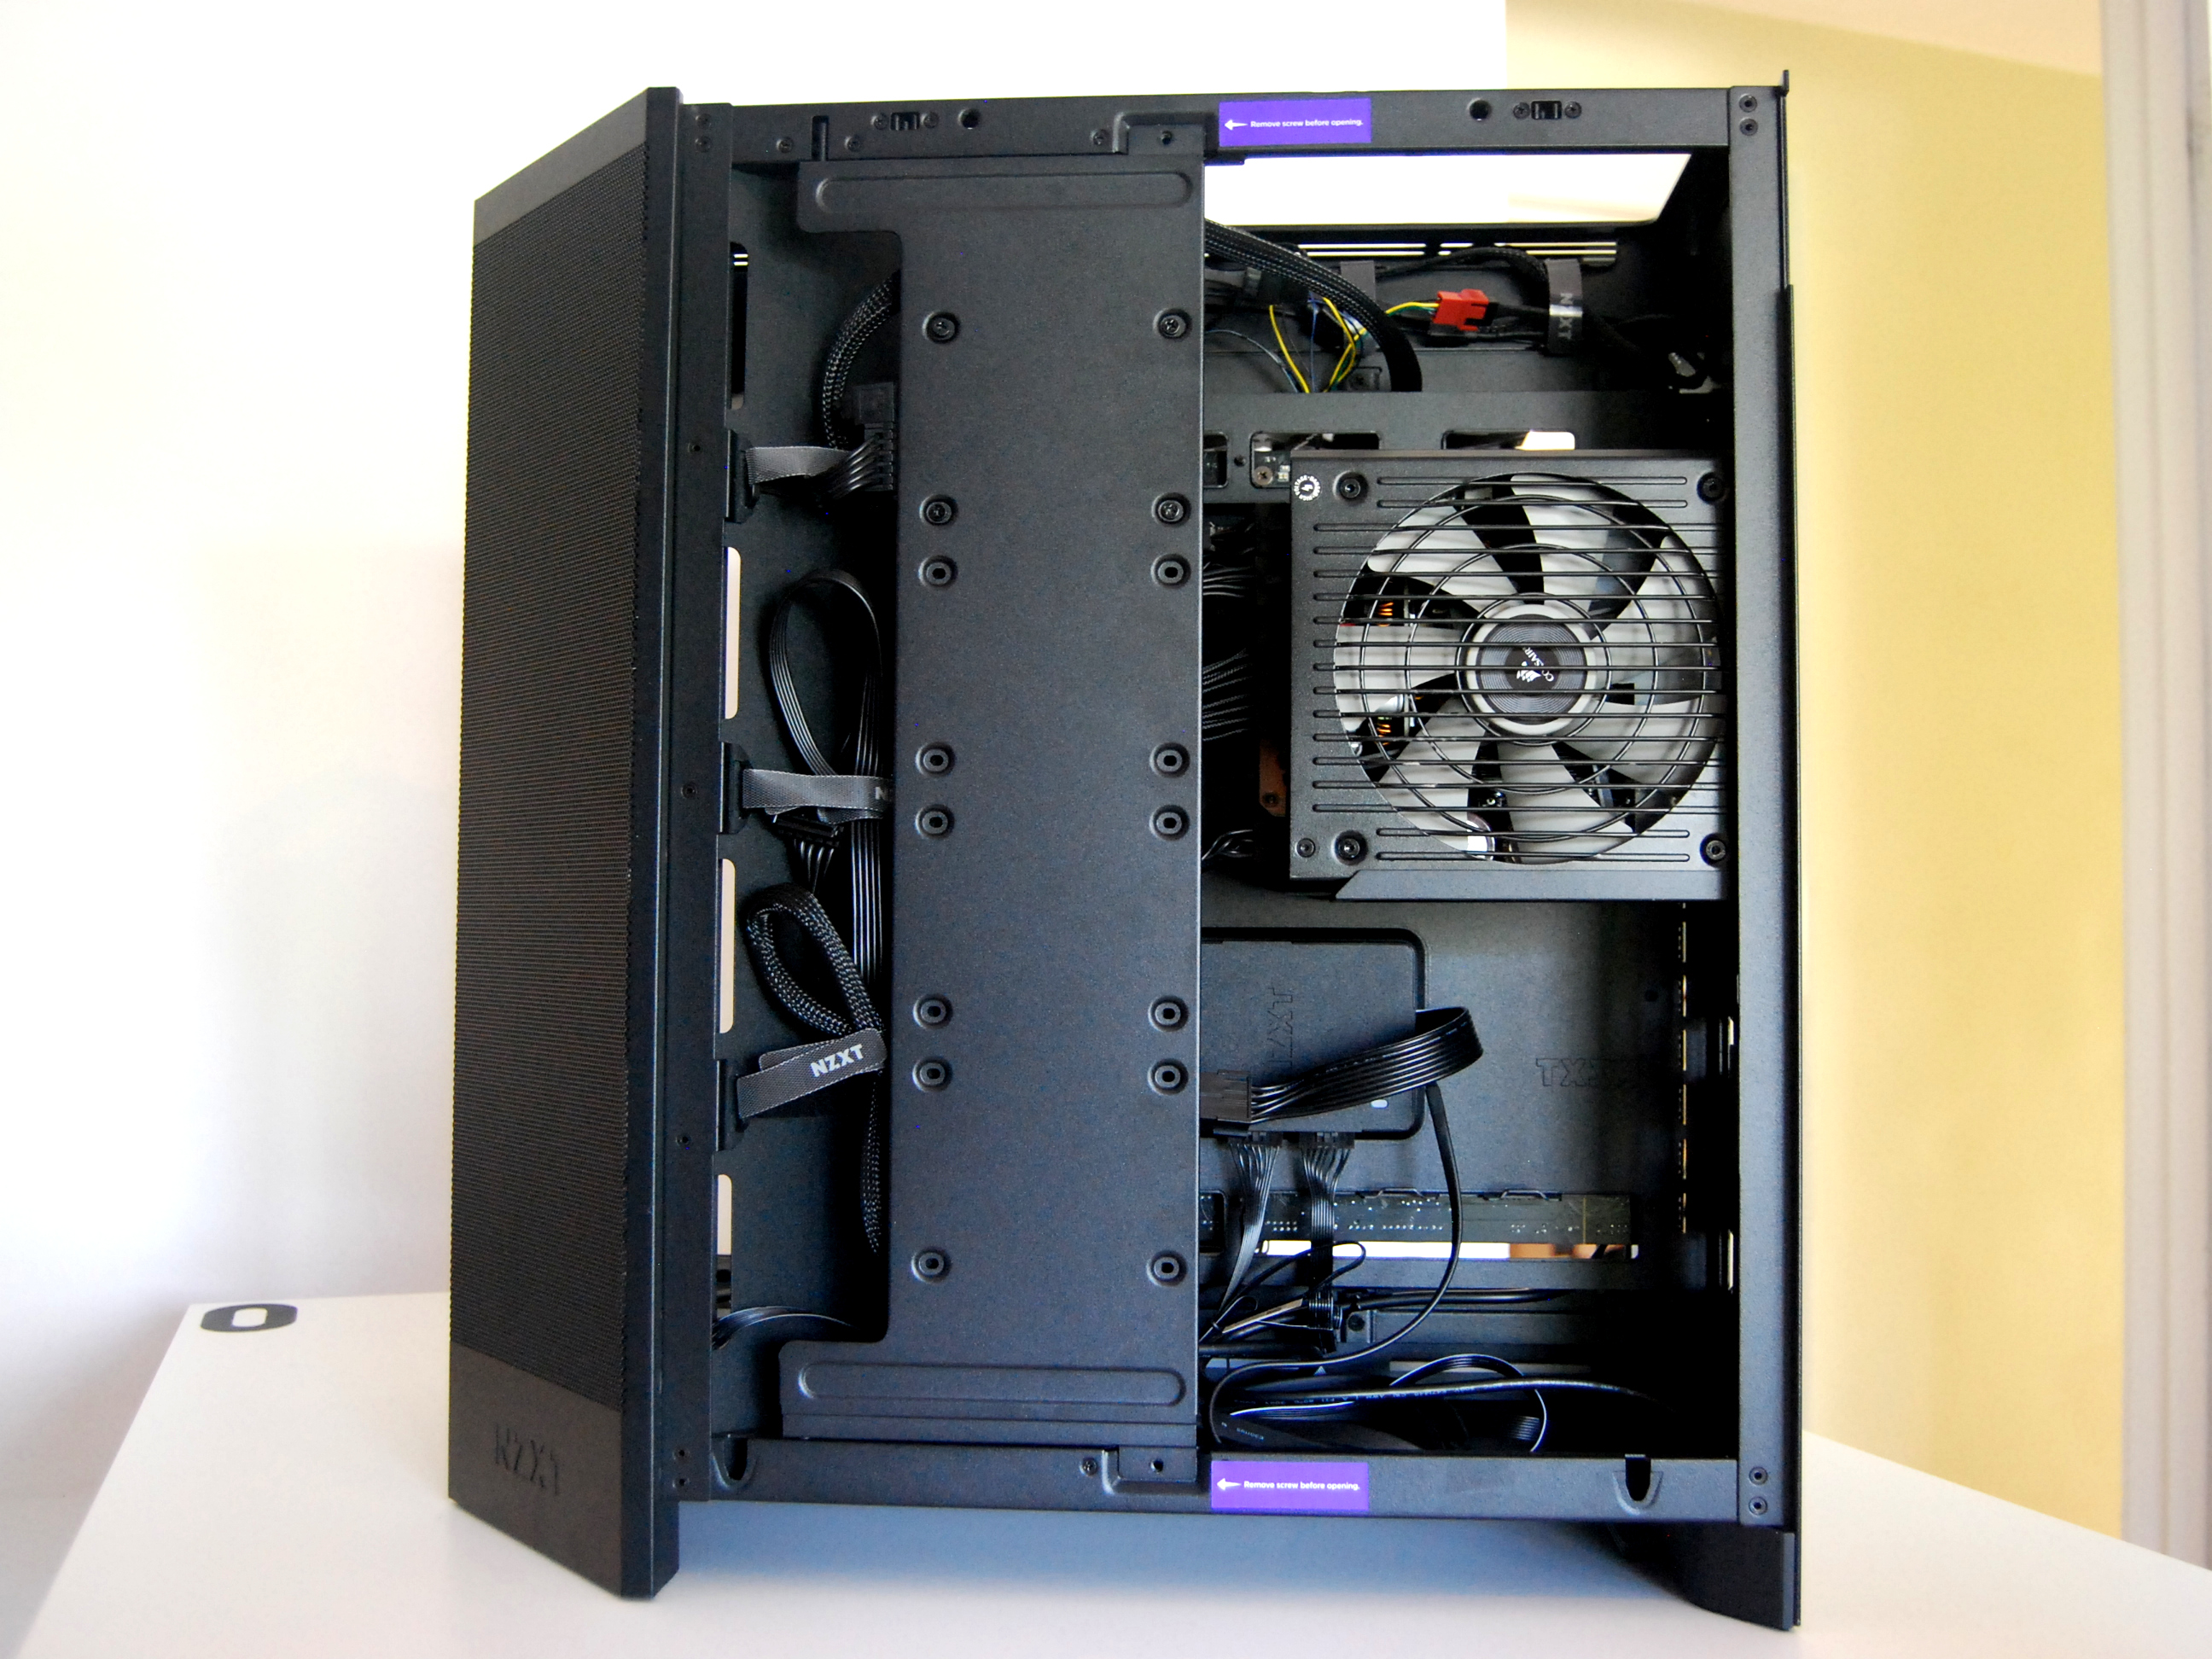
To kick off the new PC build, I disassembled the H9 Flow RGB+ as far as the (mostly) toolless entry allows. It’s unlike other cases that have a side panel or two that pull away.
The top panel, held in place with thumb screws, is removed first. This frees up the side glass and side metal panels for removal. While the front glass, rear panel, and angled fan section remain in place, you otherwise have full and easy access to the PC’s internals.
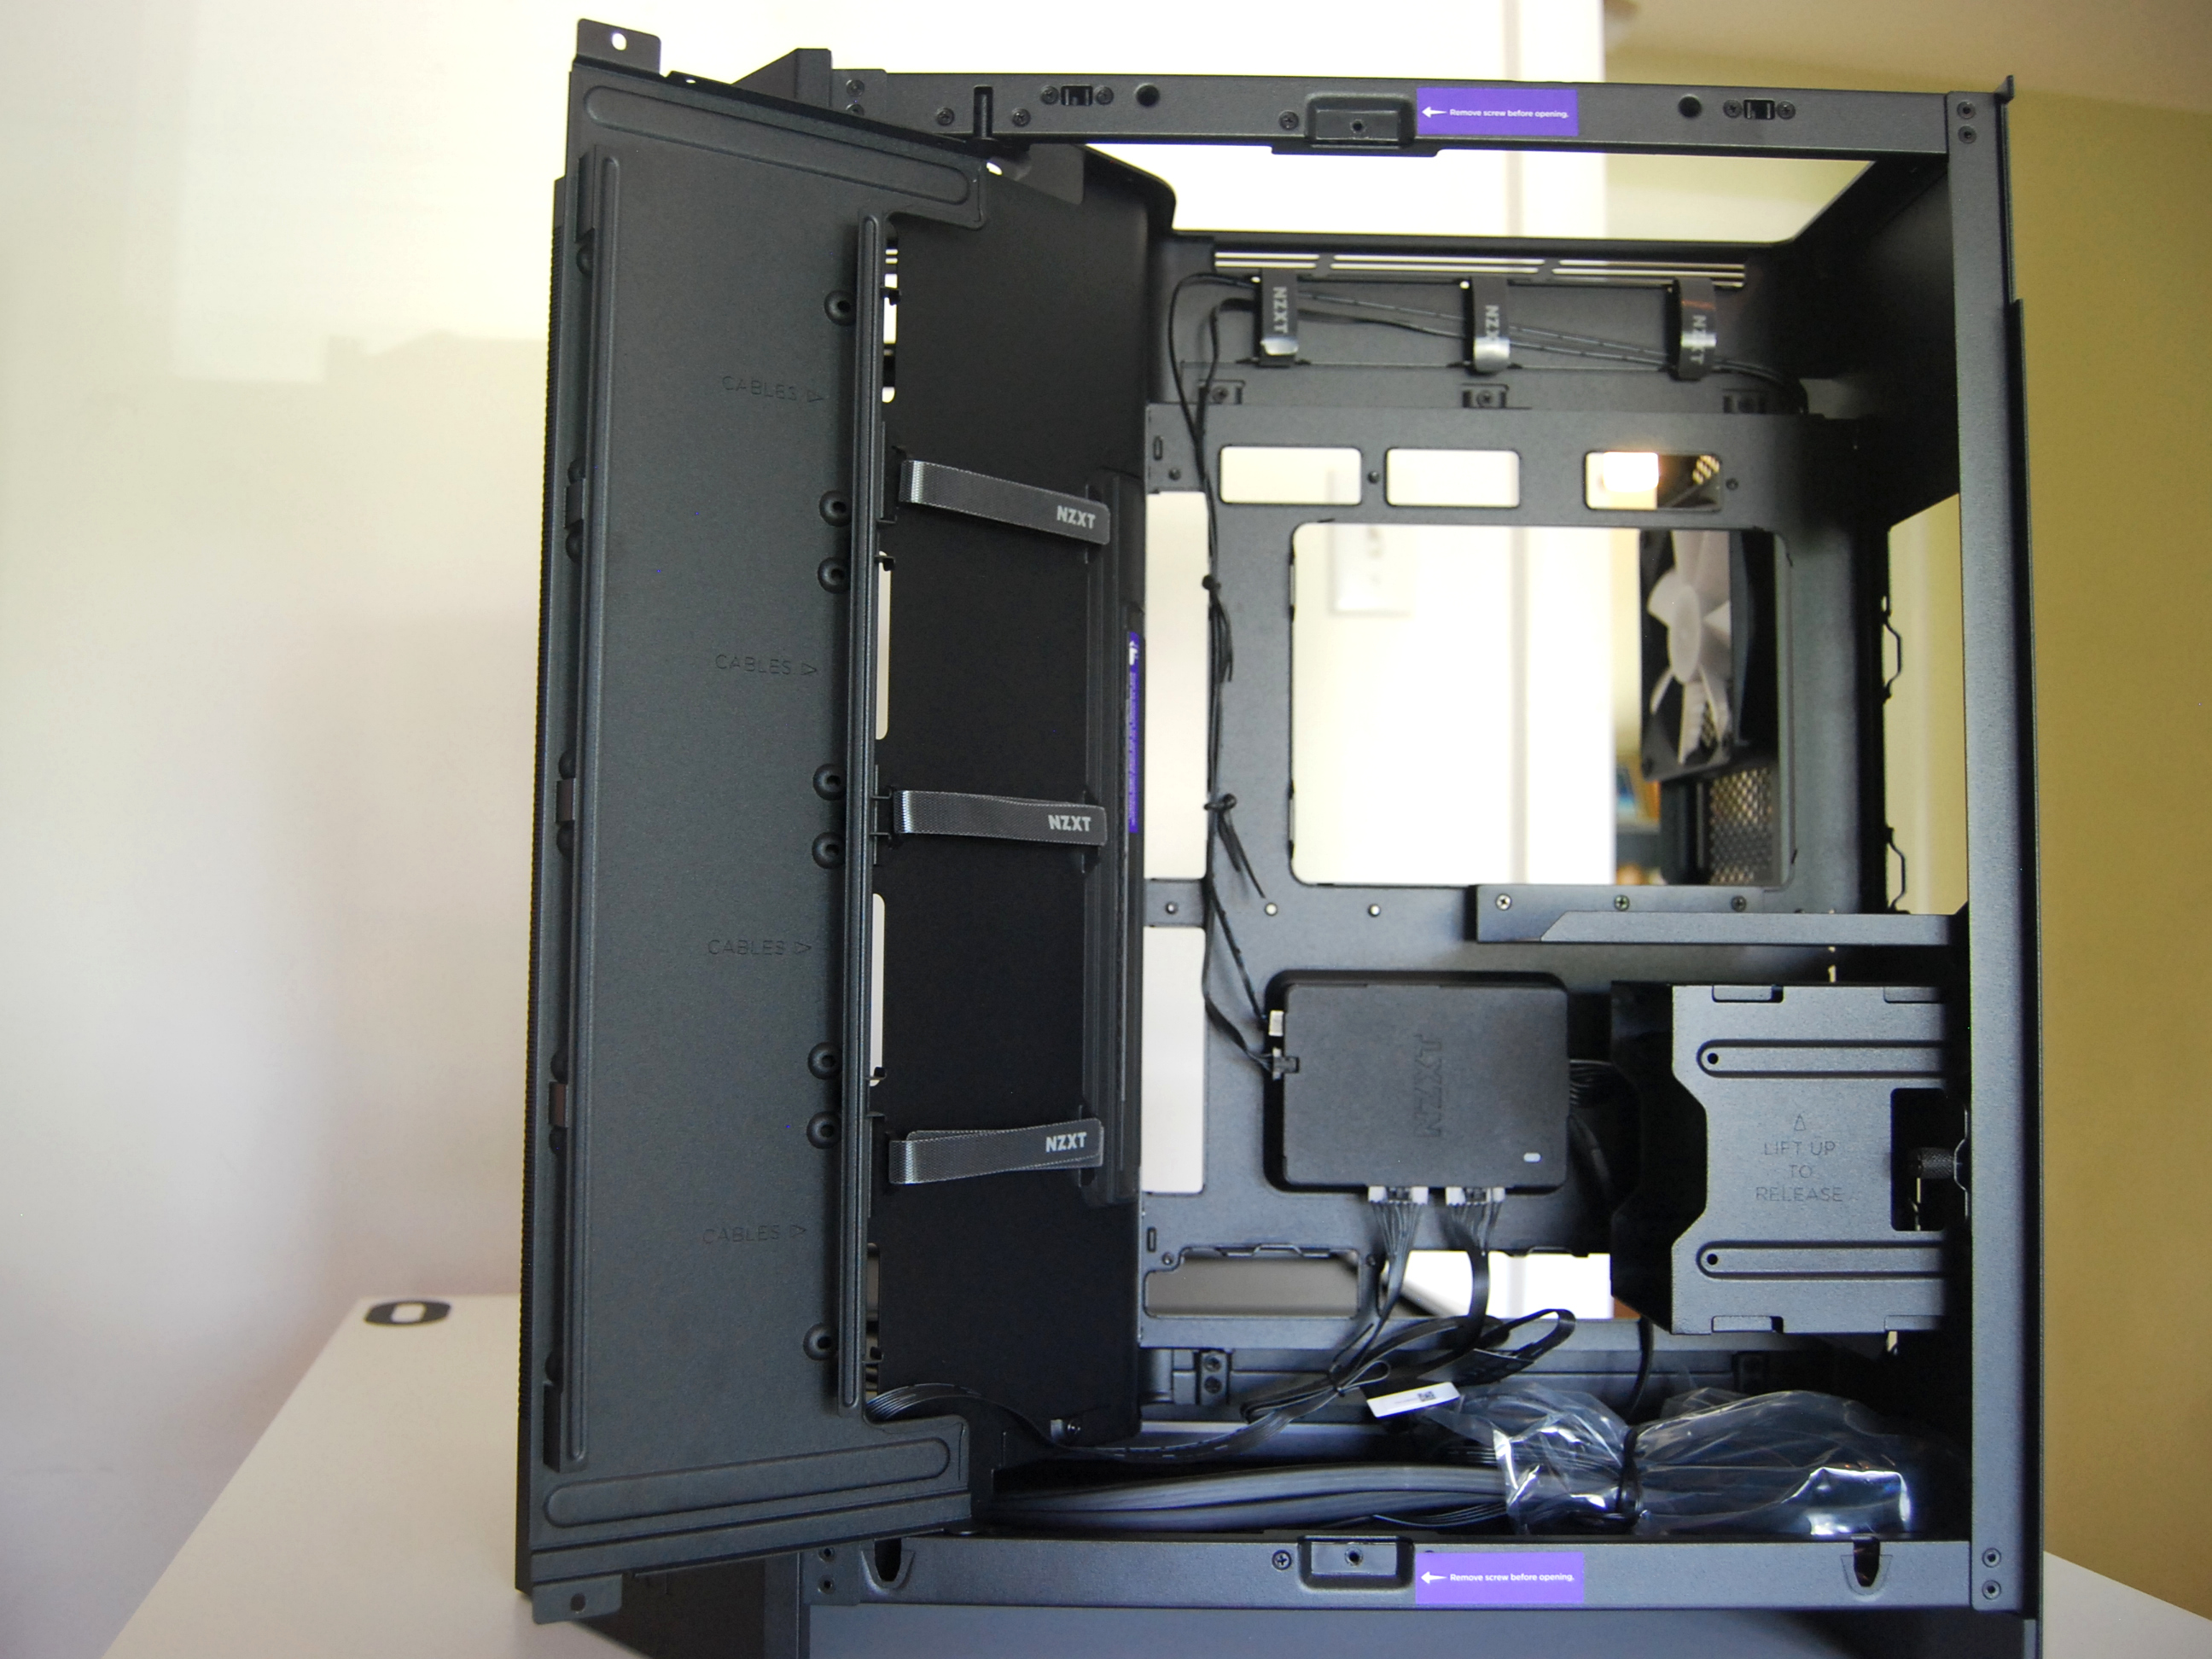
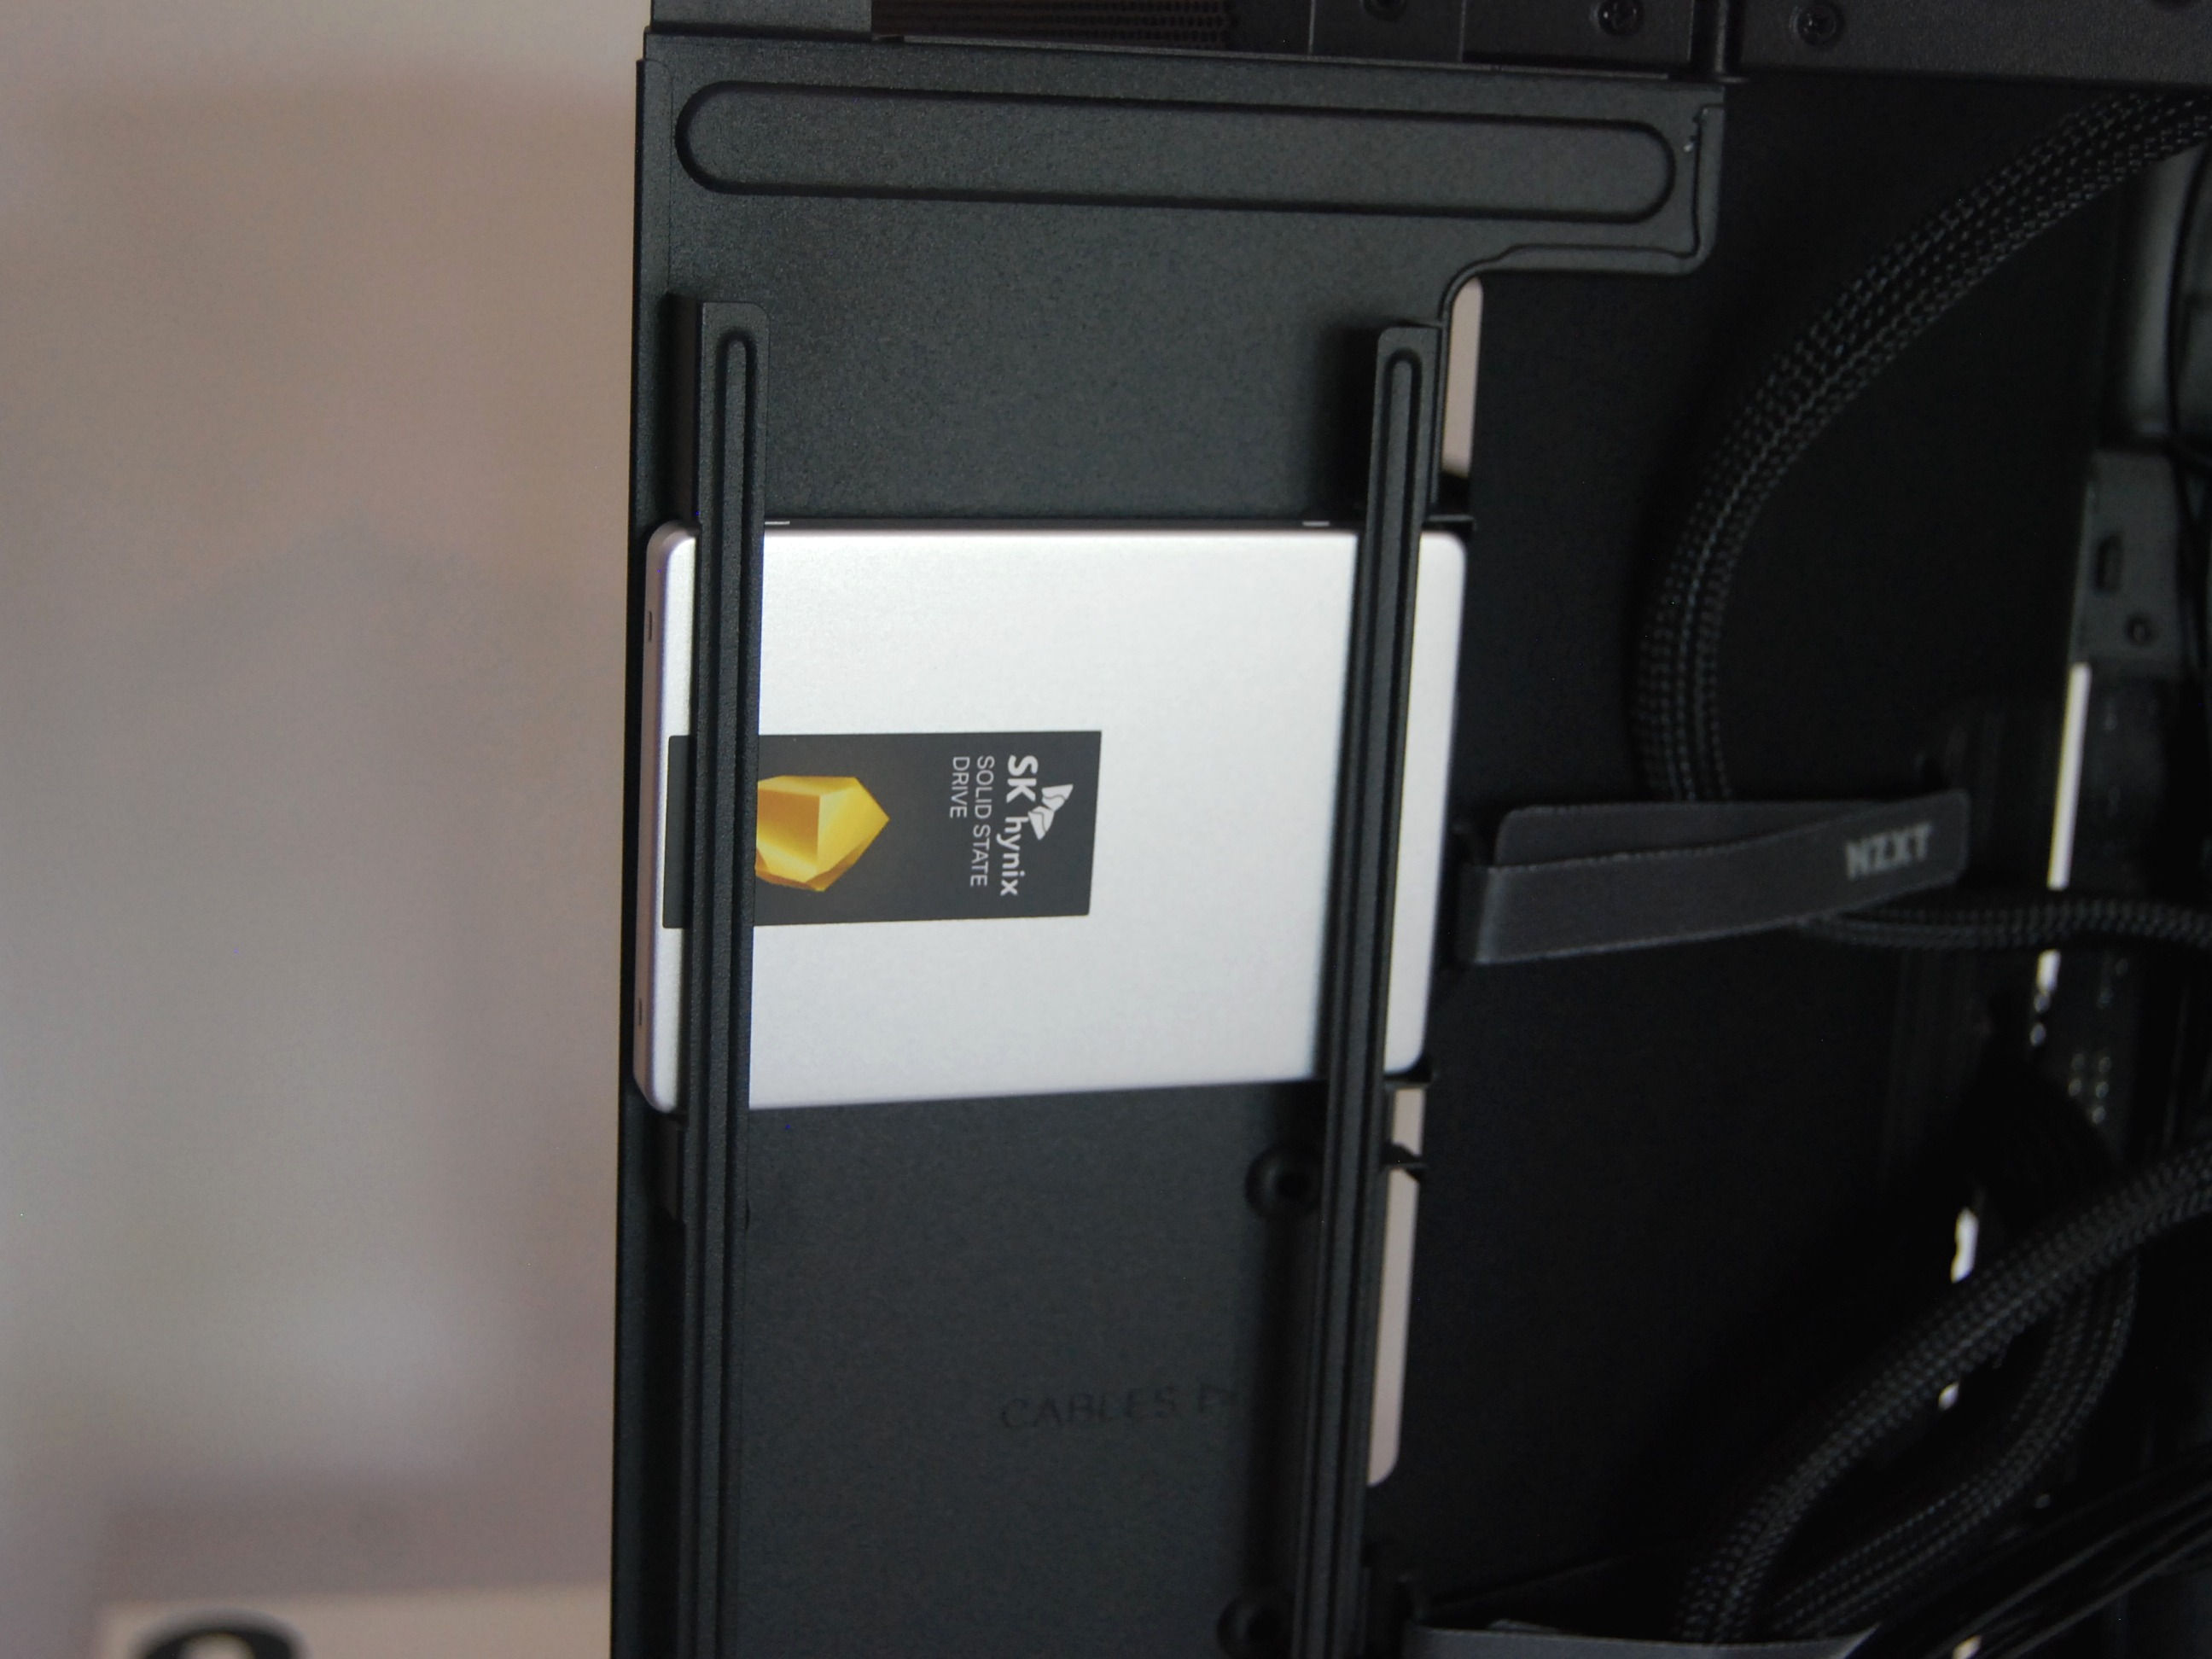
There is a hinged panel held in place with screws along the far side, and it has pre-drilled holes for attaching 2.5-inch SSDs. It swings out of the way to not impede access while building.
The cabling that comes attached to the case — front panel, fans, etc. — is bundled up neatly at the bottom of the case, ready to be plugged in. The RGB for the included fans is plugged into the Control Hub and ready to go. More on that in the next section.
The transplant from my old PC case to the new NZXT H9 Flow RGB+ was largely painless. The H9 comes with offsets already in place for an ATX board, but included in the companion hardware is everything you need for other types of boards.
You could put a smaller motherboard into this case, but I think it looks great with a larger ATX board. The case is also set up for rear-mounted motherboards, though I can’t comment on how easy the reverse setup is to install.
Much to my delight, the dreaded F_PANEL hookups come as a single connector rather than a bunch of smaller plugs.
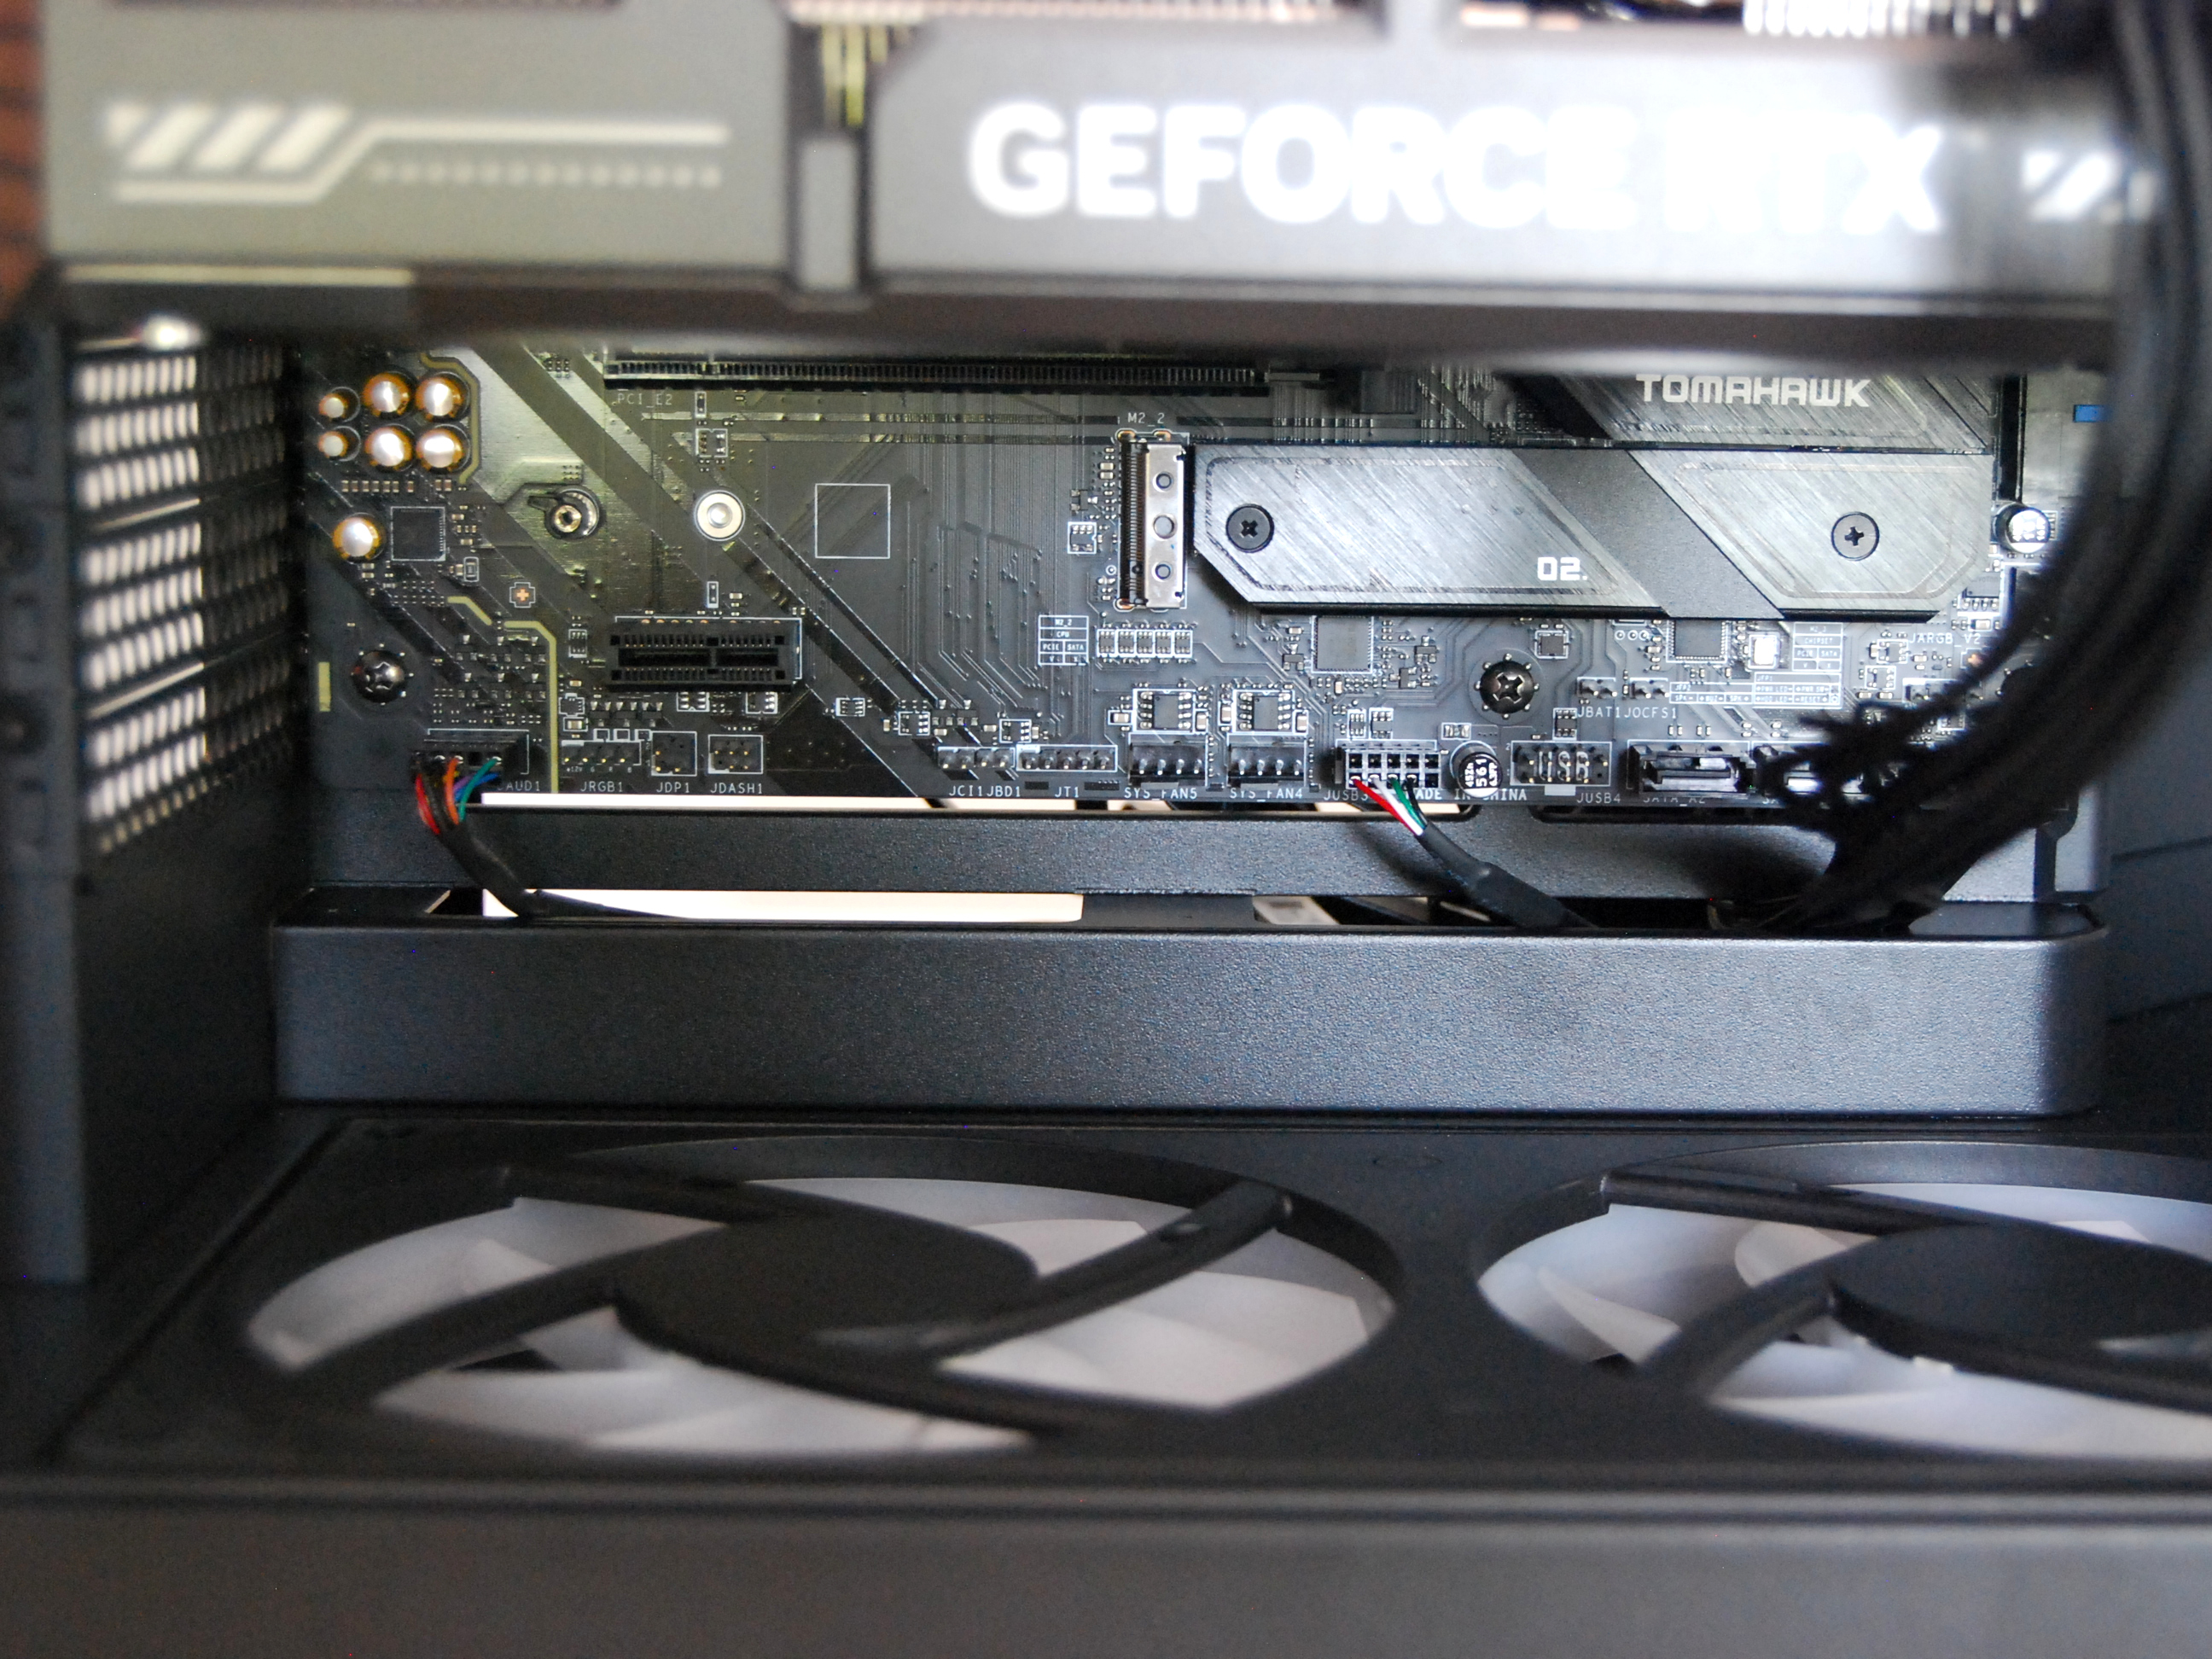
Just to the right side of the motherboard riser is a tall, narrow slot made for cable passthrough. The slot comes covered, perfect if you’re using a smaller motherboard.
For my ATX board, however, it’s best removed. NZXT includes a smaller piece that can be reinserted around the cables for a cleaner look. It’s a nice addition that shows attention to detail.
With the motherboard fastened in and the cables passed through to the front, I began plugging in. Much to my delight, the dreaded F_PANEL hookups come as a single connector rather than a bunch of smaller plugs. Nice.
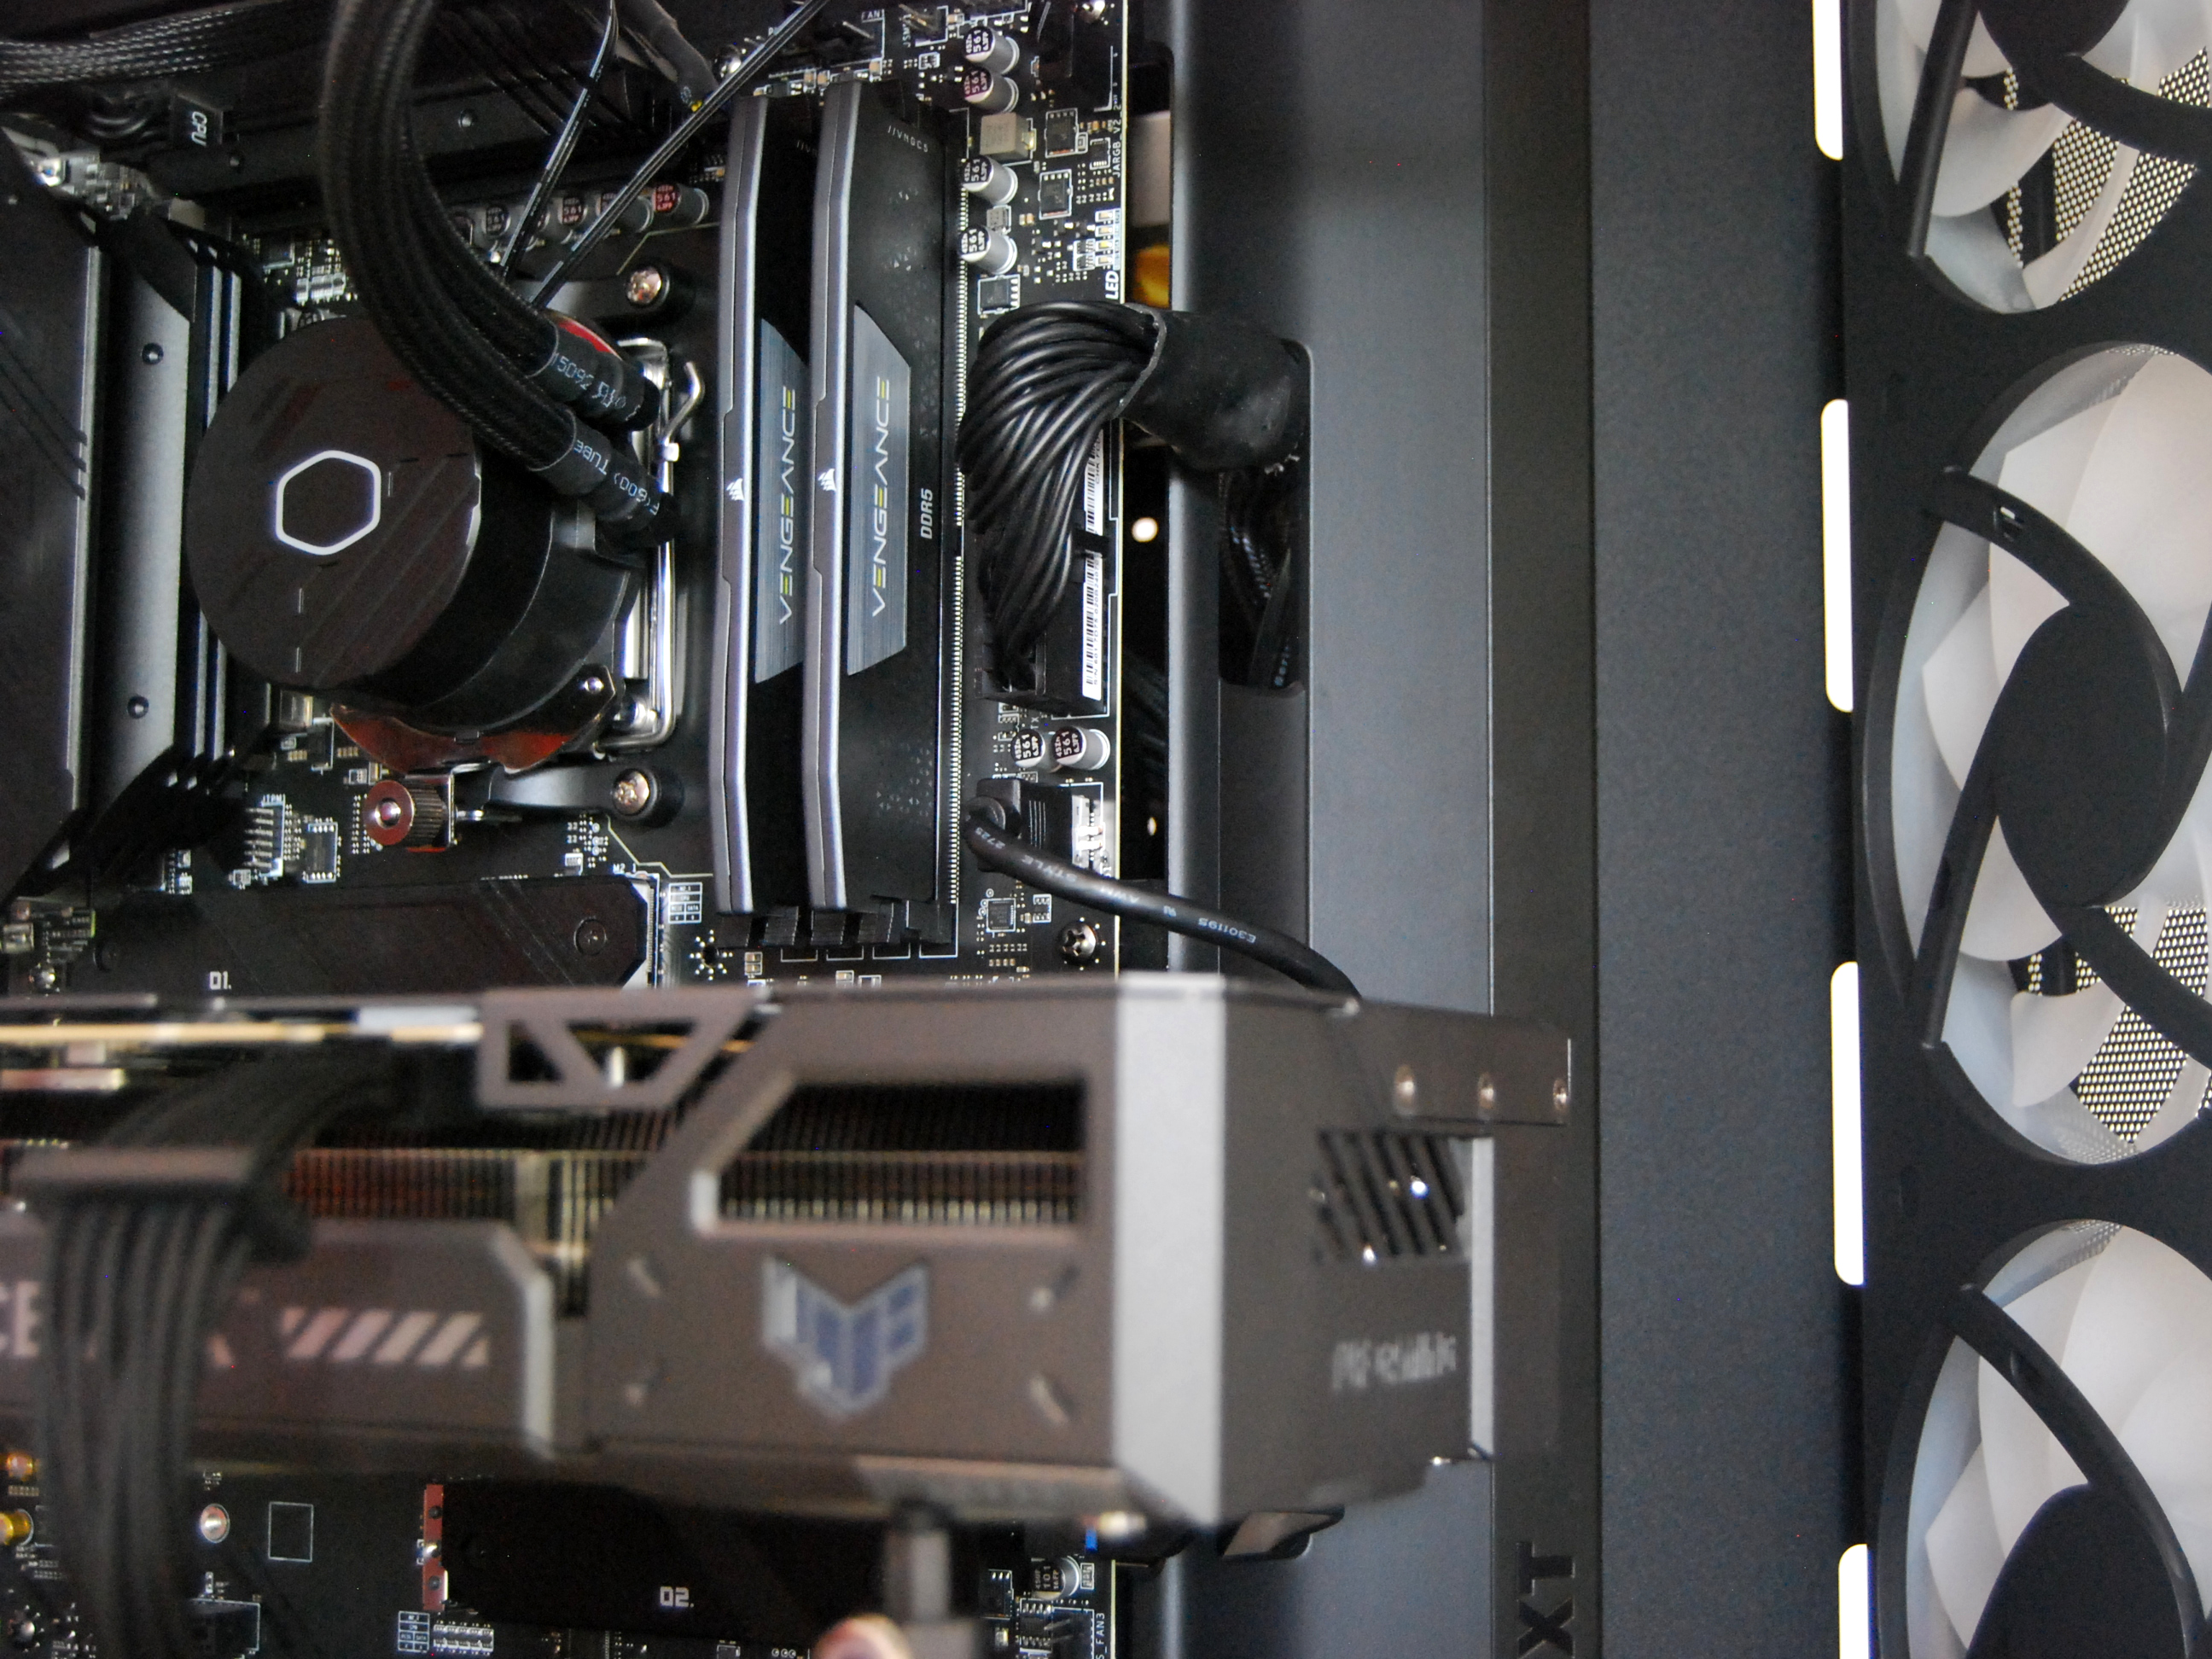
Because the motherboard sits on a raised section, there’s plenty of space for cutouts along the top and bottom for easy cabling.
The usual USB, power, and SATA connections only have to pop their heads out to be plugged in, leaving the rest of the cable hidden.
There’s a ton of space behind the motherboard to work, the included HDD bay is easily removed with a thumb screw (further opening up the space), and it’s almost impossible to clog the area with cables as long as you’re OK with a few minutes of cable management along the included channels with Velcro straps.
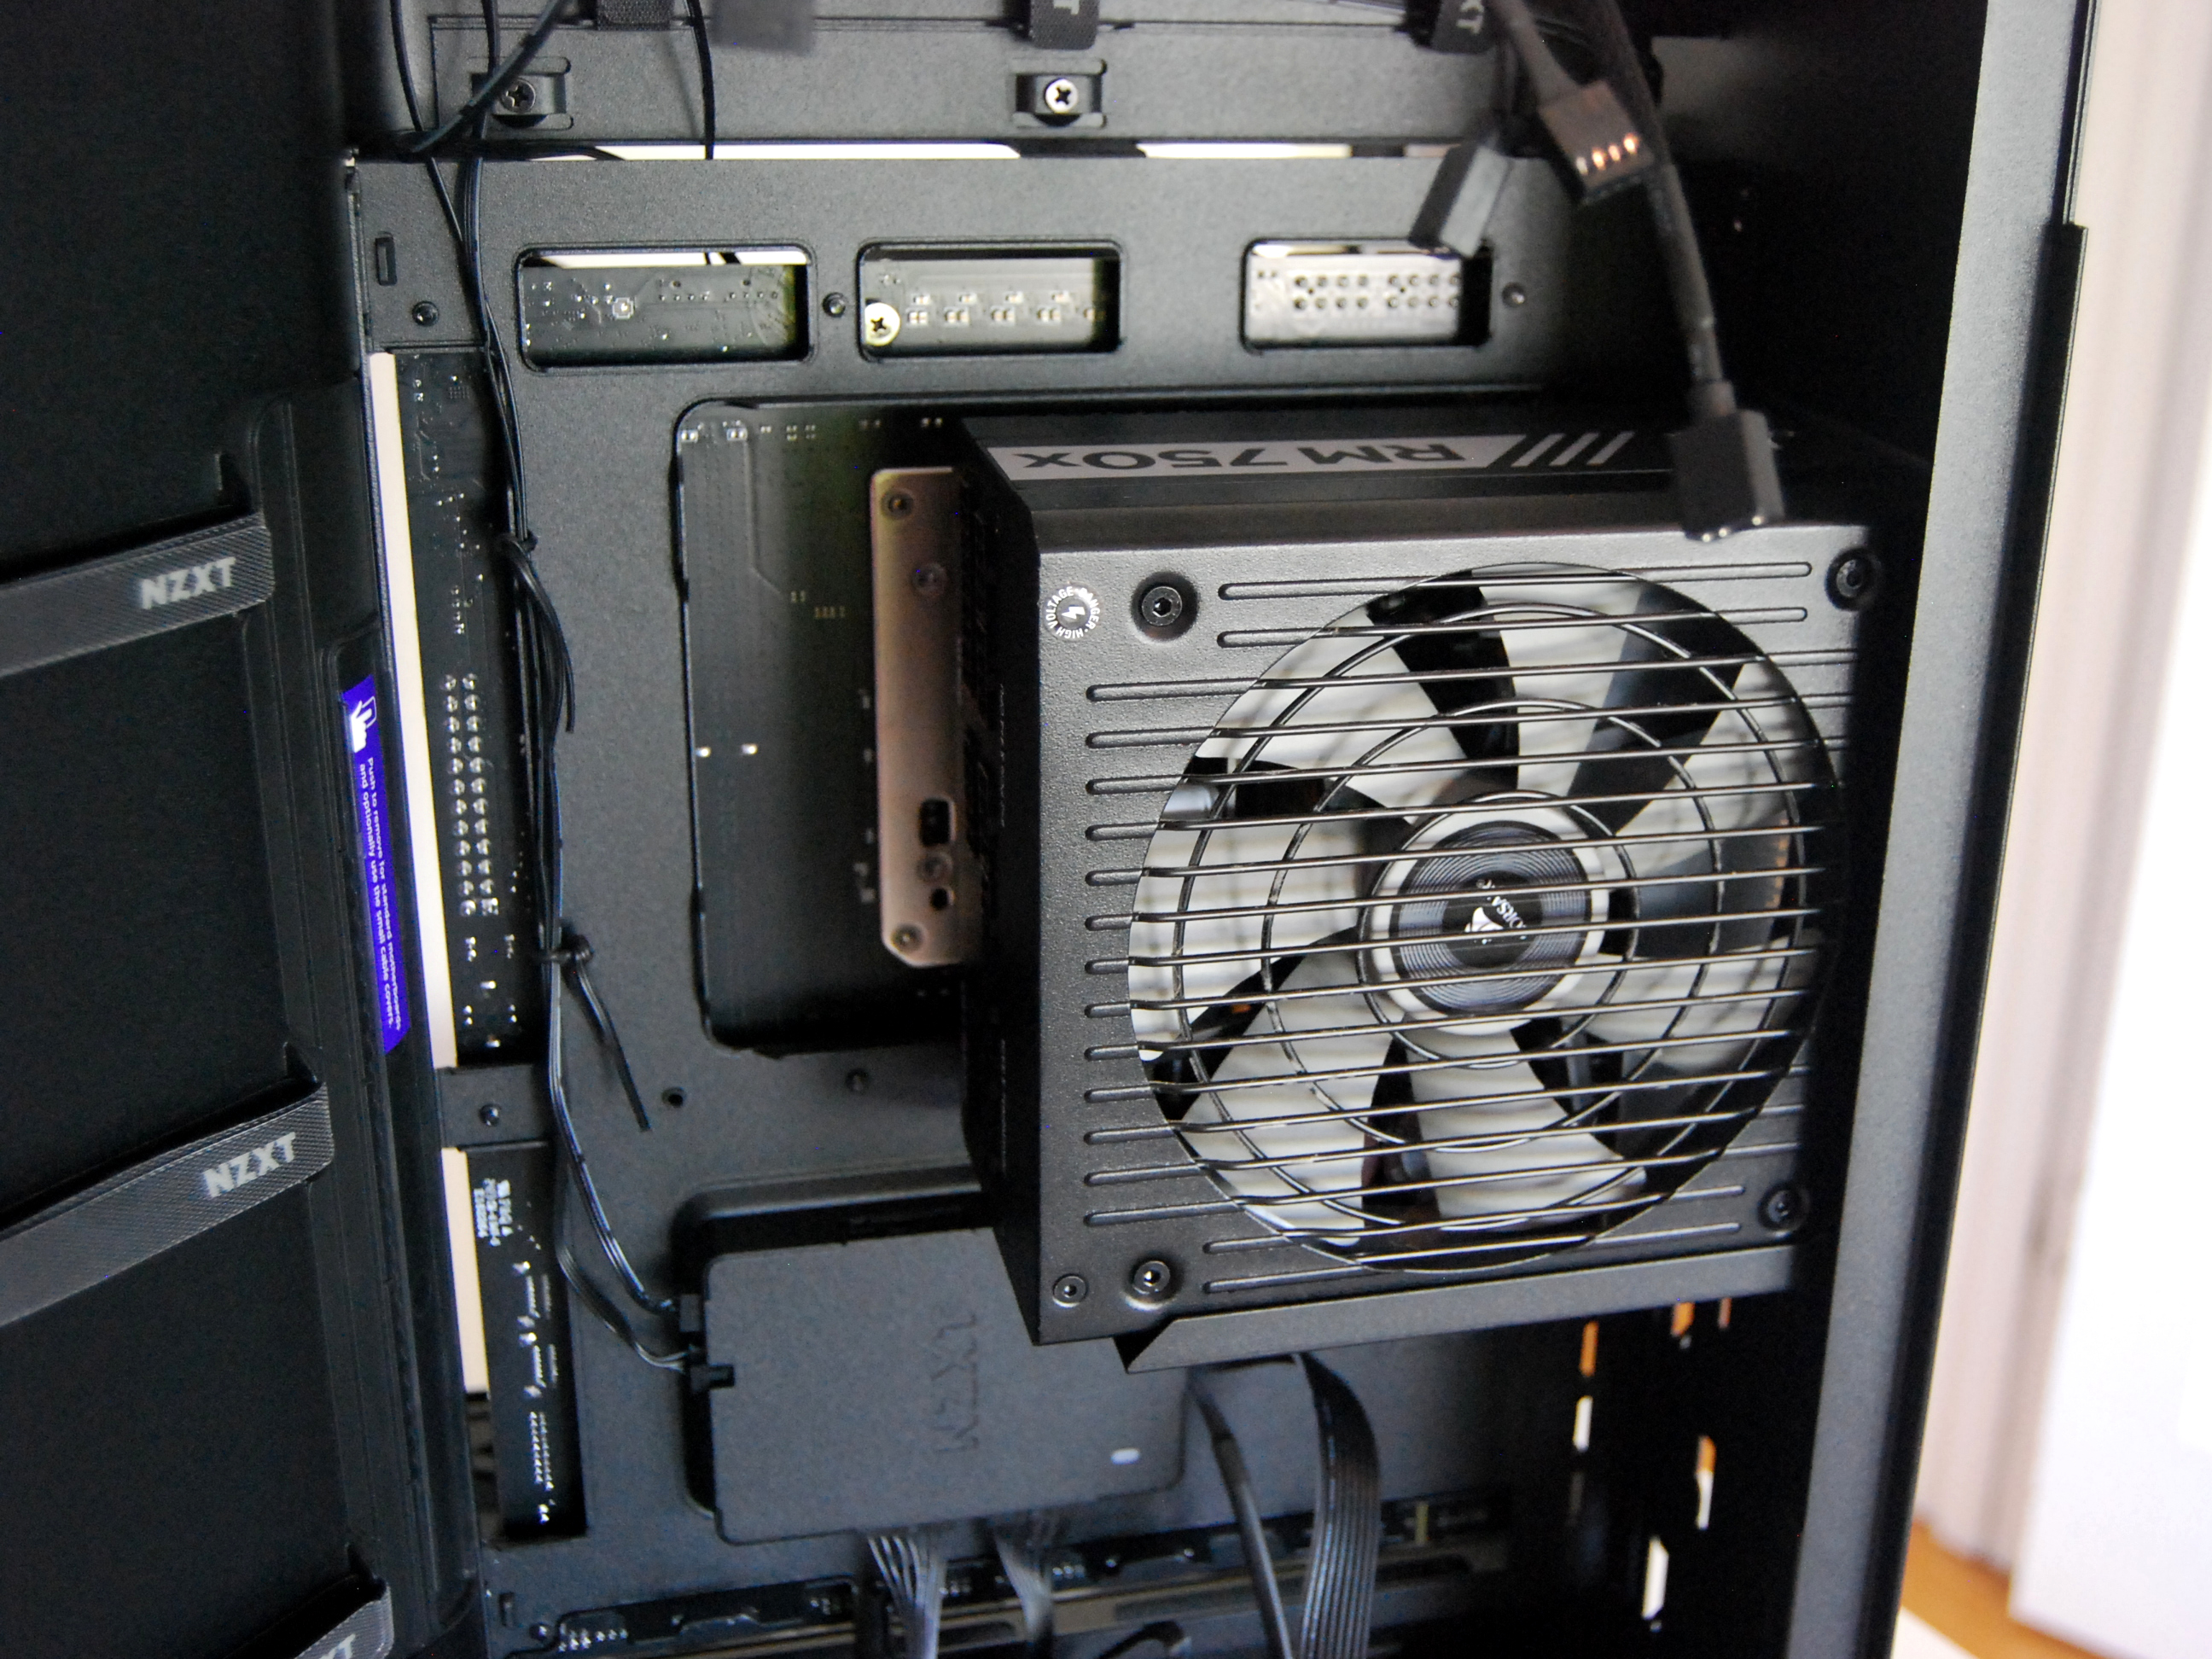
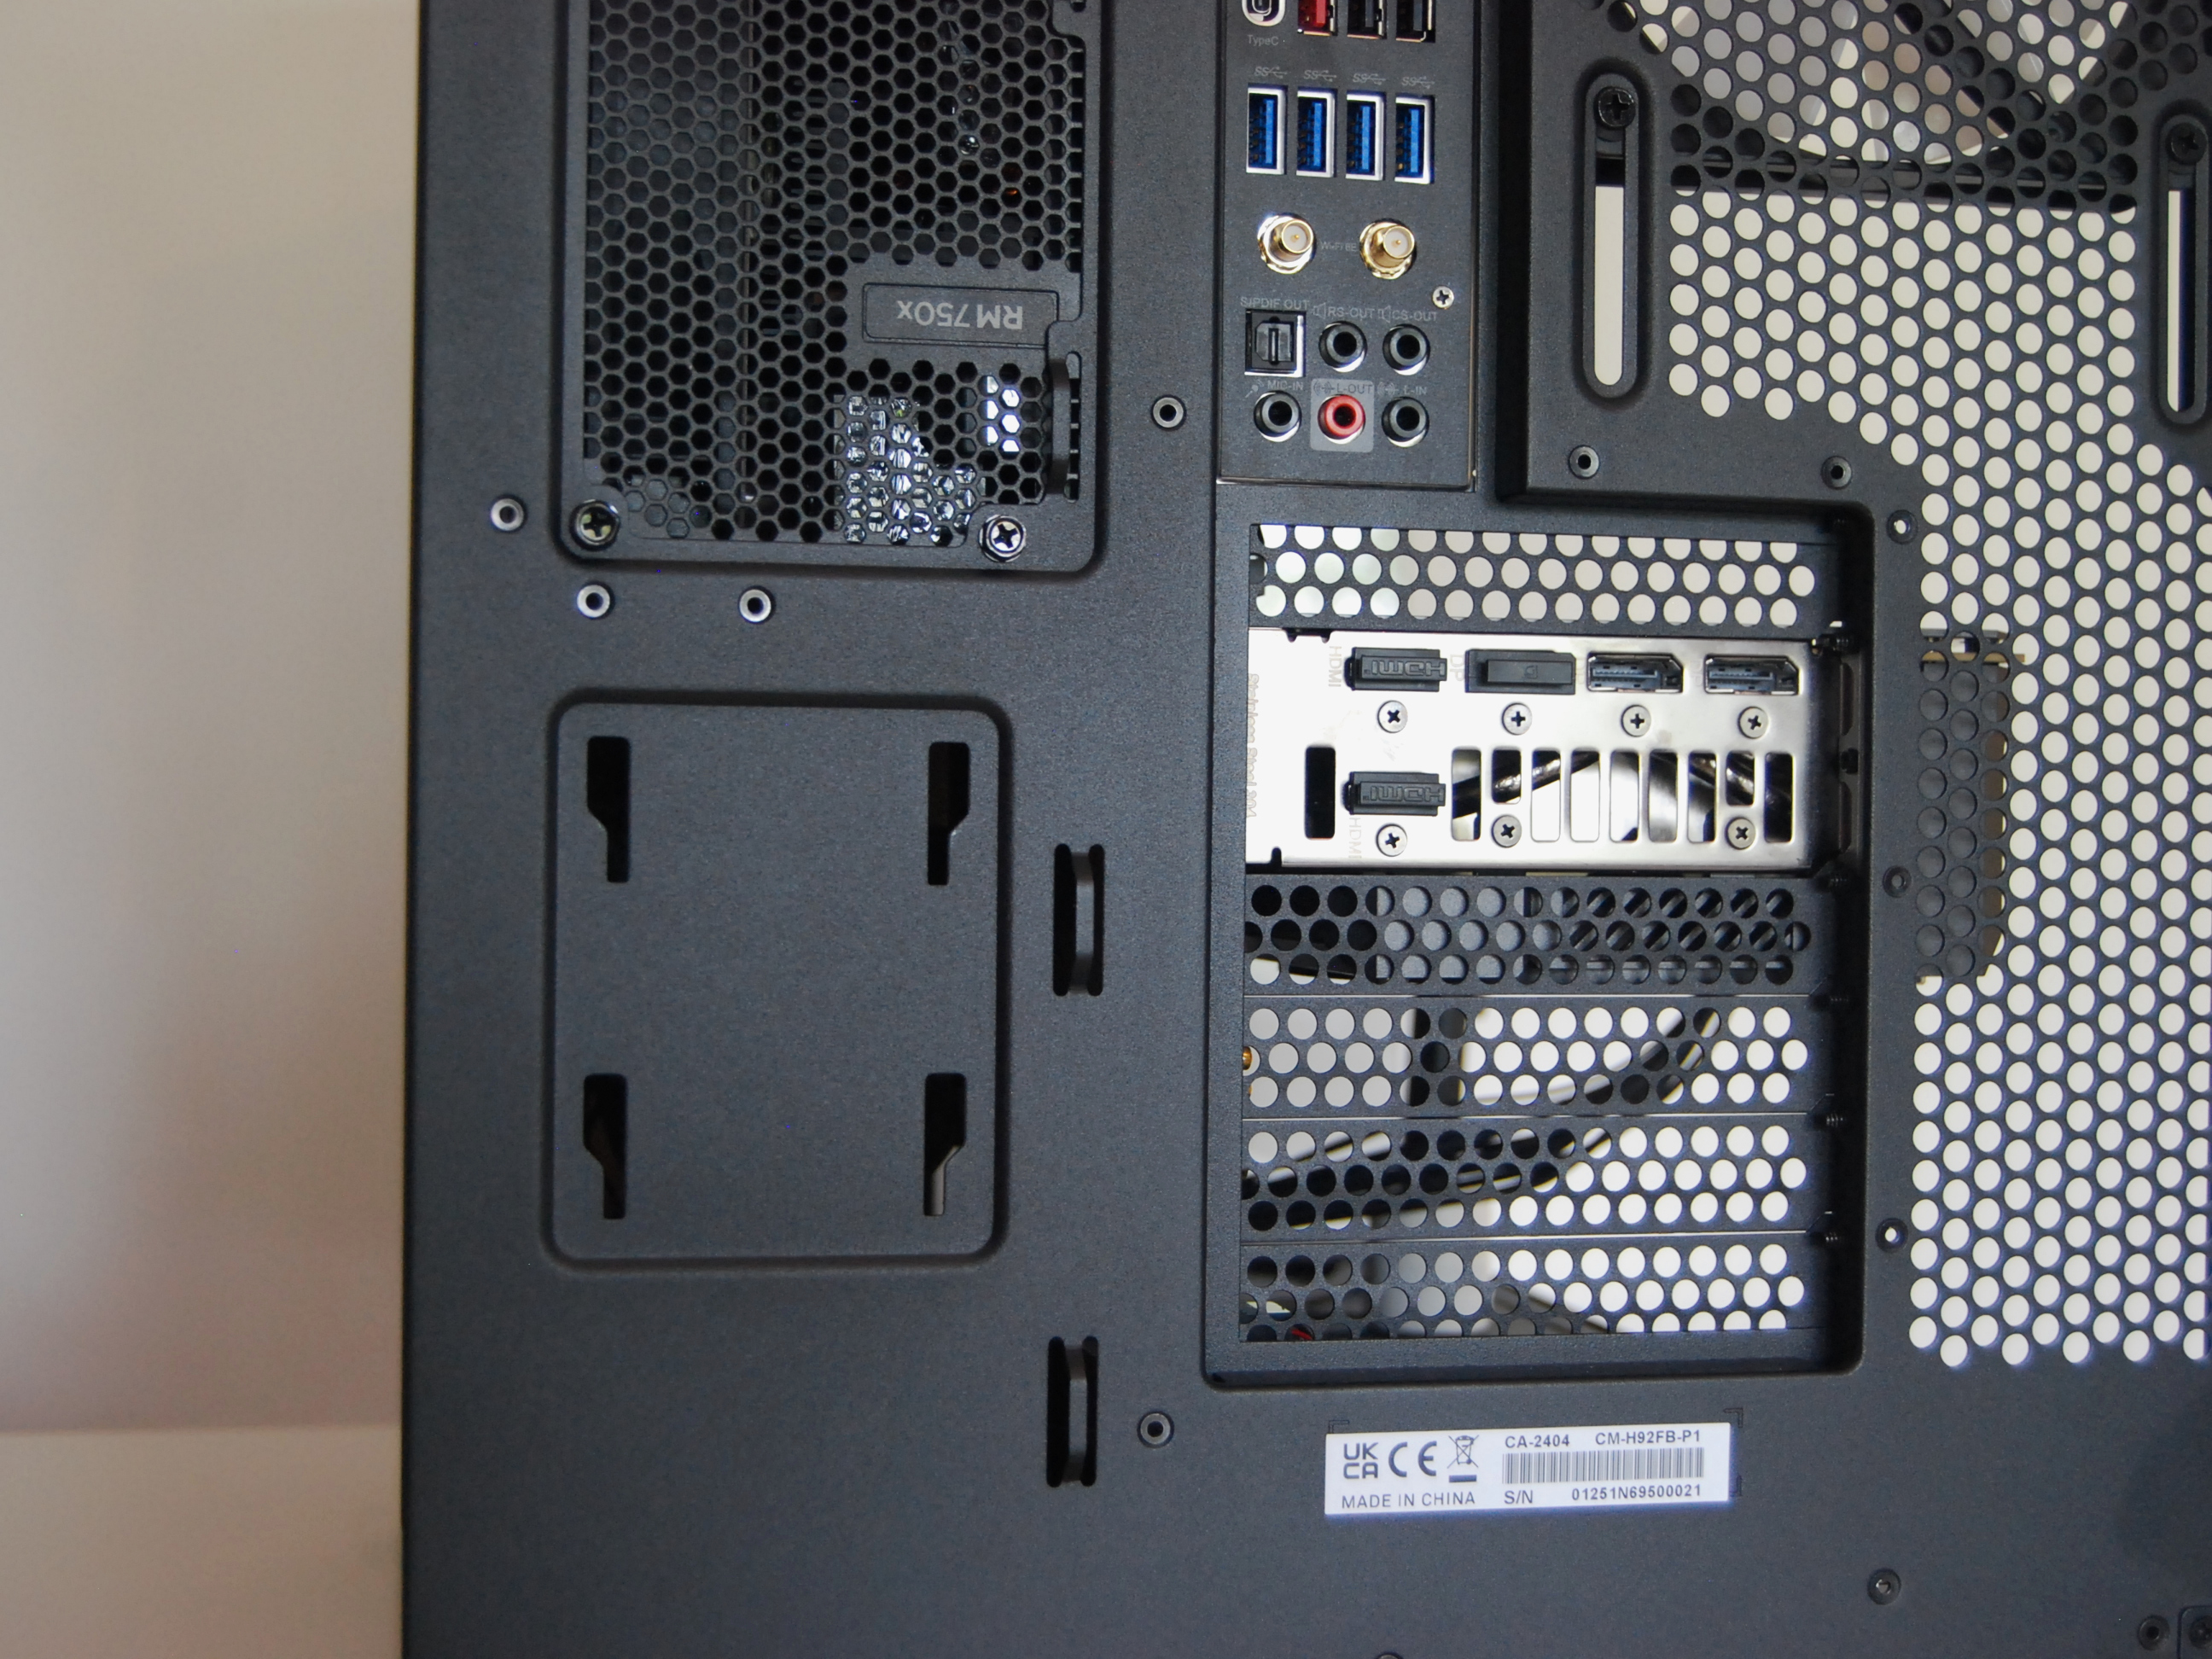
I absolutely love the vertical PSU mount that sits about halfway up the case. No longer do you have to scrounge around the bottom of the case in cramped quarters, hoping to hit the right input. I’ve never had an easier experience getting everything plugged in after the PSU was installed.
I’ve never had an easier experience getting everything plugged in after the PSU was installed.
This design, with the PSU behind the motherboard rather than below, could quickly become cramped. But NZXT has largely done a great job with the layout, avoiding overlaps.
The NZXT Control Hub for the fans and lighting is the piece closest to the PSU, and even with the block installed, you can access all headers in the hub.
Although the H9 Flow RGB+ is advertised for PC enthusiasts who presumably have a lot of building experience, there’s no reason why a newcomer can’t enjoy the spacious layout and smart cutouts inside the case.
If anything, building in a case this size will be easier than the cramped internals of a budget offering.
I didn’t sit and plan the build; I plunked everything inside and hoped for the best. Despite a lack of planning, I didn’t have to take any reverse steps to get something to fit properly.
In terms of how well the case is laid out for builders, I have to give NZXT full marks. I’ve used a fair share of cases in my time, but I’ve never used one with so much clearance that was so easy to work with.
With the PC fully built inside the H9 Flow RGB+, I could turn my attention to its other features.
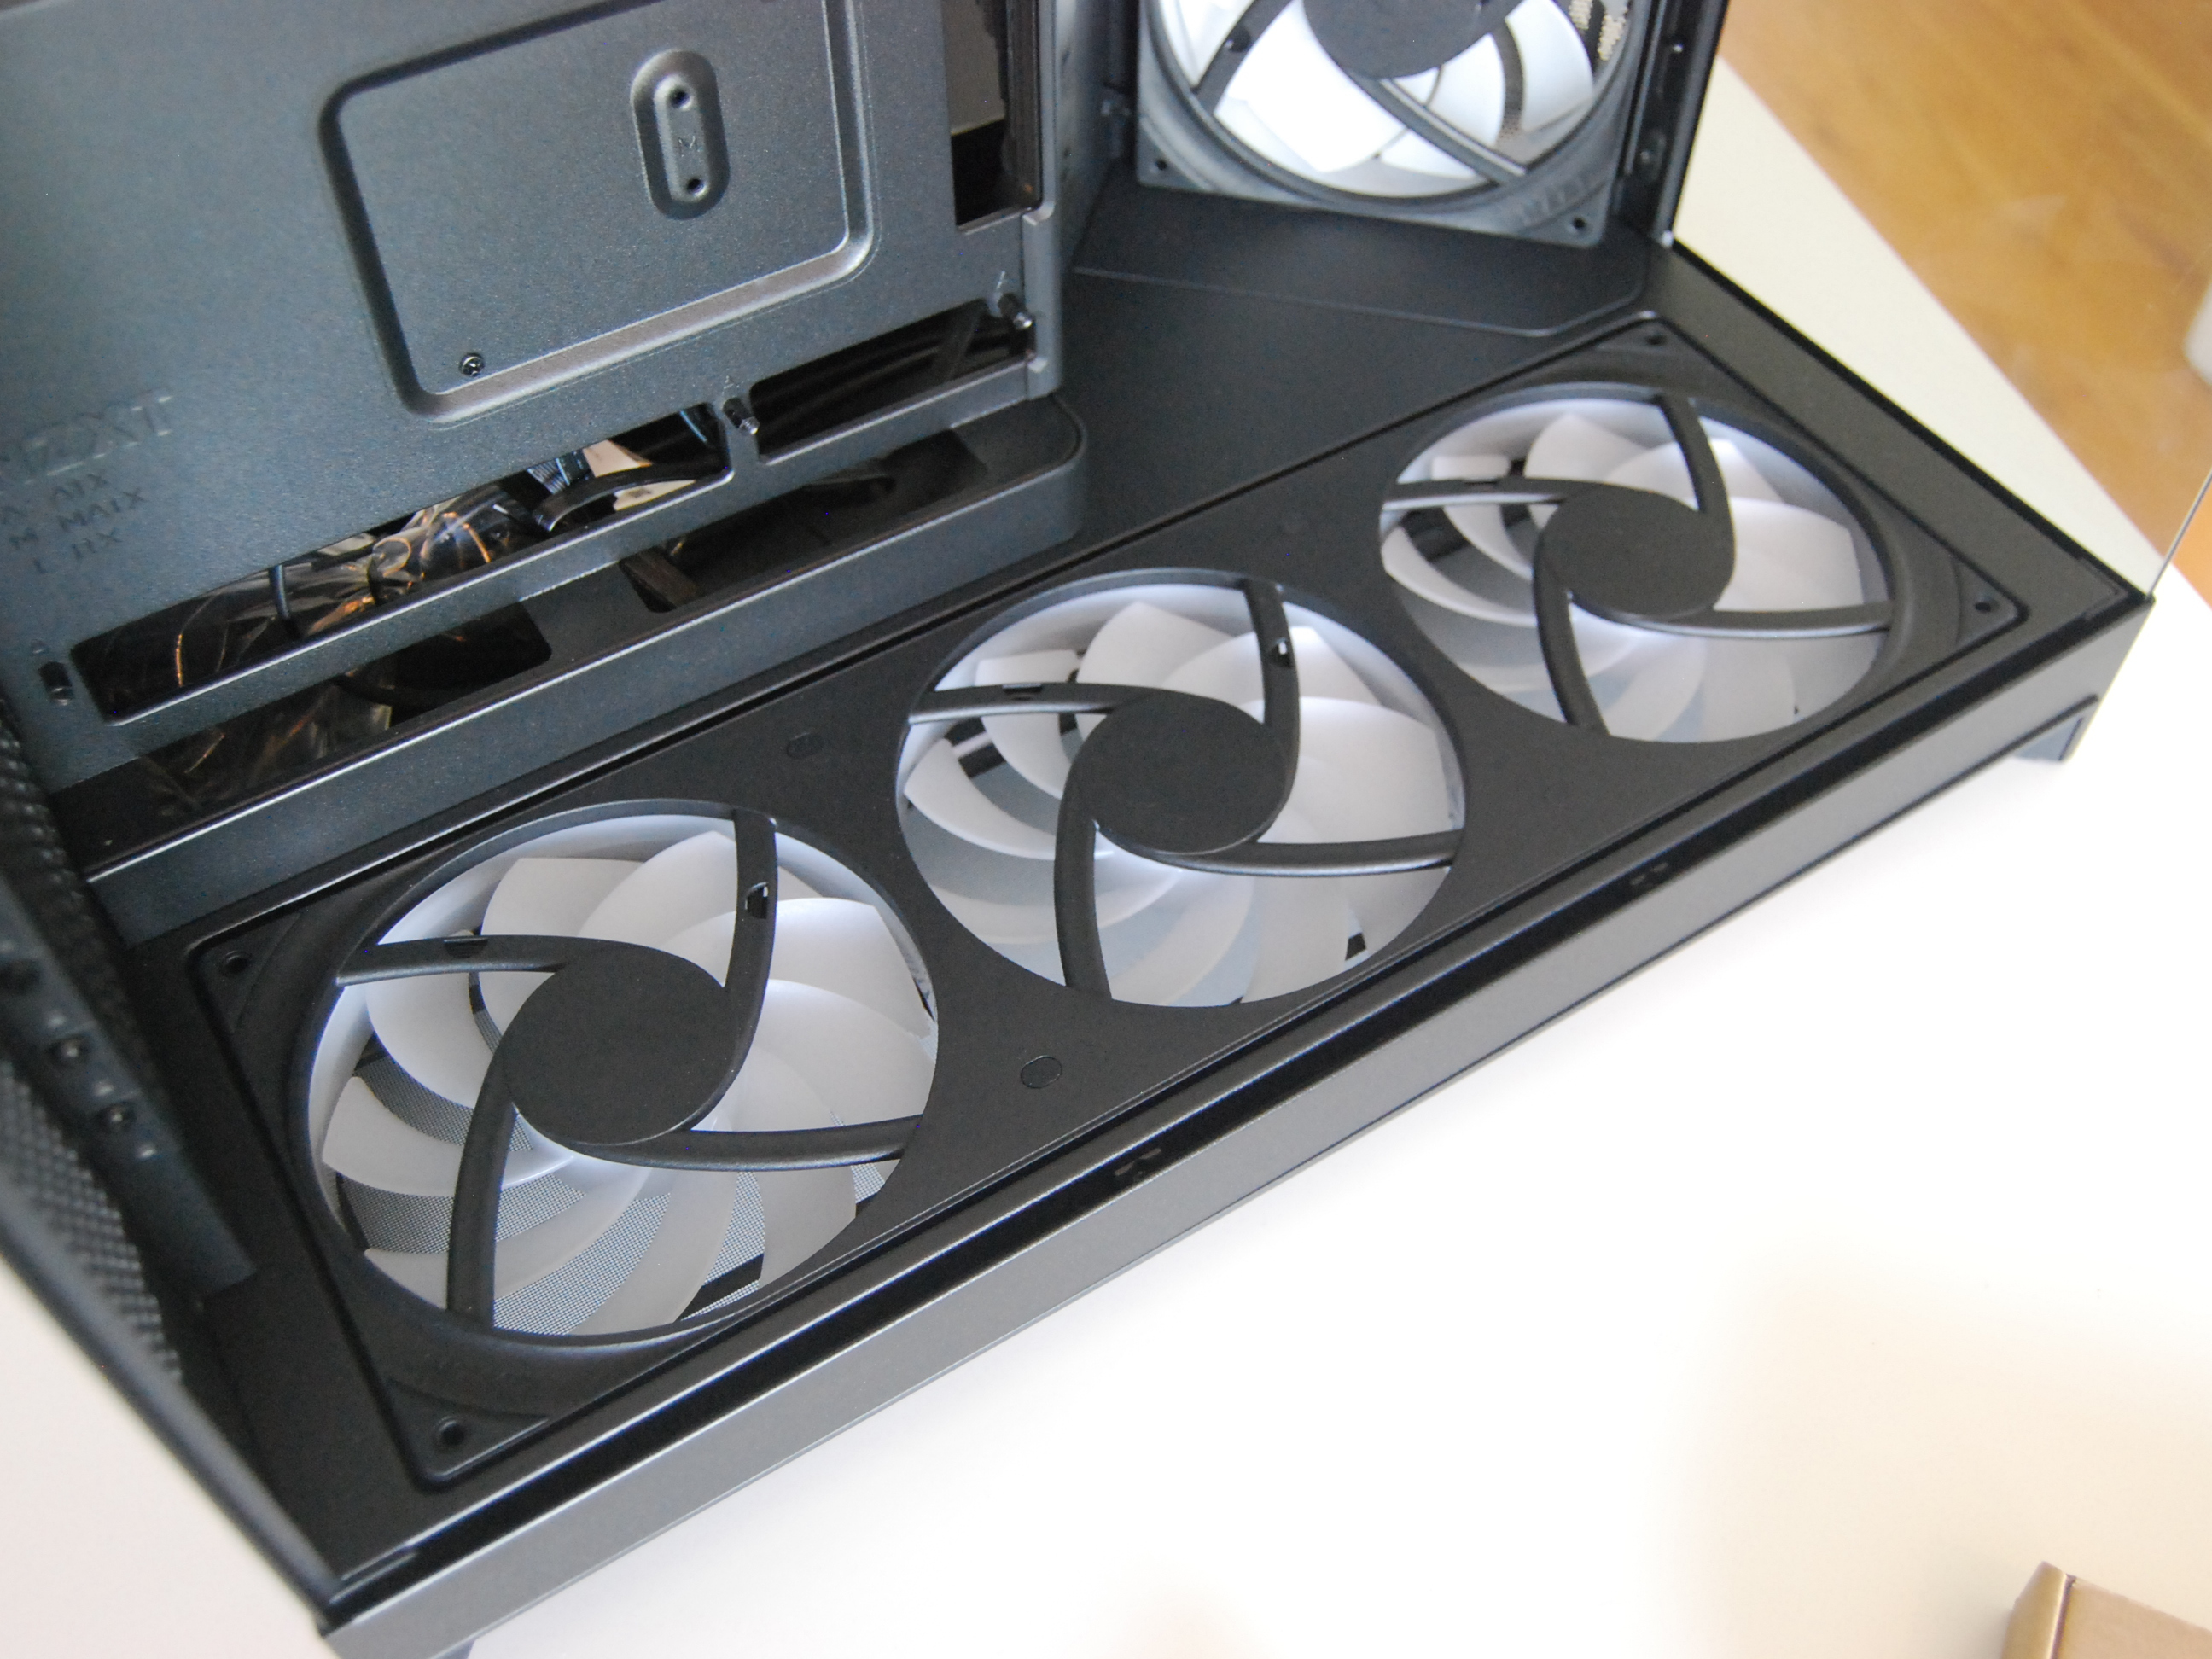
The H9 Flow RGB+ is the new high-end option, sporting a row of three fans (F420 RGB Core) along the bottom of the case, the same F420 Core three-fan setup in an upright, angled orientation near the front, and a single rear-mounted exhaust fan.
These fans work out of the box with NZXT’s CAM control software, providing easy customization for lighting and speeds.
The case has plenty of clearance below the bottom fans, all thanks to the chunky feet that keep it stable and prevent sliding around. Directly below the fans is a pull-out dust filter that can be easily cleaned.
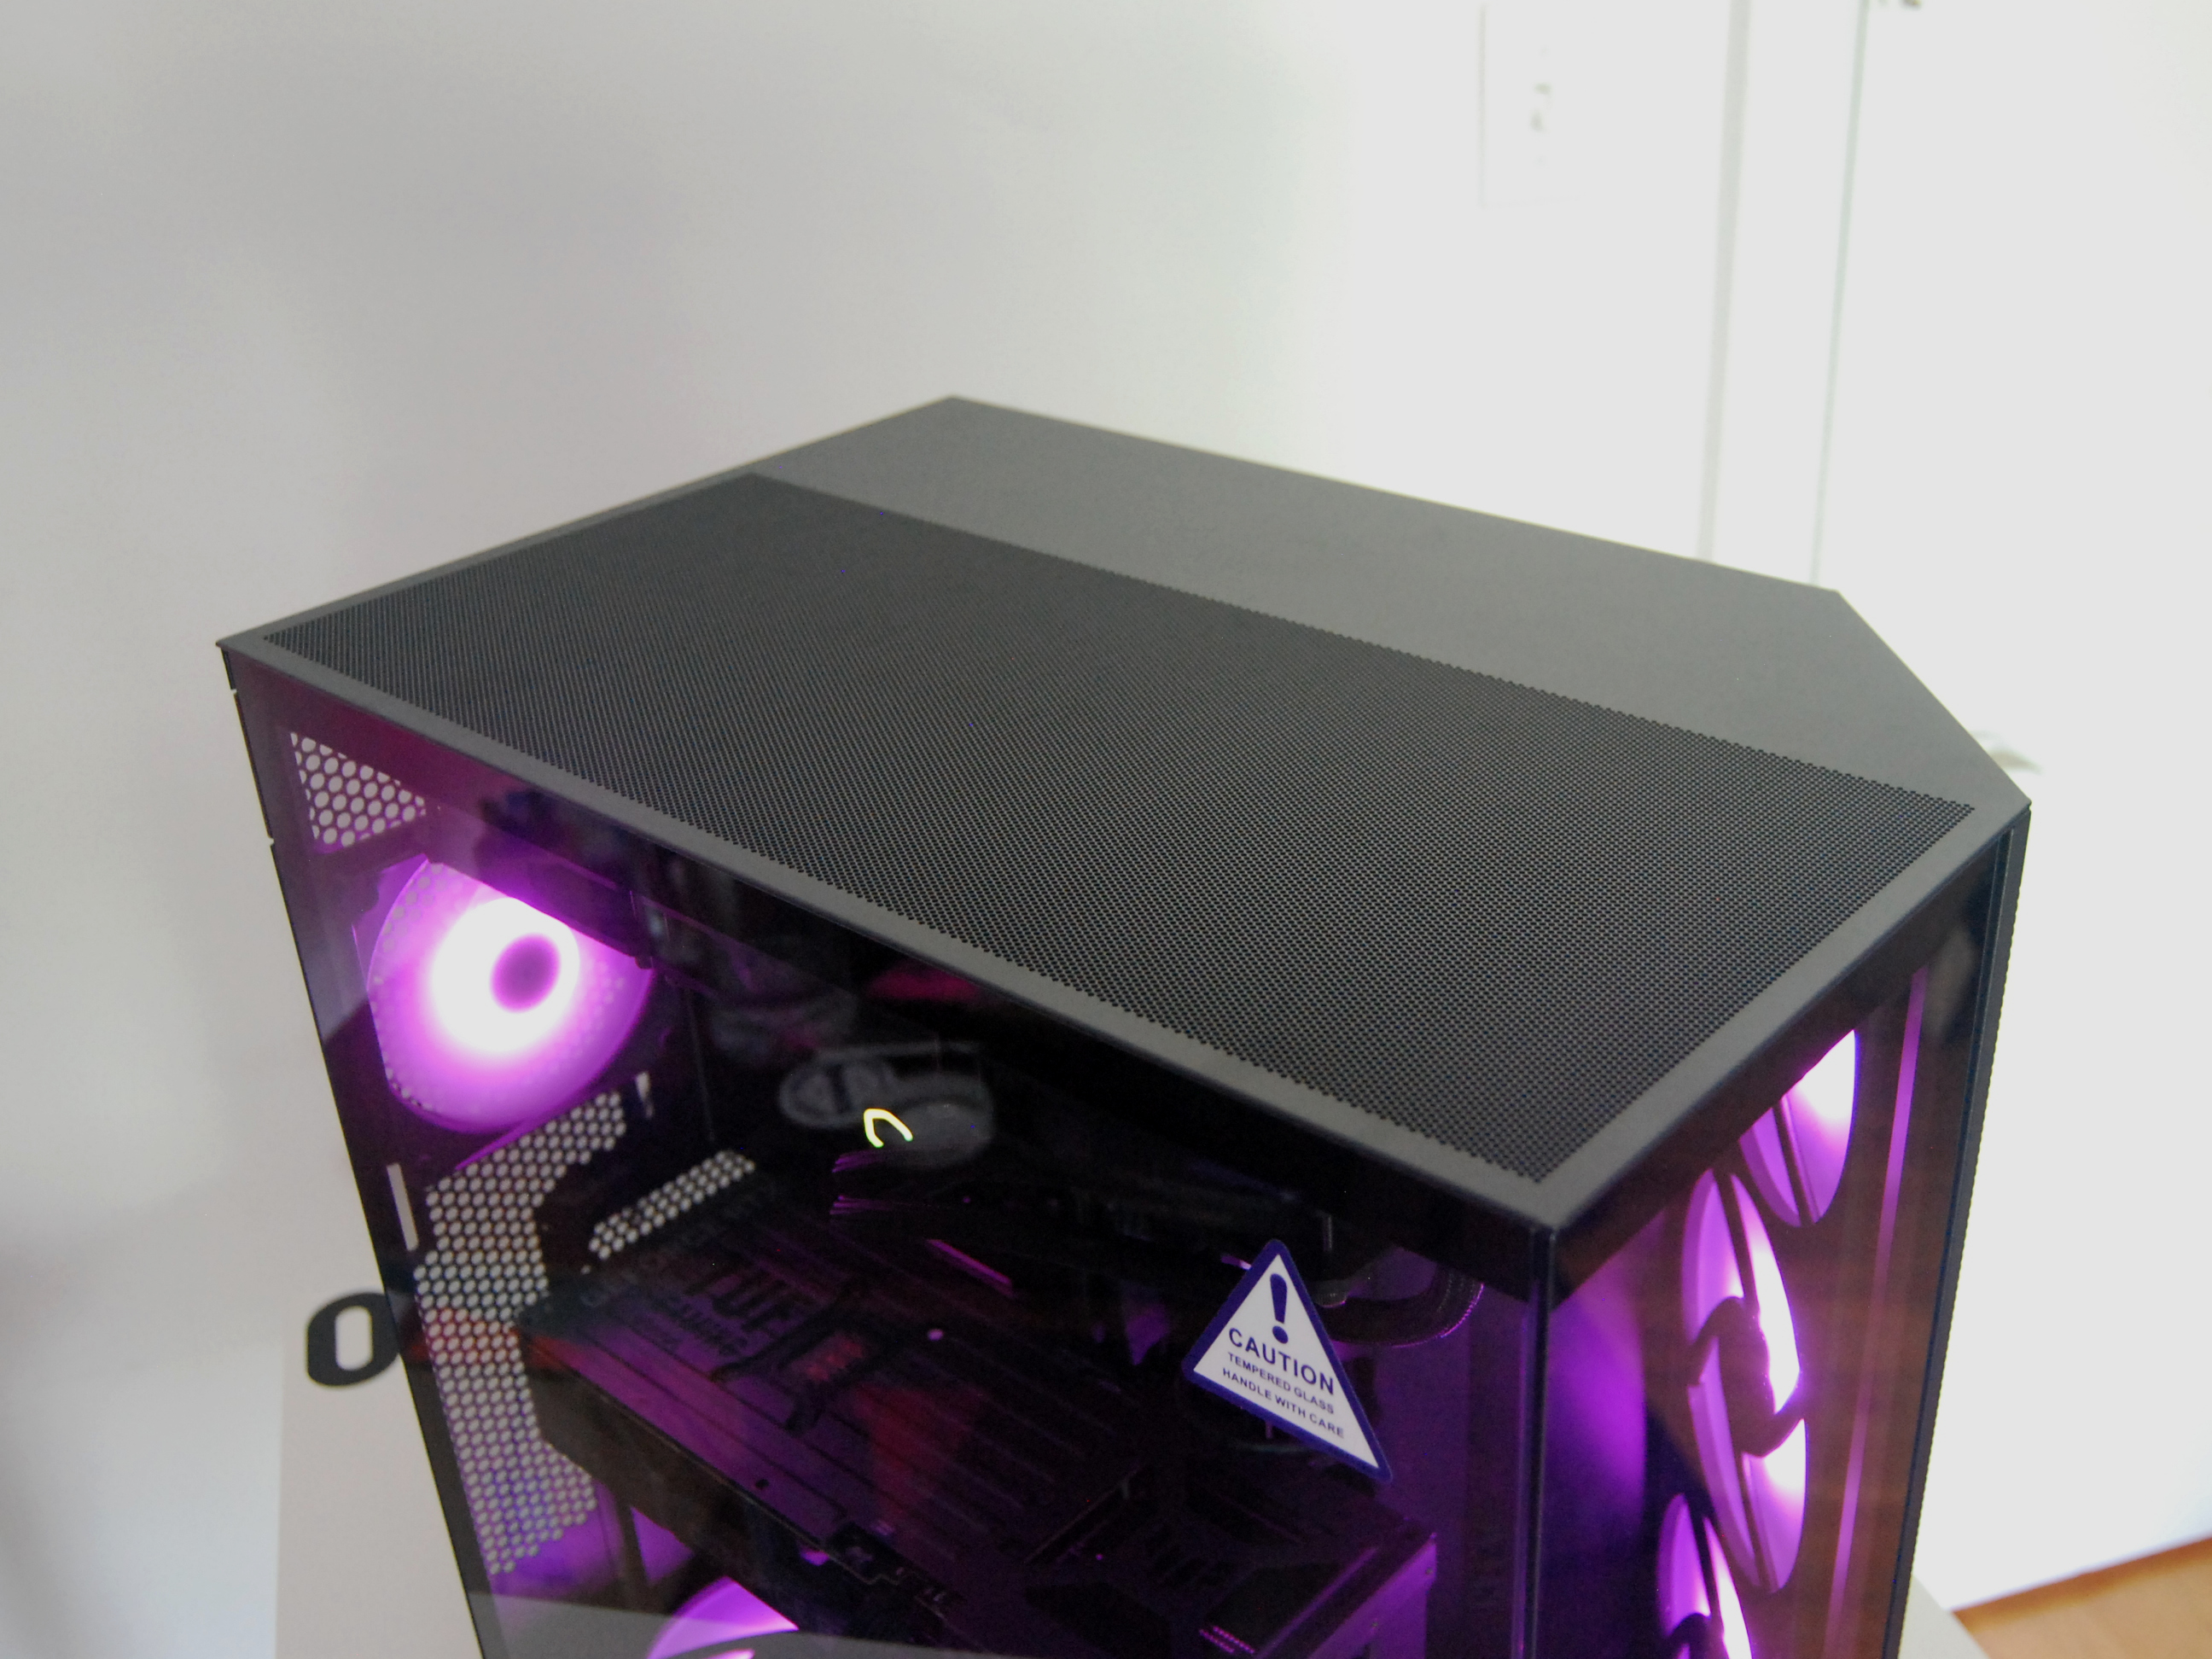
Along the top of the case is where up to a 420mm AiO radiator can be installed, with plenty of space to spare. The same setup in my last case had the AiO dangerously close to the motherboard’s VRM cover, but that’s no longer the situation.
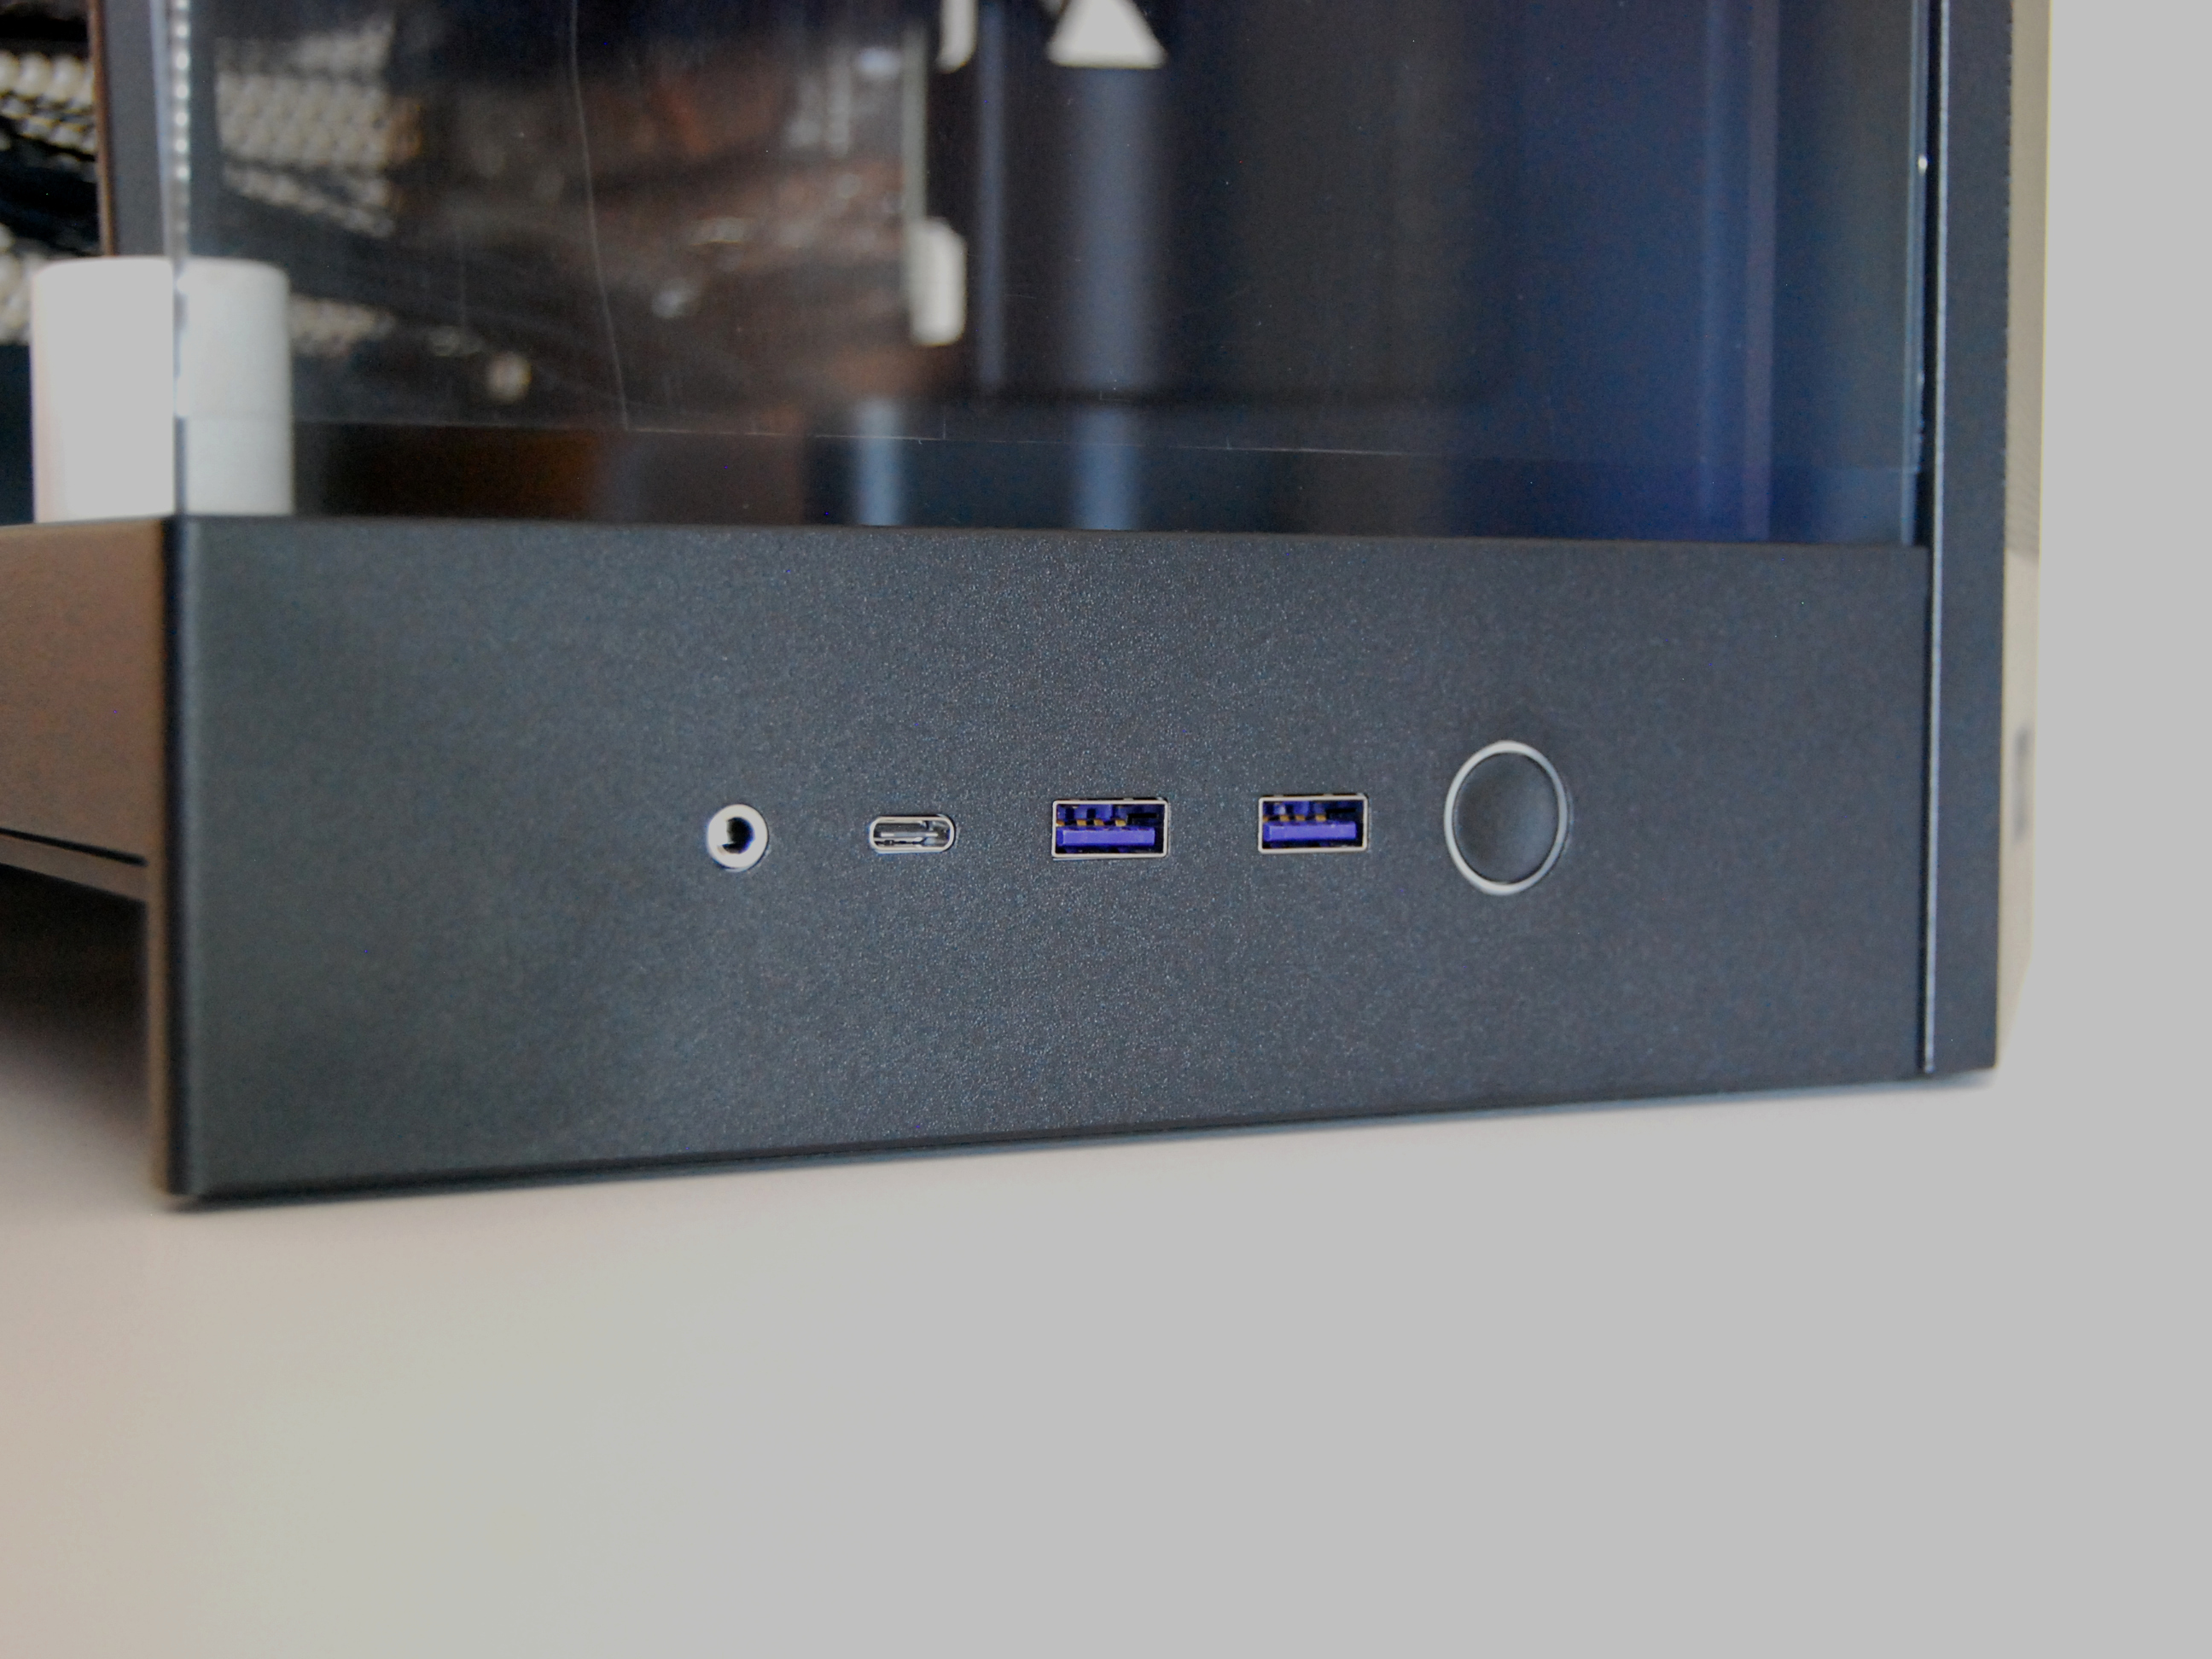
The PC’s ports are located along the bottom front edge of the case rather than the top. As someone who keeps their tower on a desk, this is a perfect setup. No more cables snaking down from the top of the PC.
The panel includes dual USB-A 3.2 (Gen 1), USB-C Gen 2×2, and a 3.5mm audio jack. The USB-C Gen 2×2 port is interesting, as it’s not the usual USB-C port. The “2×2” part of it means you’re doubling the usual 10Gbps bandwidth to 20Gbps.
There aren’t a ton of devices that can make use of the port — the ADATA Elite SE880 SSD I reviewed comes to mind — but it’ll work fine with any standard USB-C device.
Image 1 of 4

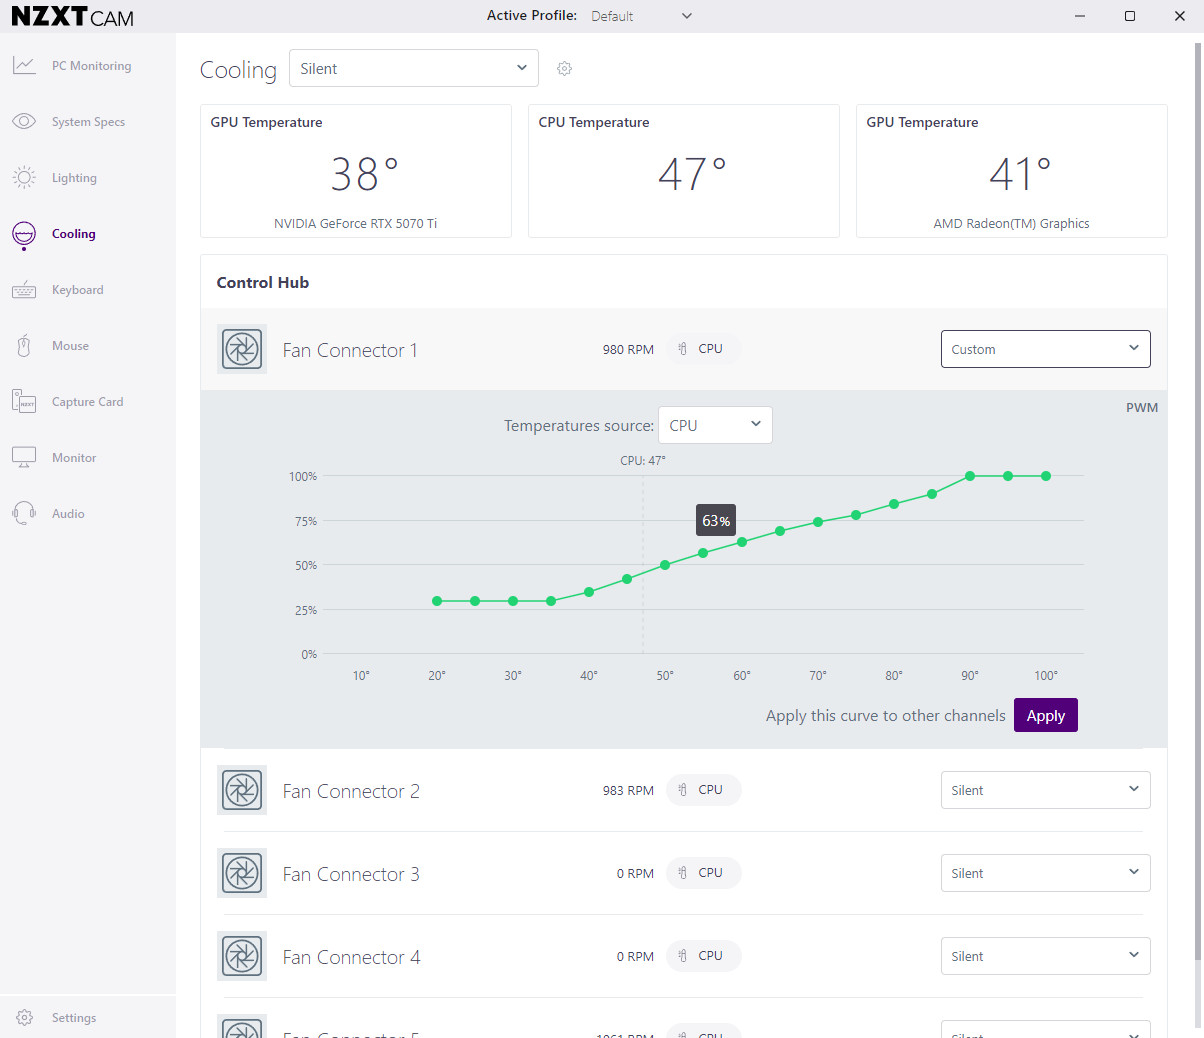
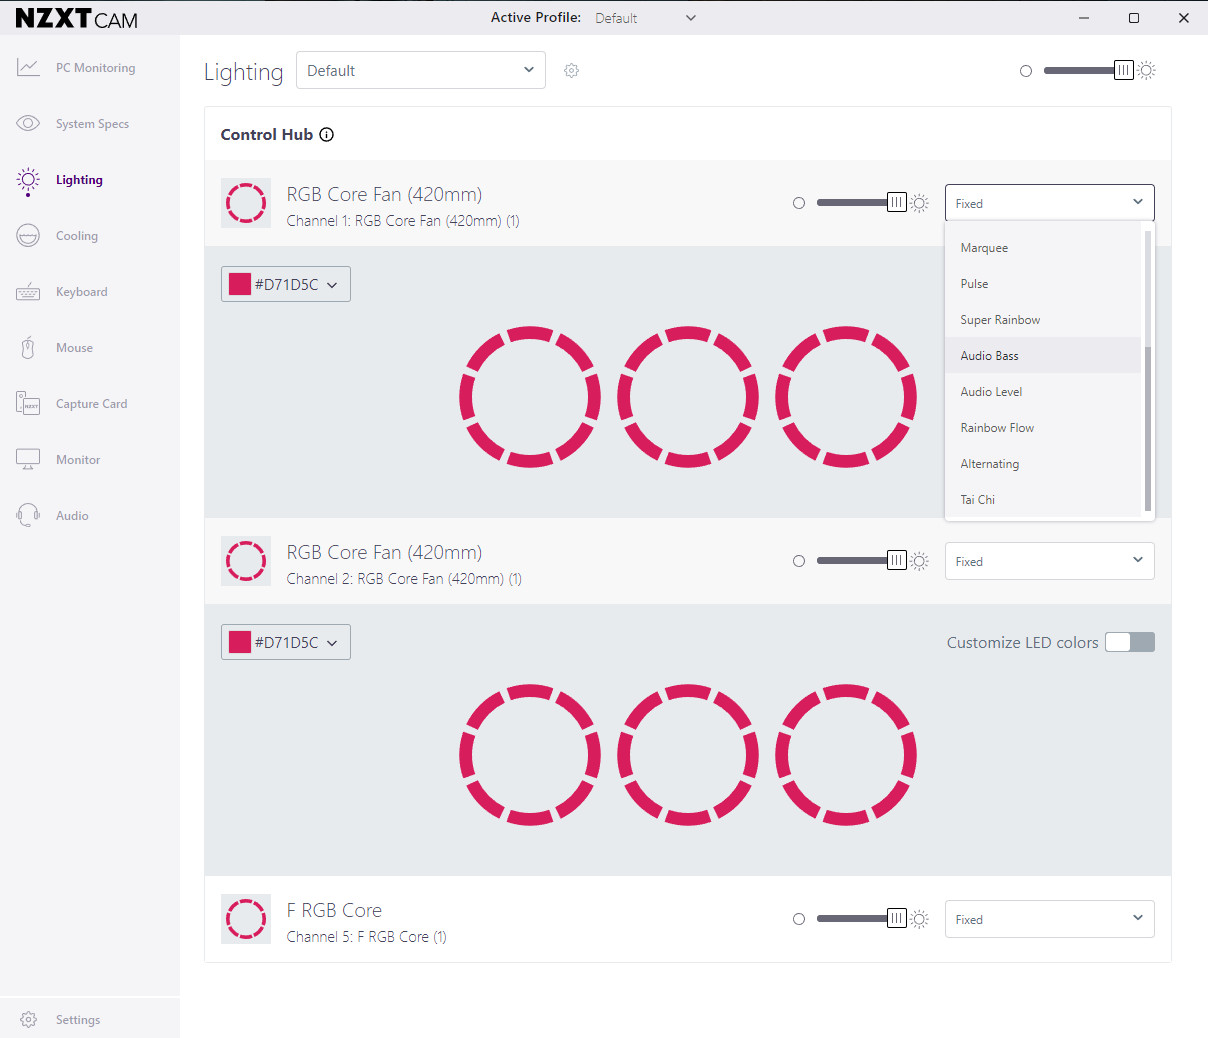
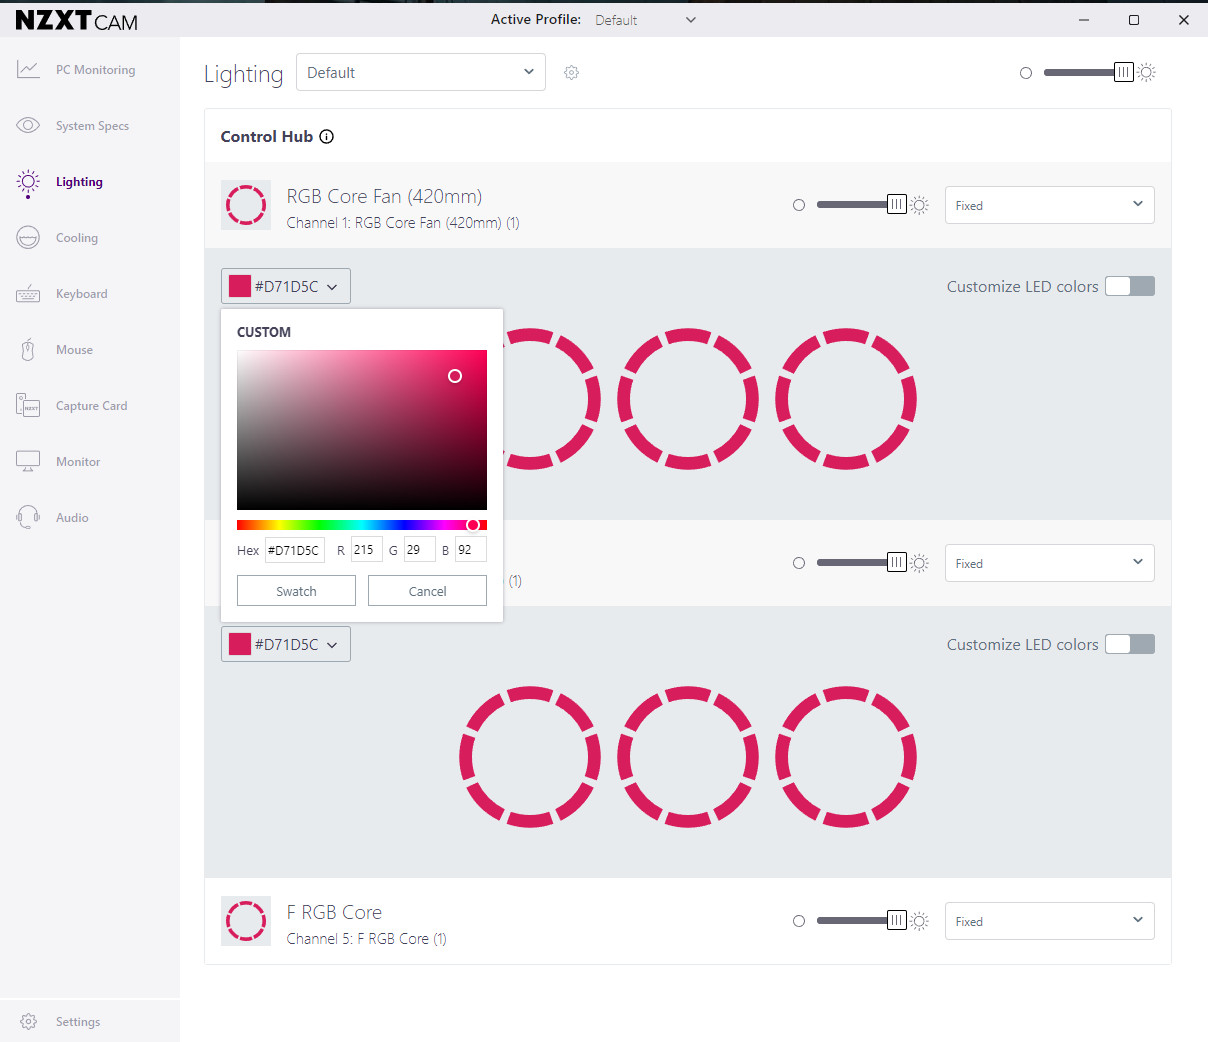
NZXT’s CAM software is fuller than I expected, with performance, accessory, and system metrics available alongside controls for lighting and fan speed.
There are a few preset fan models — Silent, Performance, Fixed, and Default — but most users will no doubt use the customization tool to adjust fan curves to their liking.
The RGB lighting has a ton of different presets, plus there’s a palette color picker with access to basically every color imaginable.
Finally, I tested thermals inside the new case. With the included fans set to the default “Silent” mode, there was no risk of overheating.
Granted, I am using an AiO to keep my CPU cool, which pushes any hot air out of the case before it has a chance to collect inside. But the RTX 5070 Ti puts out a fair bit of heat itself, on top of the heat generated by the motherboard, RAM, and storage.
I first ran a rather undemanding game (Diablo 2: Resurrected) for 10 minutes to check temperatures. My sensors showed a maximum temperature of 42.5°C on the mobo sensor with Silent mode enabled. With Performance mode enabled, temperatures dropped to 41°C at max.
I then booted up DOOM: The Dark Ages to put my PC to the test. With Silent mode enabled, the mobo sensor hit 41.5°C maximum. With Performance mode enabled, temperatures dropped to 38°C maximum.
NZXT H9 Flow RGB+ (2025): What I don’t like
NZXT’s H9 Flow RGB+ (2025) is an easy recommendation for PC builders, but there are some quirks and annoyances that you should know about.
Most pressing is the stock fan noise. Setting the fans to Performance mode has them top out at around 2,000RPM, with noise climbing to about 65dBa. It’s not as loud as a vacuum cleaner, but it’s close. It’s easy to hear even when wearing a headset.
The good news is that the fan curves can be customized through the NZXT CAM app. And as I explained in the previous section, there’s not a huge gap in heat even when using the Silent fan preset.
I never saw noise climb beyond 49dBa with the fans at 1,000RPM, and it seems like the system can keep itself cool at those speeds. At the lowest, I measured 40dBa, which is better than my previous case.
Another issue I have is with the NZXT Control Hub for RGB lighting.
As I understand it, buying the hub separately gets you a number of adapters for use with non-NZXT products. When it comes within the case, however, there are no included adapters.
That means I need to go out and buy a splitter for my Cooler Master AiO if I want its fans and pump header to sync with NZXT’s built-in system fans. It’s certainly annoying when you’re spending nearly $300 on a case.
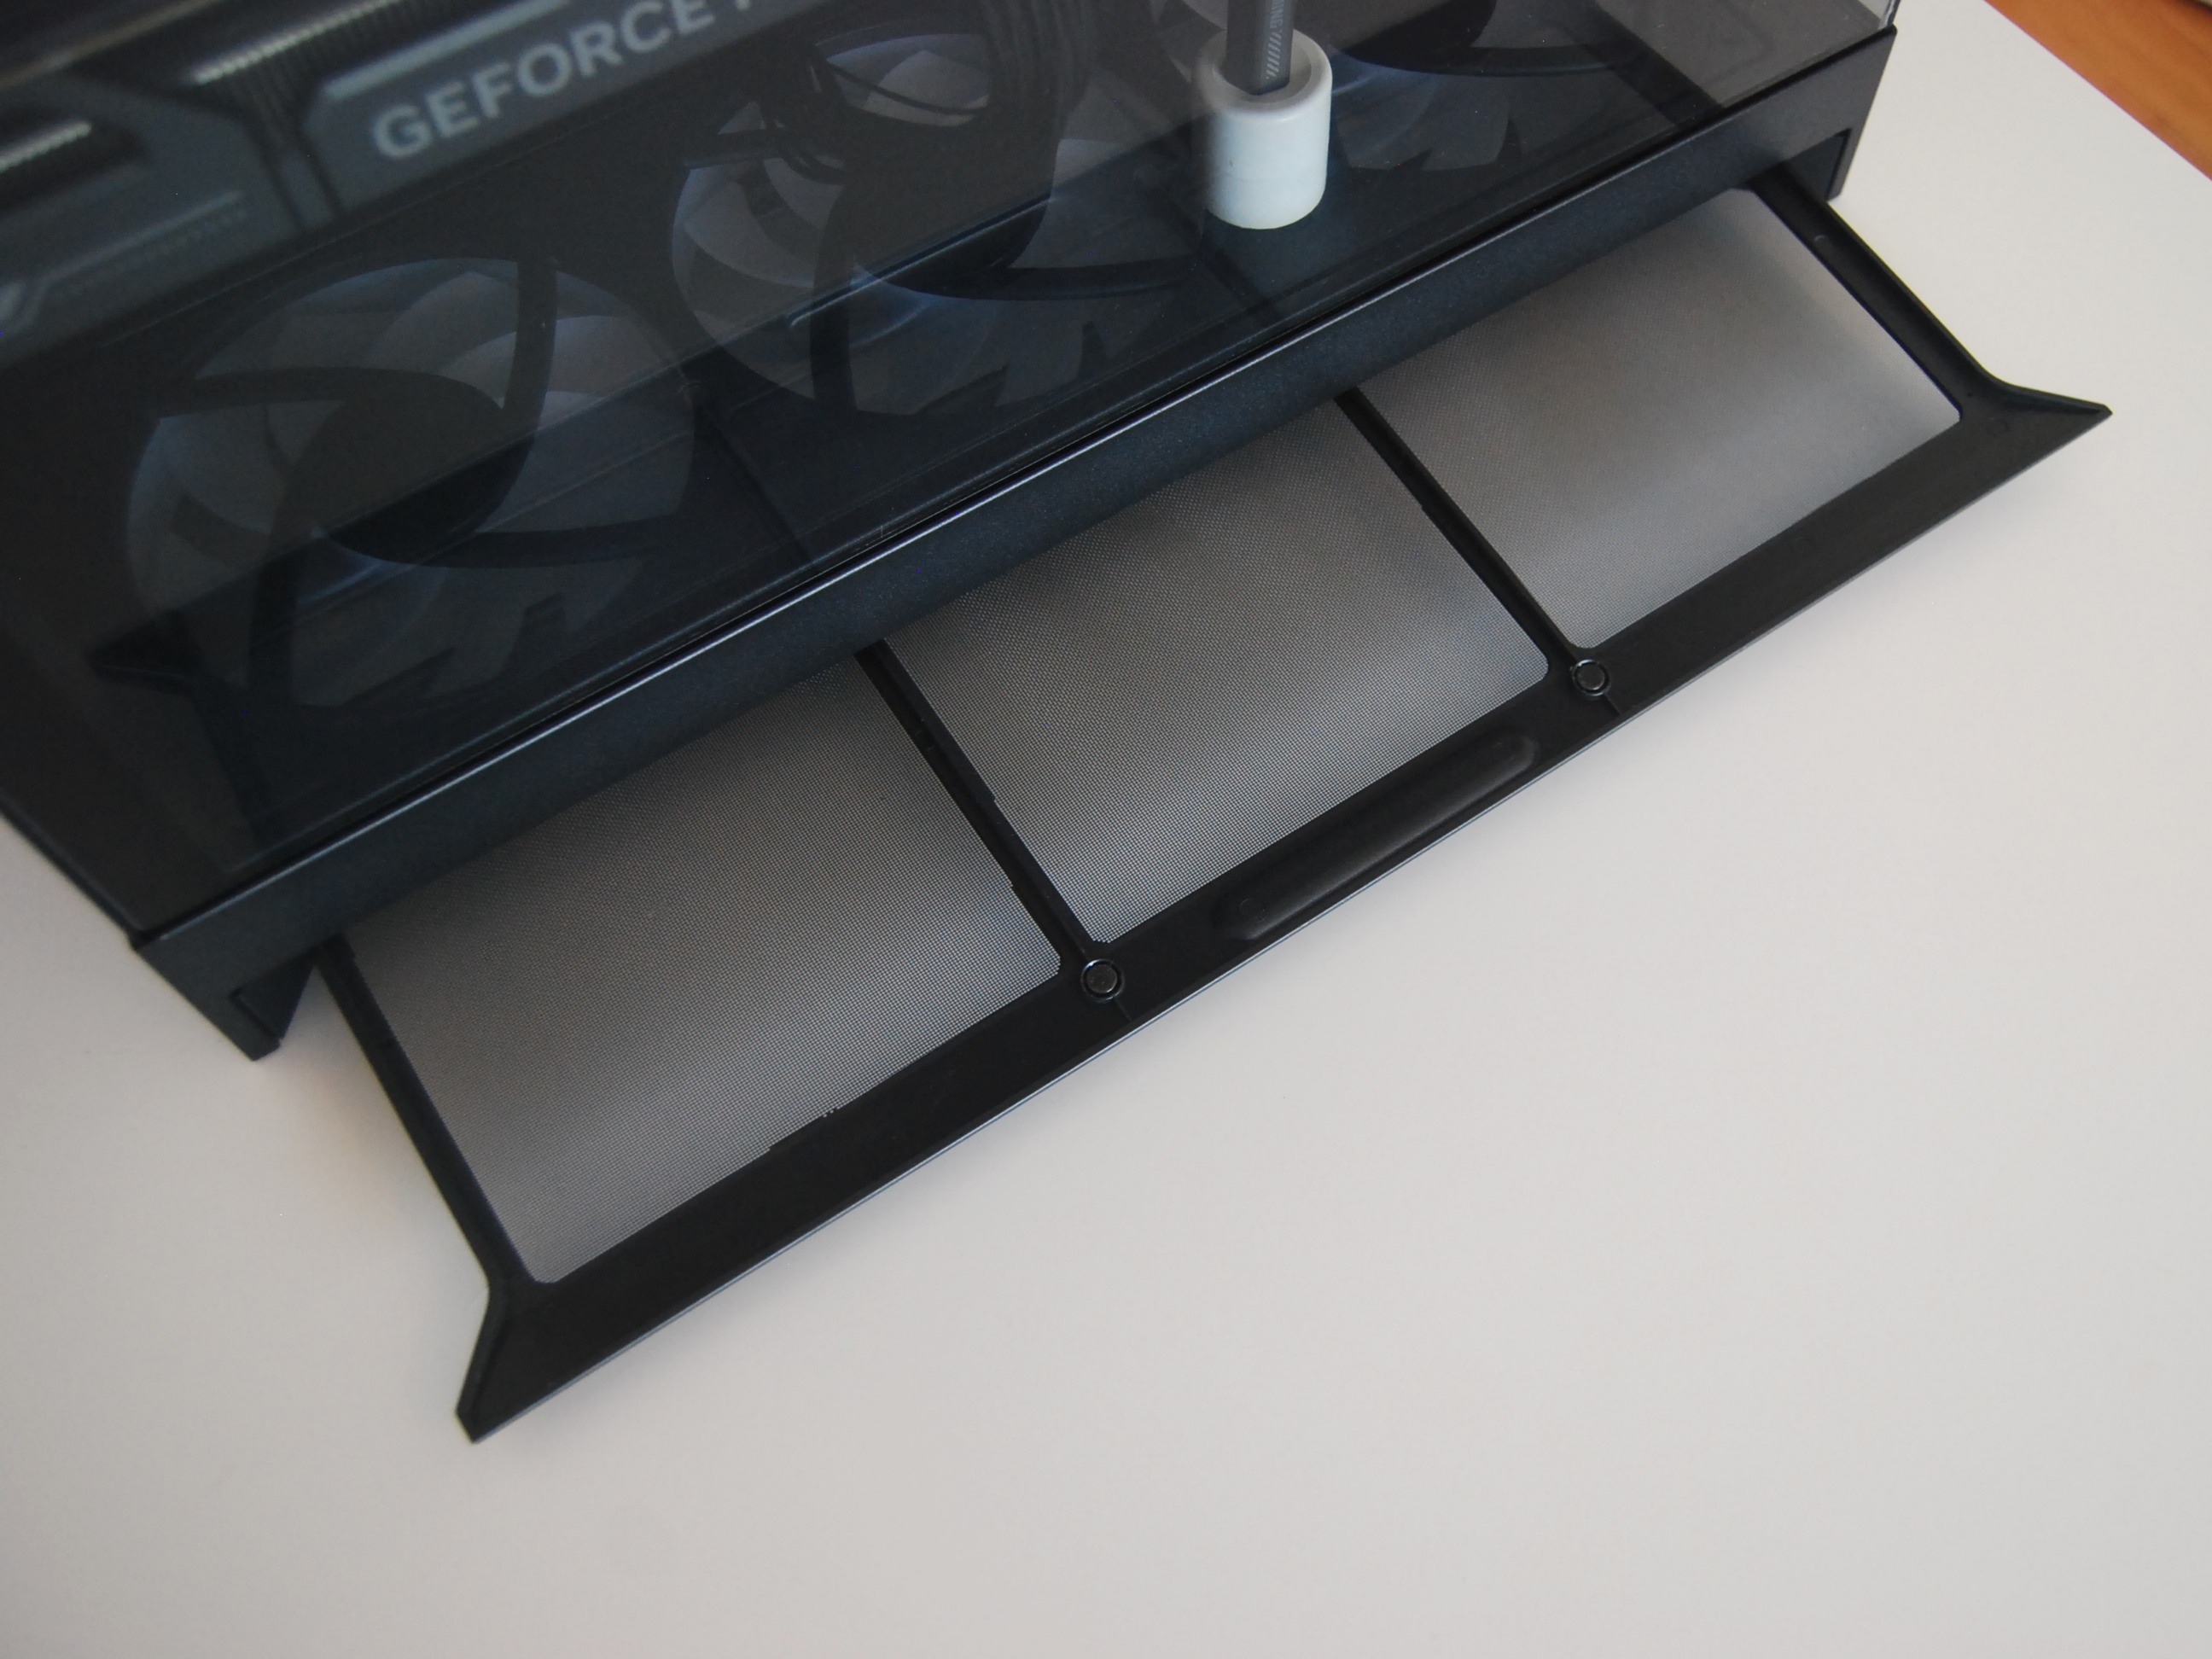
As a pet owner, I love the slide-out screen on the bottom of the PC. It has a fine mesh that will catch particles, and it’s easy to remove and clean.
The rest of the fans are covered with a steel mesh that’s not nearly as fine. And because there’s a tiny gap between the two pieces of glass at the front edge, I expect to have to clean the PC more often than before.
Finally, the case leaves your GPU hanging. Because it’s designed to house fans along the bottom, there’s a massive gap that can’t be spanned with my usual GPU support.
I’ll have to get creative with something larger that doesn’t get in the way of the fans, but it’d be nice if NZXT included something to get started.
NZXT H9 Flow RGB (2025): Also consider
NZXT H9 Flow RGB (2025): My final thoughts
✅ You should buy this if …
- You want a massive case with ample room for the latest and greatest PC performance hardware.
- You want maximum airflow in a case that’s aesthetically beautiful.
- You’re a stickler for cable management and love RGB lighting.
❌ You should NOT buy this if …
- You want the quietest case possible.
- You’d rather spend your budget on performance hardware rather than aesthetics.
- You don’t have a lot of space to spare for a huge PC case.
Sitting down to build a new PC is always exciting, but jumping into a case that’s new on the market and unproven can cause some anxiety.
But after transplanting my gaming PC into the NZXT H9 Flow RGB+, it became clear that my worries were unfounded.
This is a gorgeous PC case with easy access throughout. Smart design decisions like the swing panel for SSDs, the mid-mounted PSU, and the dual-chamber spacing behind the motherboard contribute to the ease of use.
You’ll be in heaven if you love proper cable management, and there’s more than enough airflow to keep my gaming hardware cool.
Stock fan settings might be hilariously loud, but they’re easily fixed through the NZXT CAM app. There you’ll also find RGB settings for the included fans. It’s just too bad that adapters for non-NZXT RGB hardware aren’t included.
Considering the H9 Flow RGB+ for 2025 costs about $290, it’s mainly reserved for enthusiasts who don’t mind spending more on their gaming PC.
And if you already have a bunch of fans ready to go from an older build (or you prefer less RGB), you can drop the price down to about $170.
I can easily recommend even the most expensive H9 Flow RGB+. It’s that good. As long as you have the budget and the space, this should be near the top of the list for your next PC build or upgrade.
If you love the design but want to save money and space, be sure to check out the NZXT H6 Flow instead.
NZXT H9 Flow RGB+ (2025)
NZXT’s H9 Flow RGB+ for 2025 is the best PC case I’ve used. Building inside was easy, cable management is a breeze, and it has enough airflow to keep any system cool. If you don’t have the budget or the space for this huge case, check out the H6 Flow instead.


