
Apple Maps
The macOS Photos app uses AI to detect details like addresses in images. Here’s how to open the addresses in Apple Maps.
If you’ve ever browsed maps online in a web browser, such as to use mapping sites like MapQuest, you may have taken screenshots of a location’s address for later use.
Apple’s macOS Photos and Preview apps can sense information, such as the text of an address, in screenshots you’ve taken. There’s also a variety of ways you can manipulate text in screenshots from within both apps.
In most cases, Control-clicking or Right-clicking an address in an image in the Photos preview or in Preview will open a popup menu with a variety of options you can use to open the address location either in your web browser, or in Apple Maps.
We’ll discuss below how to use the address Maps lookup feature both in Photos and Preview. We’ll look at Preview first because both apps essentially use the same Preview technology and context menus.
In the following example, we’ll use a screenshot from a web maps app taken in a web browser on the Mac and opened in macOS’s Preview app located in the Applications folder in macOS’s Startup Disk.
The default setting in a new installation of macOS is to open .png images in the Preview app. You can change this setting using the Finder’s Get Info window for each image file, but for this example, we’ll stick with using Preview.
First, the original screenshot:
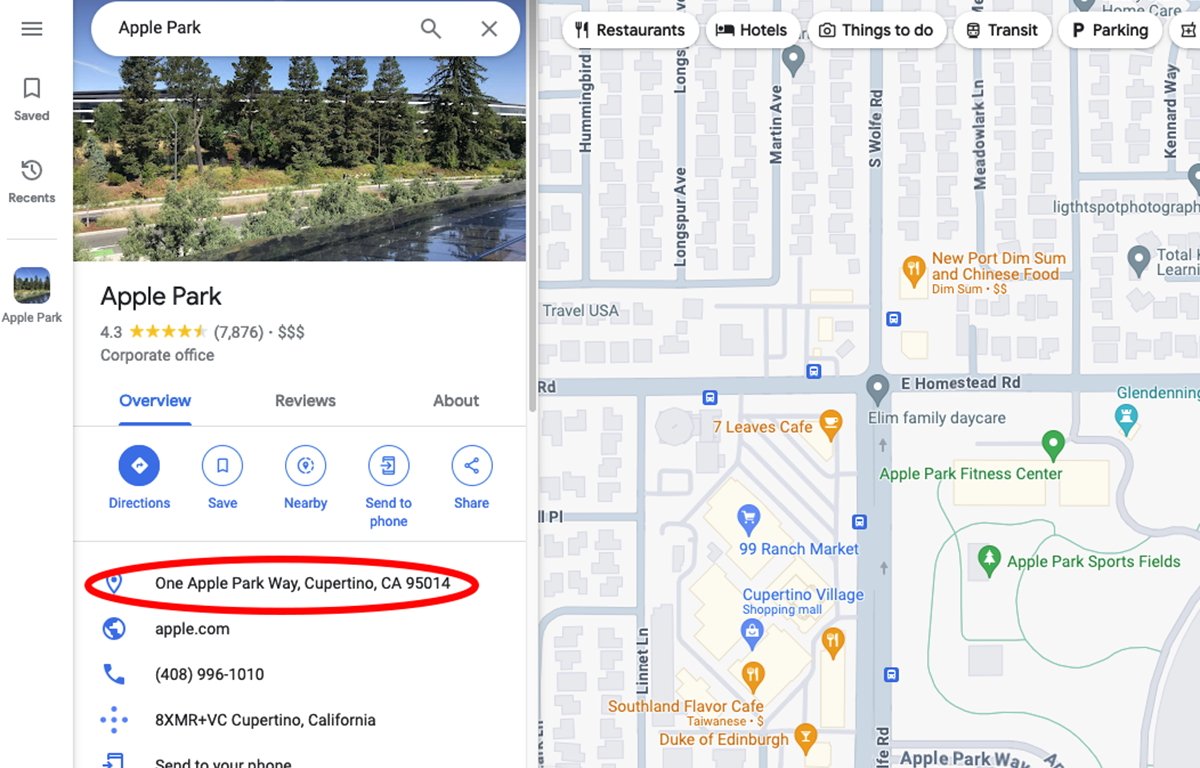
A web browser screenshot from a maps app online.
The address circled in red. If you hover over an address with your mouse you’ll see a small dotted outline.
If you Control-click on the address while the outline is visible, or on the small grey arrow button to the right, you’ll get a popup menu containing serval options:
Hover and Control-click.
There are two ways to open the address you clicked in Apple Maps, and one way in your web browser, which you may not need since you just searched for it. We’ll cover the browser way first, then the two ways in Apple Maps.
If you select the Look Up menu item with the address in it, Preview will display a popover with several options in it, one of which is a button titled Search with followed by the name of your web search engine app.
If you click this button it will switch to your web browser and use the address as a search term just as if you had searched for it directly in your browser:
Using “Look Up” to open the address in a web brower.
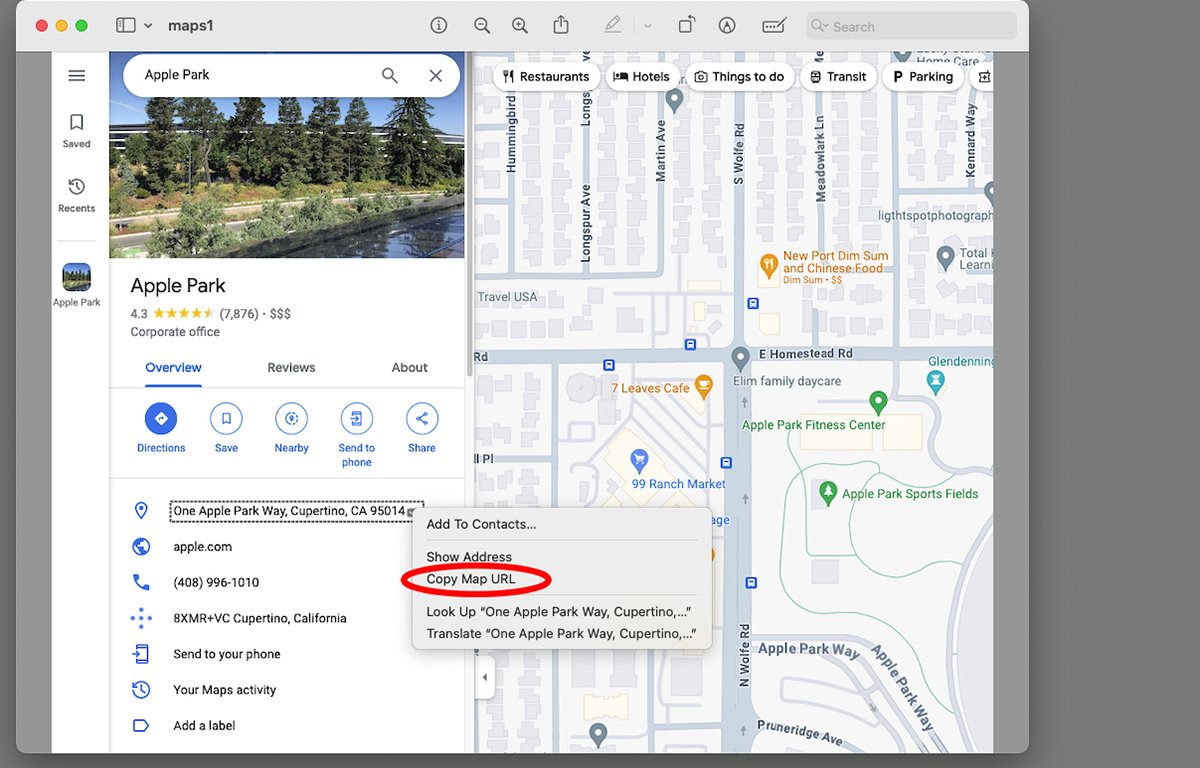
The second way is to look up the address in Apple Maps. To do so, choose Copy Map URL from the popup menu in Preview.
This copies the URL in Maps format from the address text to one Apple Maps can understand:

Use the “Copy Map URL” feature.
Next, open the Apple Maps app from the /Applications folder on your Startup Disk or from the Dock, then paste the copied URL into Maps’ address search bar at the top left of the main window. When you do, Maps will display a small popup with the address just below the search bar.
Click the place name in the popup and Maps will zoom to the address:
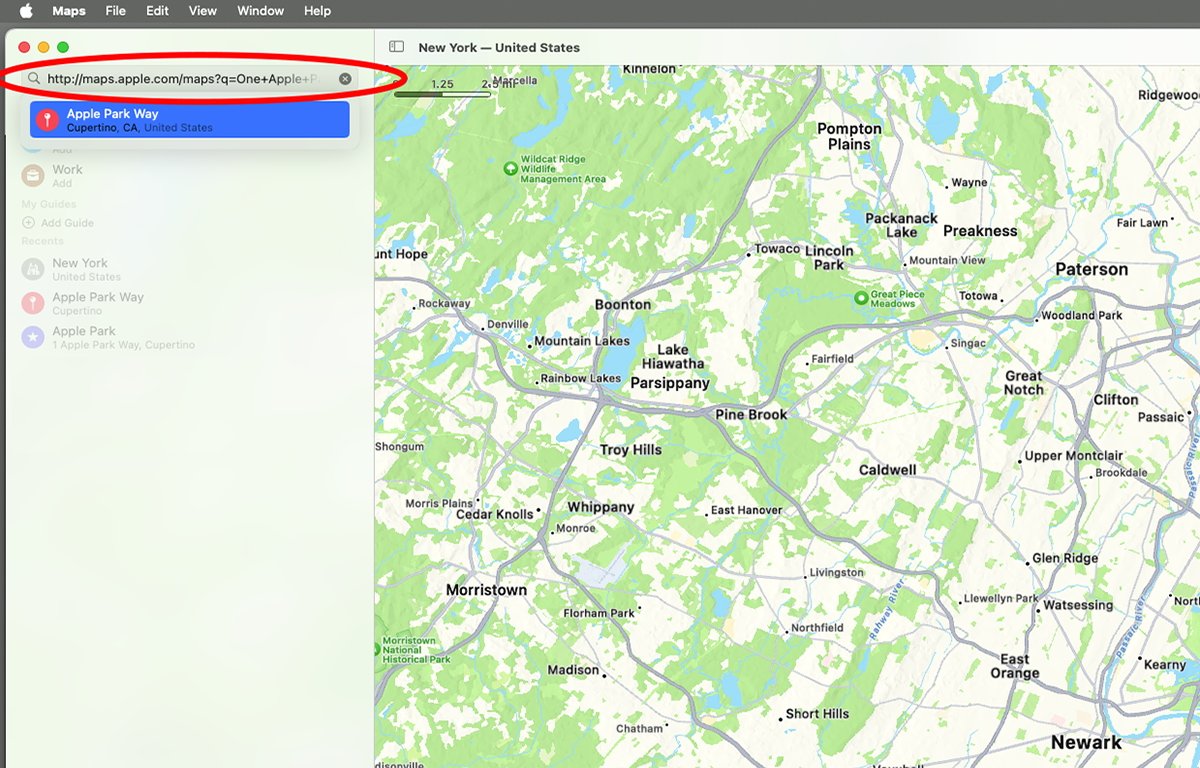
Paste the copied Map URL into Apple Maps.
Opening an address link directly in Maps
The third, and even easier way to open an address URL in Apple Maps from Preview is to Control-click the address, then select Show Address from the popup menu.
When you do, a different popup will appear showing a tiny portion of the map, along with an Add to Contacts button, and an Open in Maps button. If you click the Open in Maps button, macOS will switch to the Apple Maps app and zoom to the address, launching Maps if it’s not already running.
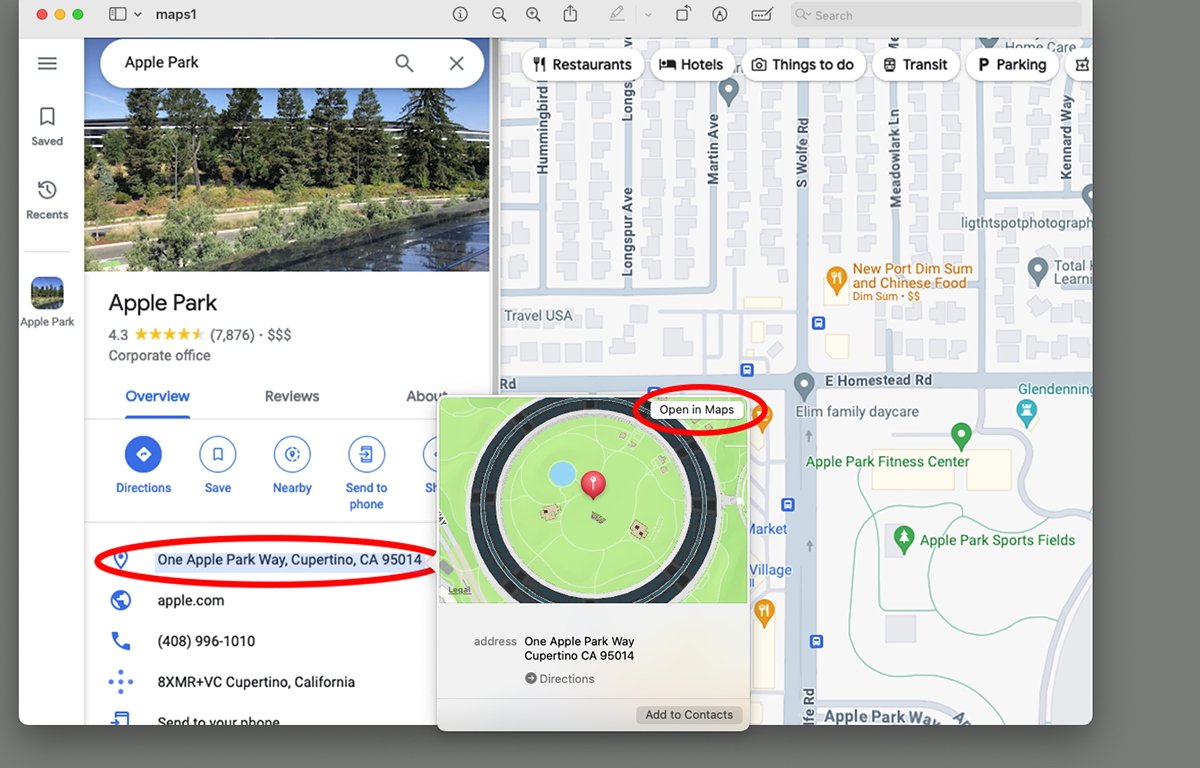
Click “Open in Maps” to open the address in the Maps app directly.
If you click the small Directions button instead of the popup in Preview, macOS will switch to the Maps app and display the directions popover in the upper right corner. In the directions popover you can enter any From: address and get directions from a location to the address in the Preview image.
You can also choose View->Show 3D Map from Maps’ menu bar to tilt the map into a 3D perspective, or you can choose View->Show Look Around to display a 3D rotatable street view of the location.
You can zoom the Look Around pane in Apple Maps for a full view of the location in 3D in the Apple Maps main window.
There are a few other text options in Preview’s popup context menu that are useful such as Share Text, Copy Text, and Add to Contacts directly. Using the Share Text item you can send the text to the Notes or Reminders app, or to Messages or Freeform.
Opening an address link in Photos
Now that you know how to open address links in Maps from Preview, you can do the same in Apple’s Photos app in macOS.
Apple’s Photos is your central location for photo and album storage, collections, sorting, tagging, printing, and exporting.
To add a photo to Apple Photos in macOS, open the Photos app in the Applications folder from the Finder, then drag an image from the Finder into its main window.
Photos adds the new photo with a thumbnail to the current Photos library.
Once a photo has been added to the Photos app, if you double-click it in the Photos Library pane you get a zoomed preview of the image in the Library pane.
Once opened in the Photos previewer, Photos can now recognize text addresses just as the Preview app does. You can Control-click or Right-click on an address in the Photos preview pane to display a context menu just as you did above in Preview.
The Photos popup context menu is essentially the same as the one in Preview but with a few extra options such as Copy, Share, Rotate, and a variety of Album manipulations for the Photos app to use.
Photos and Preview feature several AI tricks and the address lookup in Maps is one of the most useful. We also covered previously how to use Preview’s image AI to selectively copy parts of an image without too much hassle.
As AI plays an increasingly larger role in Apple’s software it will be interesting to see what new tricks Photos and Preview can be made to do.


