Back in college, I spent countless hours in Microsoft Word writing essays and making notes. Along the way, I picked up a few tips and tricks that helped me work more efficiently. Here are 10 of them I think every student should know.
1 Master the Different Types of Breaks
Before I understood what breaks were and how they worked, I used to spam the enter key to jump to the next page of my document. And while that sufficed for shorter essays, I quickly realized when I started working on lengthier documents that that method wouldn’t cut it.
That’s when I learned about breaks. There are two kinds of breaks in Word: page breaks and section breaks.
Page breaks are how you tell Word to end the current page and move to a new one. They are superior to spamming the enter key because you don’t have a bunch of invisible space that will jerk all your text around when you inevitably change something.
On the other hand, section breaks partition your document, with each section having its own formatting. They are handy when setting up different page layouts or numbering schemes in the same document.
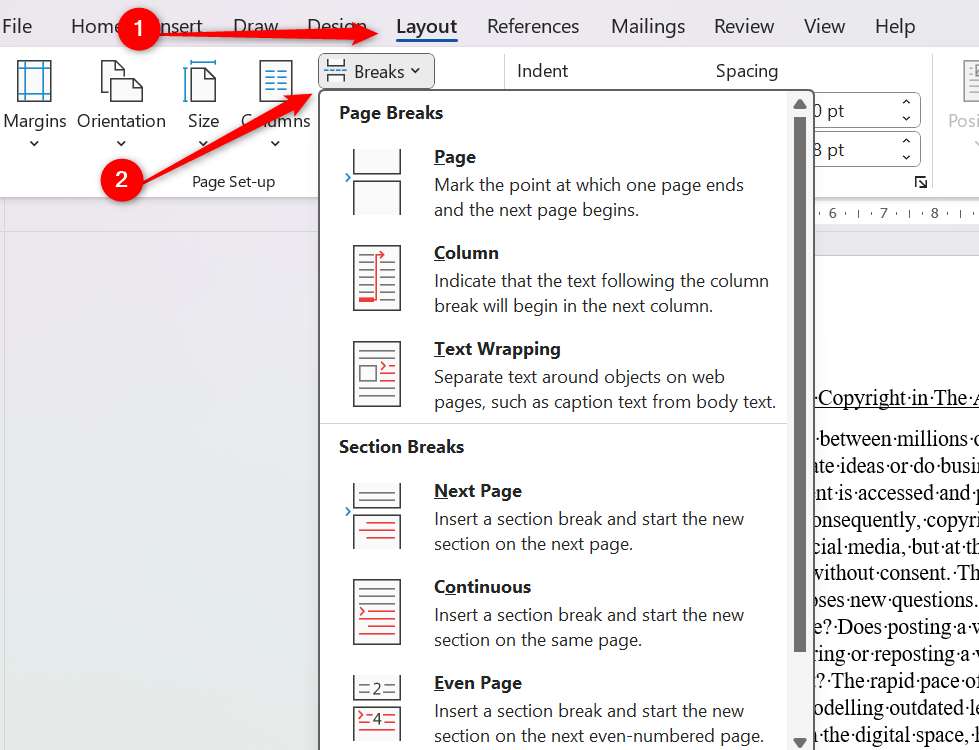
Adding a break to your document is easy. Simply head to the “Layout” tab, and select “Breaks”.
Page and section breaks have a couple of variations, so it’s worth exploring how to use the different types of breaks.
2 Update the Default Heading Styles
Heading styles are a must when you’re writing essays for school. They add structure to your document and make it easy to navigate to different sections quickly. Additionally, if you’re writing a thesis, using styles will pay off spectacularly because they allow you to easily create an automatic table of contents.
Microsoft Word has default heading styles that you can use to format your documents, but they probably don’t comply with your school’s formatting requirements, so, you’ll need to modify them.
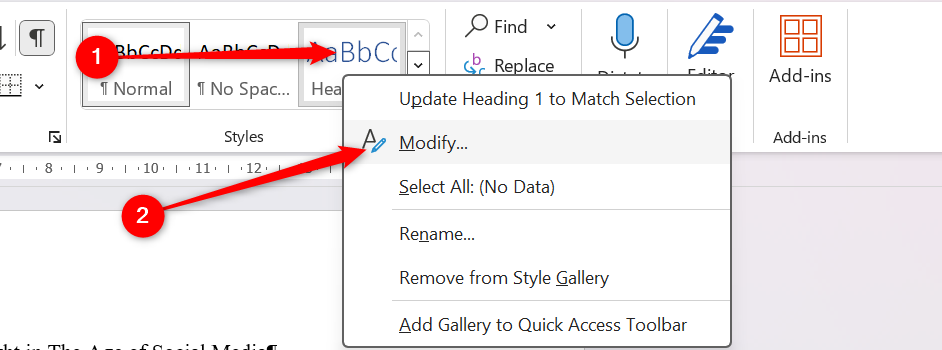
On the Home tab, navigate to the Styles pane and right-click the style you want to customize. Select “Modify” from the options, and a new window will appear. Here you can change everything about the style from the color to the font, and size.
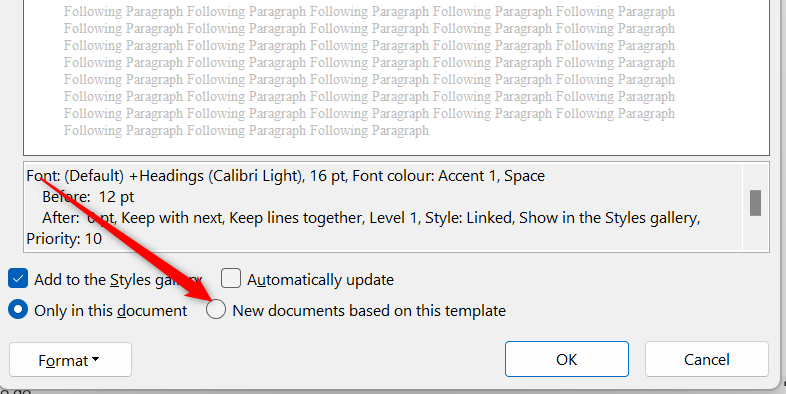
Since you’ll be writing tons of essays in the same formatting style, it makes sense to save your customizations so that you can easily apply them to a new project. To ensure that Word remembers your customizations, tick the “New Documents Based on this Template” circle, before pressing “OK”.
3 Use Transcription to Take Notes
Instead of splitting your attention between trying to take notes and listening in class, you can let Word handle the note-taking for you. With Word’s transcription feature, you can record any lecture and have it automatically converted to text, saving you the headache of keeping up with everything.
Here’s how to use it. First, go to the “Home” tab and click the downwards pointing arrow under “Dictate.” Then select “Transcribe.”
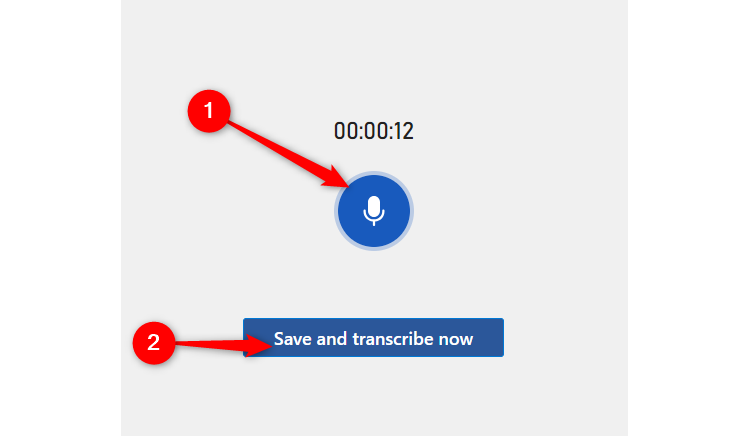
A side pane will pop up on the right. Hit “Start Recording,” and Word will start capturing the audio from your class. You can pause or resume the recording by clicking the microphone button. Once the lecture is over, hit “Save and Transcribe Now,” and Word will deliver a transcript of your lecture in just a few moments.
4 Don’t Forget to Use the ‘Show/Hide’ Button When Editing
There’s more to your Word document than meets the eye. Things like spaces, paragraph breaks, tabs, and other hidden formatting can seriously mess with your layout when you’re editing.
Instead of driving yourself crazy trying to figure out what’s going wrong, use the “Show/Hide” formatting button to reveal everything. This trick lets you see all the hidden elements in your document so you can fix issues quickly. You’ll find the button in the paragraph section of the Home tab.
5 Maximize Your Productivity With Focus Mode
We’ve all been there—you’ve got a 3,000-word essay due by morning, and you’ve barely gotten five words on the page. In times like this, all the options and formatting tools Microsoft Word offers on the ribbon are more of a distraction than a help.
Luckily, there’s a way to block out the noise and focus purely on getting words on the page. Word’s Focus mode is a game-changer for this. To access it, head over to the View tab and click the “Focus” icon. This will strip away everything but the page, creating a distraction-free space to help you concentrate.
Once you’re ready to exit Focus mode, hover your pointer over the ellipsis at the top of the screen to bring back the ribbon, then click the Focus icon again—or just hit the Escape key.
6 Turn On Autosave and Never Lose Work Again
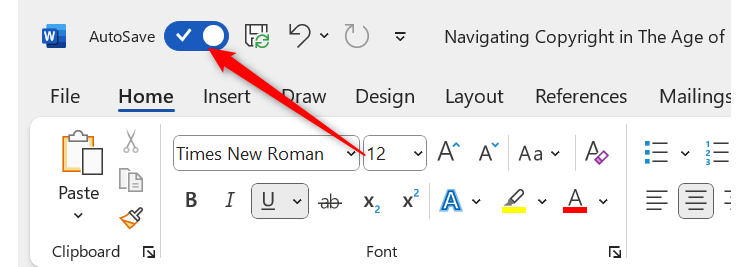
There’s nothing more frustrating than working on an essay for hours only to lose it all when your PC unexpectedly crashes. But with autosave, you can avoid that nightmare. Just make sure the autosave toggle at the top of your document is switched on, and you’re covered.
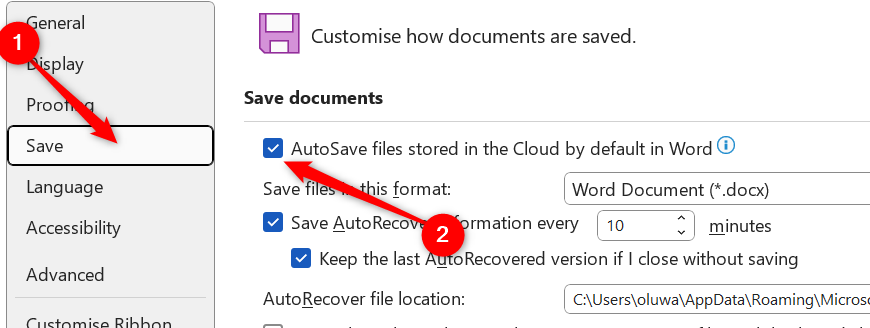
You can take things a bit further and ensure that autosave is always on by default. Head to “File,” select “Options,” and in the window that pops up, click the “Save” tab. Then, check the box that says “Autosave Files Stored In The Cloud By Default,” and you’ll never have to worry about losing your work again.
7 Memorize a Few Handy Keyboard Shortcuts
Shortcuts can save you a few seconds of fumbling in the ribbon trying to find the option you need. Those seconds add up and can be the difference between finishing an essay on time or not. There are tons of shortcuts in Word, but here are some of my favorites:
- Ctrl+Alt+F: Insert a footnote
- Ctrl+Alt+M Insert a comment
- Alt+Ctrl+C: Copy a format
- Alt+Ctrl+V: Paste a format
- Ctrl+H: Open the Find and Replace pane
- Ctrl+Alt+1: Apply the Heading 1 Style
- Ctrl+Alt+2: Apply the Heading 2 style.
- Ctrl+Alt+3: Apply the Heading 3 style.
You can check out a more comprehensive list of all the shortcuts in Word to find the most important ones for you.
8 Use Researcher to Find Credible Sources
If you’re struggling to find sources to back up your arguments, Word’s Researcher tool can be a lifesaver. Powered by Bing, Researcher scours the web for high-quality sources you can use in your essay.
The best part? You don’t have to break your writing flow to hunt down information. You can open Researcher in a side pane and grab what you need without losing your train of thought.
Another reason to love Researcher is that it filters out junk. Instead of random websites, it directs you to reliable journals and academic sources, so you don’t have to worry about the veracity of the info you receive.
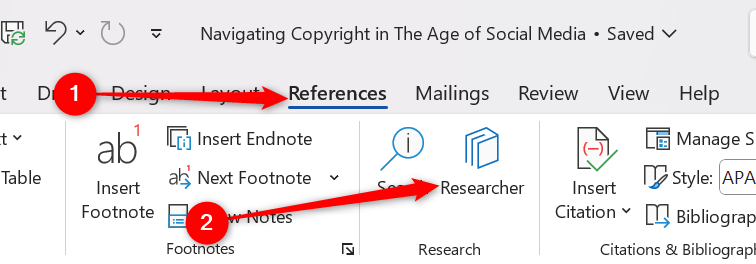
To access Researcher, head to the references pane and click the “Researcher” icon.
9 Let Word Handle Your References
Manually referencing your work can be confusing and frustrating. Every citation style has its own set of rules, and keeping track of them all can take up a lot of time. Luckily, Word can handle this for you.
Just head to the “References” tab and look for the “Citations and Bibliography” section. Make sure you’ve selected the correct citation style, then click “Insert Citation” and choose “Add New Source.”
Word will open a window where you can fill in all the necessary details. Once you’ve added the info, click “OK”, and Word will generate the correct citation, applying all the rules for you.
The best part is, that if you add all your sources this way, you can easily create a bibliography at the end of your document. Just click the “Bibliography” icon and choose the style you want, and Word will do the rest.
10 Share Your Documents for Easier Collaboration
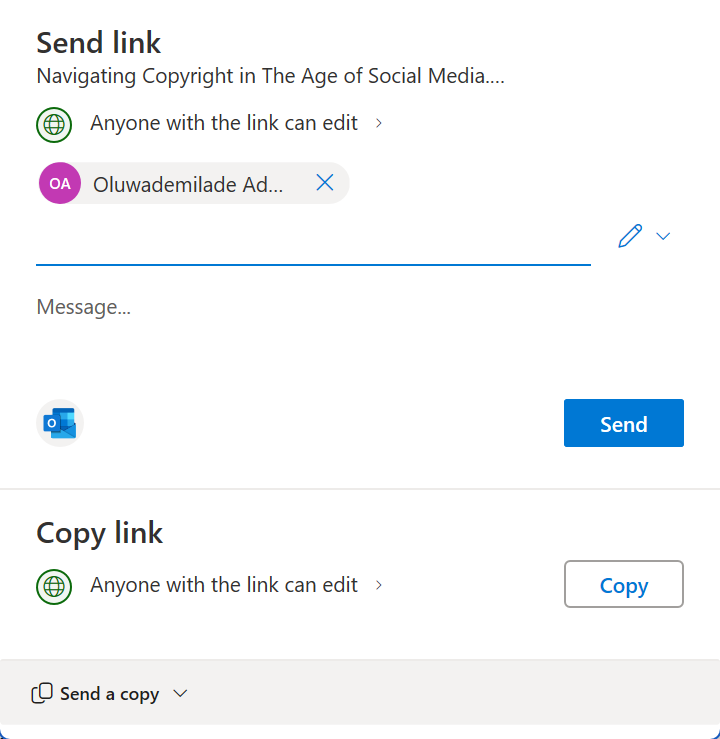
If you need someone to review your documents, or you’re working on a group project, there’s no need to send copies back and forth or try to merge separate documents later. Instead, you can collaborate in real-time directly through Word.
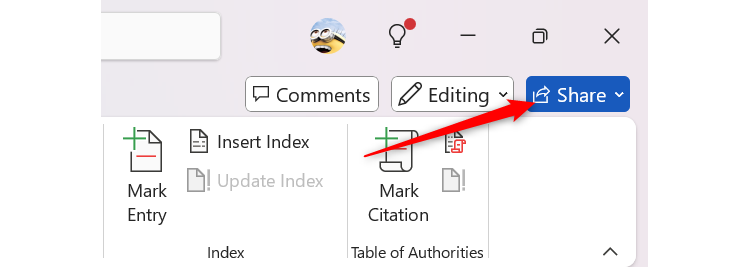
To do this, click the “Share” button in the top-right corner.
A window will pop up where you can enter the email addresses of the people you want to share it with. You can also adjust their access level—whether they can just view or also edit the document. Plus, you can set an expiration date for the link and even add a password for extra security.
Microsoft Word is an incredibly powerful tool, and these tips will help you get the most out of it for your studies. But why stop there? Take your Word game to the next level by mastering formatting tricks and boosting your workflow speed, and you’ll be well on your way to being the most efficient and productive student you can be.


