Windows 11 has many frustrating and intrusive default settings, but the good news is that you don’t need to put up with them. While I can’t fit them into one guide, I can at least point you in the right direction. Change these right away to avoid the annoyances.
Unnecessary Startup Apps
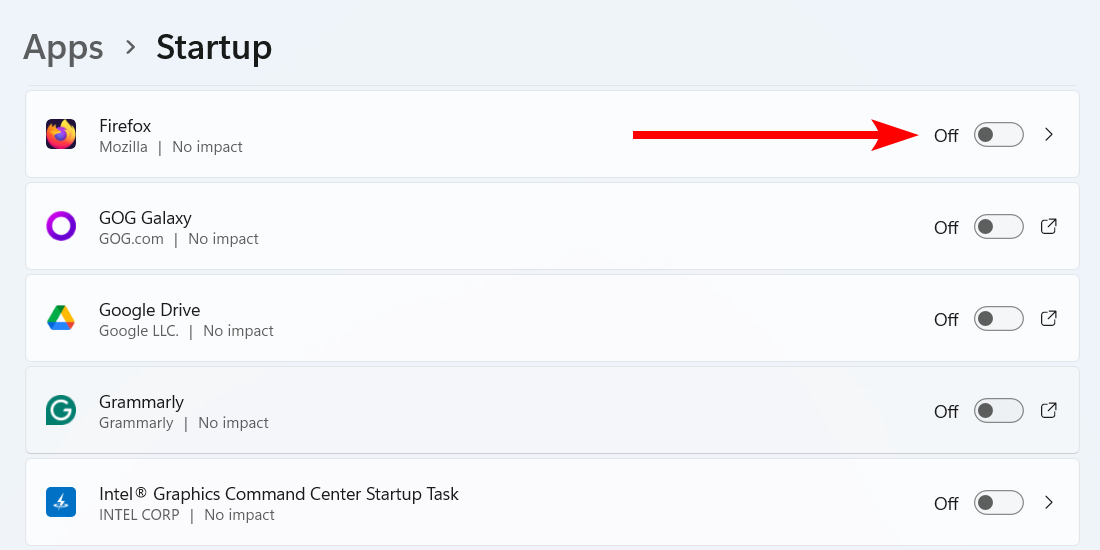
Startup apps launch automatically as your computer boots up. While having some apps ready to go from the get-go can be handy, they can slow down the startup process and consume system resources afterward, leading to sluggish performance. Fortunately, you can easily disable them with a few clicks.
To find the startup apps, press Win+i to open the Settings app, and go to Apps > Startup. From the list, toggle off any app you don’t want to launch at startup.
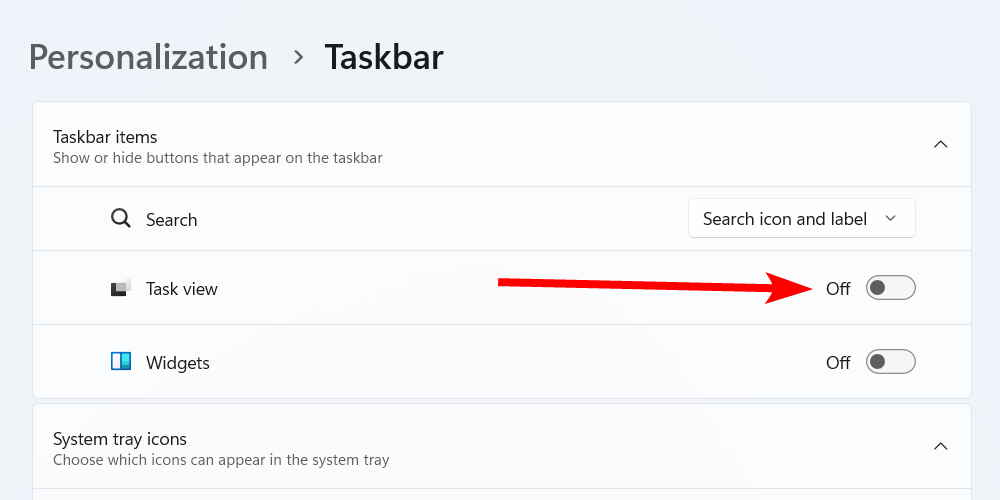
If you don’t need news, weather, and other content in your Taskbar, then the widgets are nothing more than an annoying distraction. Not only that, but they can also impact your PC’s performance, especially during startup. This is more noticeable if you’re using a low-end computer or one with low RAM and CPU.
To disable widgets, right-click an empty space on the Taskbar and select “Taskbar Settings” in the menu. From there, simply toggle off the “Widgets” option.
Distracting Notifications
Windows can sometimes bombard you with constant alerts and updates, disrupting your workflow and concentration. Notifications can be useful for important messages and reminders, but the default notification settings often need tweaking to prevent any disruptions.
You can also quickly disable notifications temporarily by clicking the Notifications icon in the taskbar or pressing Win+N and clicking the bell icon in the top-right corner to turn on Do Not Disturb mode. It will turn blue when the mode is on.
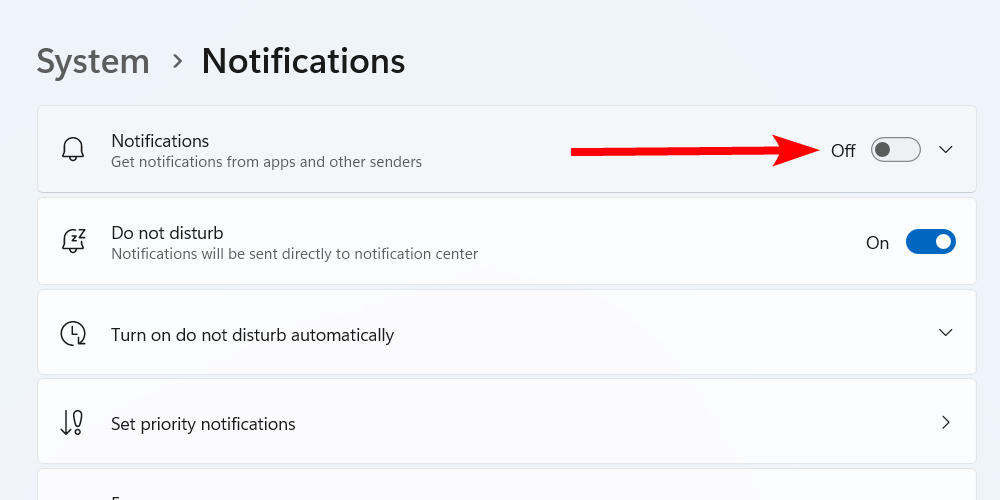
To completely disable notifications in Windows 11, go to System > Notifications. Then, turn off the toggle next to “Notifications,” and you should no longer receive them.
If you don’t want to disable the notifications system-wide, you can choose the ones you want to keep while blocking others. Leave the main toggle on in the System Notification settings, scroll down to see the list of apps that can send notifications, and toggle off notifications for specific apps.
Related
How to Schedule Custom Notifications on Windows 11
Make custom messages pop up at the specified date and time.
Forced Use of the Microsoft Account
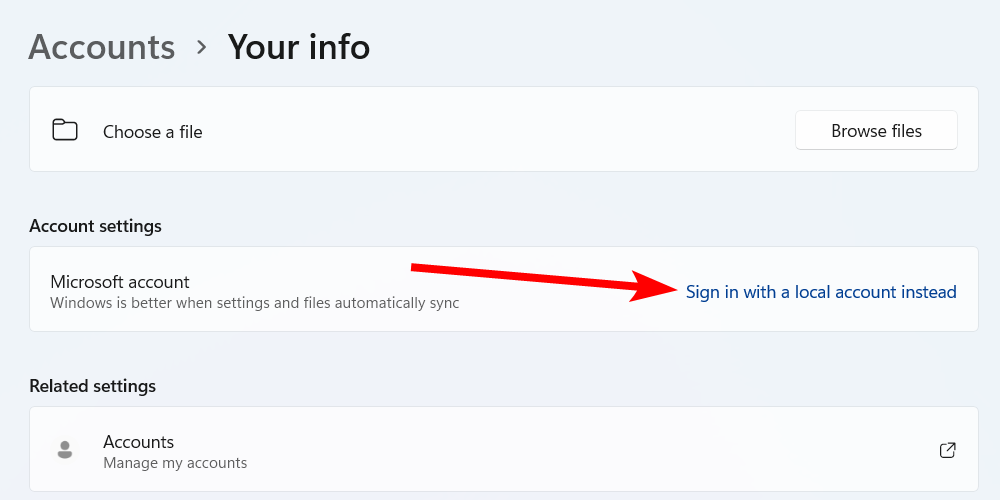
When installing Windows, Microsoft made it hard to bypass the Microsoft account creation process. If you caved and created one to move the process of installing Windows along, but you don’t need it, you can easily disable it. This will make you use a local account on Windows.
To do that, press Win+i to open the settings app, and go to Accounts > Your info. In the Account Settings section, click the “Sign in with a local account instead” link.
From there, just follow the steps to sign out of your Microsoft account. Keep in mind that some features, such as Microsoft Store and OneDrive, might require you to sign in with your Microsoft account to use them.
Edge as the Default Browser
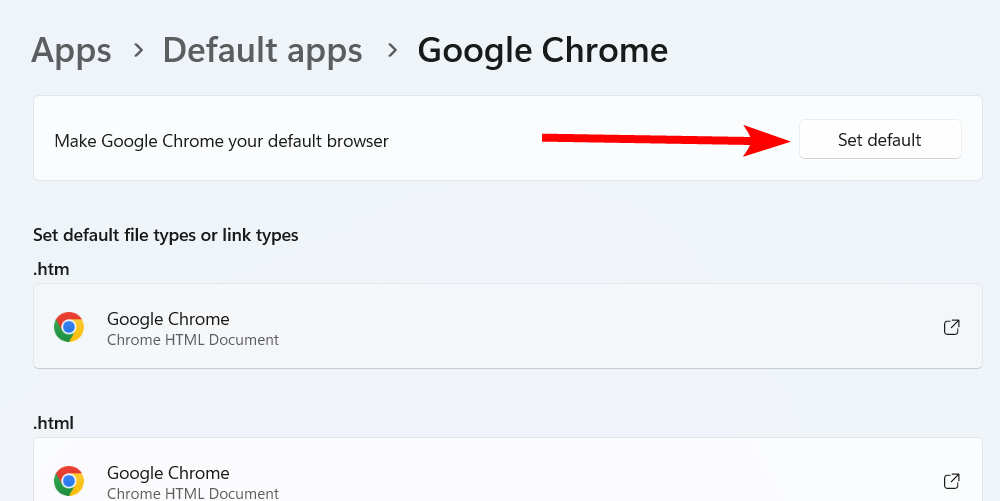
Microsoft is on an aggressive push to make you use Microsoft Edge. So, naturally, it is the default browser on your Windows computer. But if you prefer Chrome, Firefox, or any other browser, you can easily change the default browser to what you use.
To do that, go to Settings > Apps > Default apps. In the list of apps, find and click the browser you want the new default to be (e.g., Chrome, Firefox, or Brave). Finally, click the “Set Default” button.
A checkmark will appear next to the button to signify that it’s now the default. You can do this for other types, too, to make them the default for things like text editing, viewing PDFs, and playing media files.
Windows Updates on Limited Internet
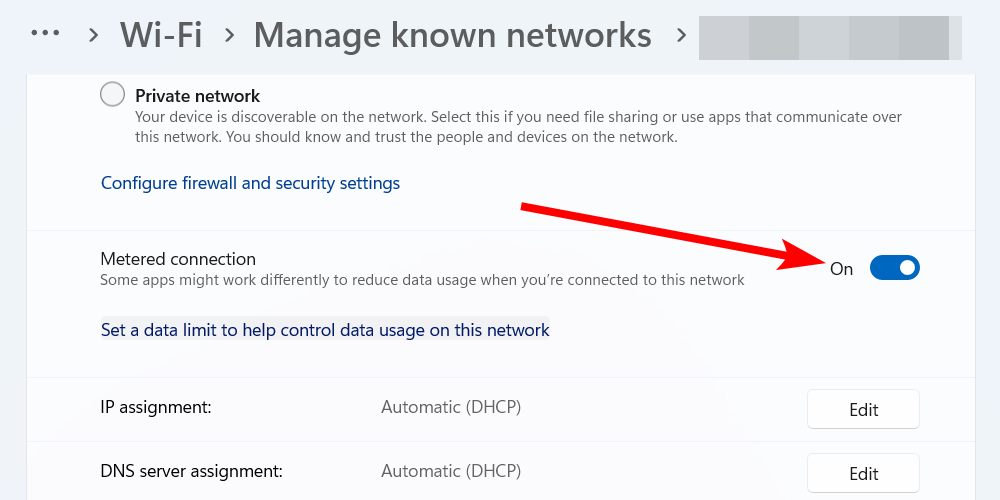
Windows Updates are essential for security and functionality, but they can quickly consume your bandwidth, especially if you’re working with a data cap. When left alone, your Windows computer will download them in the background, but you can control the process so you can decide when to download the Windows Updates.
To do this, press Win+i to open the Settings app, go to Network & Internet > Wi-Fi > Manage Known Networks. From the list of networks, select the one you want to limit and turn on the “Metered Connection” toggle.
Doing this makes Windows optimize data usage on your PC, meaning many apps on your system will not automatically update. However, some critical security updates may still download on their own.
Start Menu, Lock Screen, and File Explorer Ads
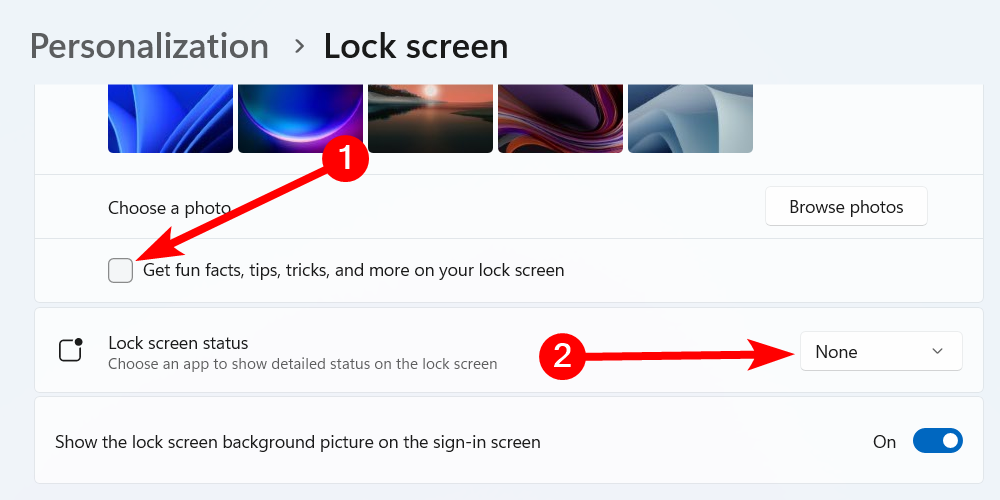
Windows 11 can show you ads in places where you don’t expect them, including the Start Menu, Lock Screen, and File Explorer. These are intrusive, but you can easily disable them with a few clicks.
To disable Start Menu ads (suggested content), go to Settings > Personalization > Start and disable the “Show Recommendations for Tips, Shortcuts, New Apps, and More” toggle.
If you don’t want to see lock screen ads, go to Settings > Personalization > Lock Screen. Here, set “Lock Screen Status” to “None” and turn off the “Get Fun Facts, Tips, and More from Windows and Cortana on Your Lock Screen” toggle.
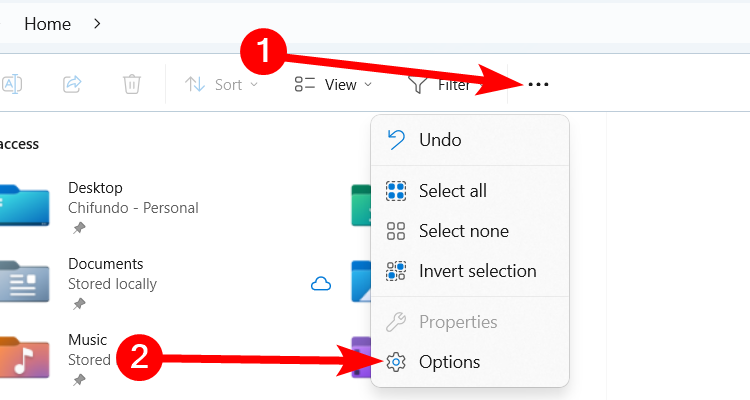
To disable ads in File Explorer, press Win+E to open File Explorer, click the three-dot icon in the top menu, and select “Options” to open Folder Options.
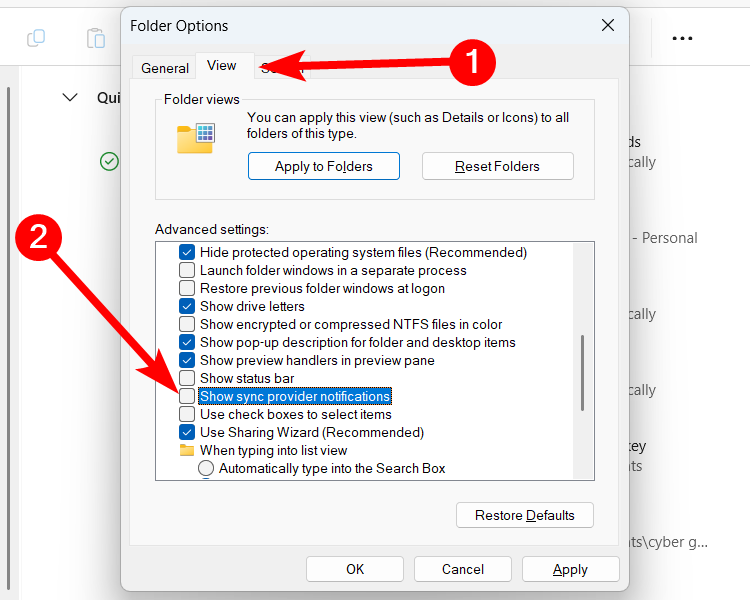
Select the “View” tab, uncheck “Show Sync Provider Notifications,” and click the “OK” button.
These default Windows 11 settings can impact your user experience, but fortunately, they are easy to change. You only need a few minutes to tweak them to create the Windows environment you want. I encourage you to explore more settings and make changes that suit your specific needs.


