Creating manual minutes in meetings can be a stressful and laborious task. That’s true until you discover that you can automate the whole process. Wave goodbye to hammering away on your keyboard in the corner of the room, and say hello to automated note-taking in Microsoft Word.
As someone who has been asked to take minutes in dozens of meetings over the years, it would be remiss of me not to share the best ways to save time and make professional, accurate, and consistent meeting notes.
Use or Create a Template
You should never use a blank document to create your meeting minutes, as it will take more time to format the notes before you distribute them, and it’s more difficult to achieve consistency each time you create a document for a new meeting. Instead, use or create a template.
Using an Existing Template
There are dozens of ready-made meeting minute templates available for free in Word for the web, and there are yet more options if you’re using the desktop app. The benefit of using Word’s templates is that everything is ready to go, a real time-saver if you’re working with tight deadlines. However, some templates may not contain every section you need, so they may require minor adjustments and additions.
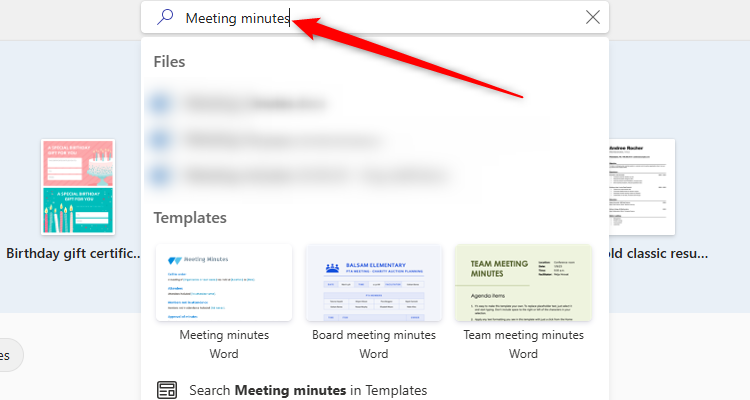
To access these in Word for the web, type Meeting Minutes into the search bar, and press Enter.
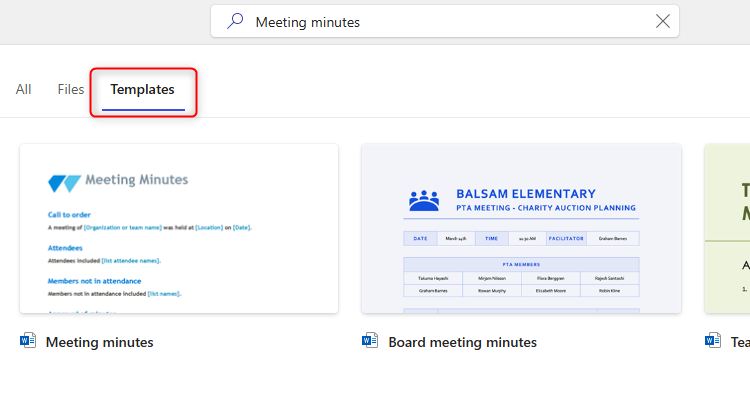
Then, click the “Templates” tab to see the many options available.
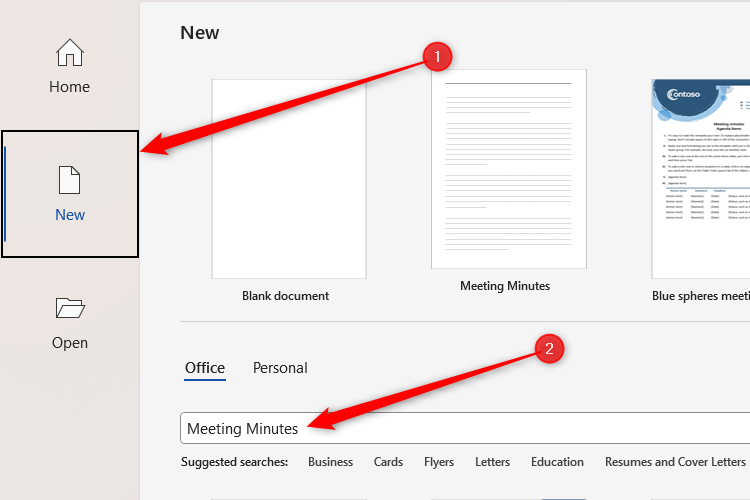
To do the same in the Word desktop app, click “New,” type Meeting Minutes into the search bar, and press Enter.
Creating Your Own Template
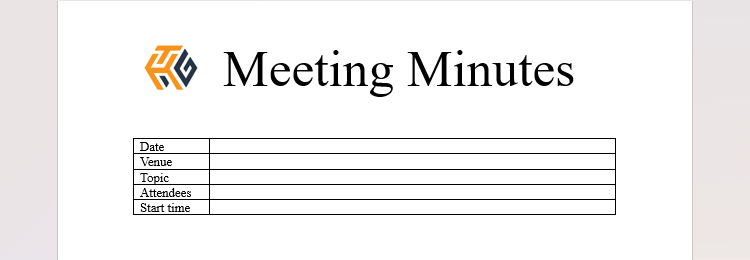
There are many benefits of creating your own template for minutes—you can choose a structure that suits the typical meetings you are minuting, have your logo imprinted on your document, and reuse certain sections. What’s more, when you distribute the minutes, your colleagues will be familiar with your layout, so they know where to look for important items.
Creating a new template can take time, so make sure you do this in advance of your first meeting. Open a blank Word document, and design your template according to your requirements.
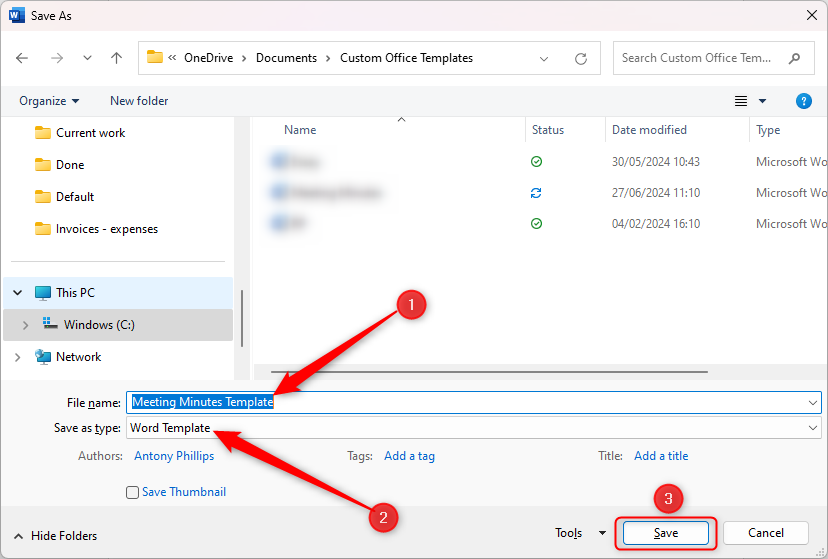
Then, to save this as a reusable template, press F12, name your template, and change the Save As Type to “Word Template.” When you click “Save,” the template will be saved in a dedicated template folder on your computer (and your OneDrive if you have it set up).
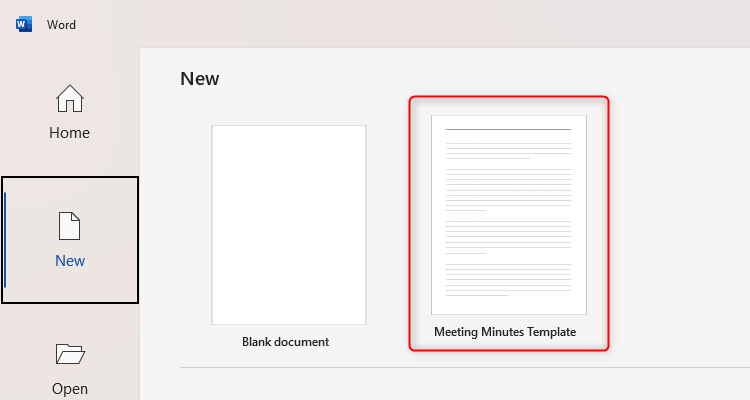
The template will now be available when you open a new Word document.
If you cannot see the template in the section shown in the screenshot above, click “Personal” in the pane below, and the template will be there for you to use.
Record in Word or Upload an Audio File
Before I learned about Word’s dictation tool, I used to type minutes manually. Doing this caused several issues—I couldn’t type quickly enough to capture some important details, my noisy typing annoyed colleagues, and I couldn’t contribute to discussions as I was so focused on getting everything down.
Then, I discovered a way to capture everyone’s comments automatically, a feature that works in both Word for the web and the Word desktop app. What’s more, this method distinguishes between different voices, so you don’t have to waste time typing contributors’ names.
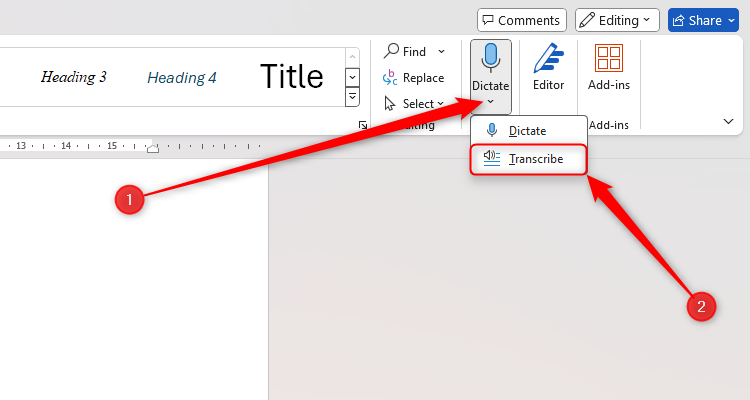
In the Home tab on Word’s ribbon, click the “Dictate” drop-down arrow and choose “Transcribe” to launch the Transcribe pane.
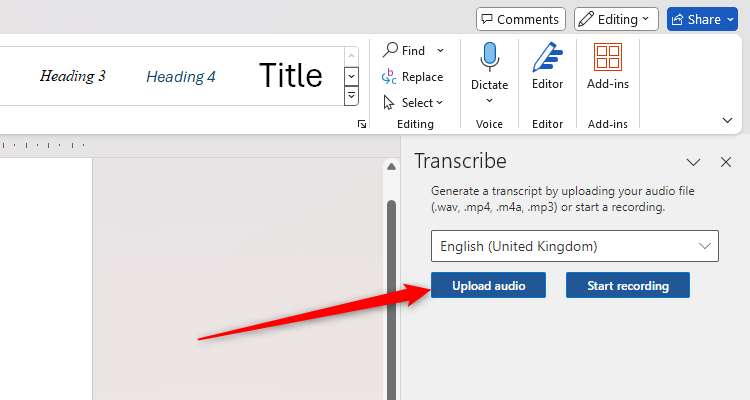
From here, you can either upload a pre-recorded audio file or create a new recording within Word itself. Let’s look at each of these options.
Uploading an Audio File
This is my preferred way of capturing comments in meetings. It’s handy to be able to use a dictaphone that can produce higher-quality recordings and is more portable than a laptop’s microphone or a device connected to a computer. It also means you can dedicate a specific time slot in your busy schedule to uploading the data and distributing it to those who need it.
To do this, click “Upload Audio” in the Transcribe pane.
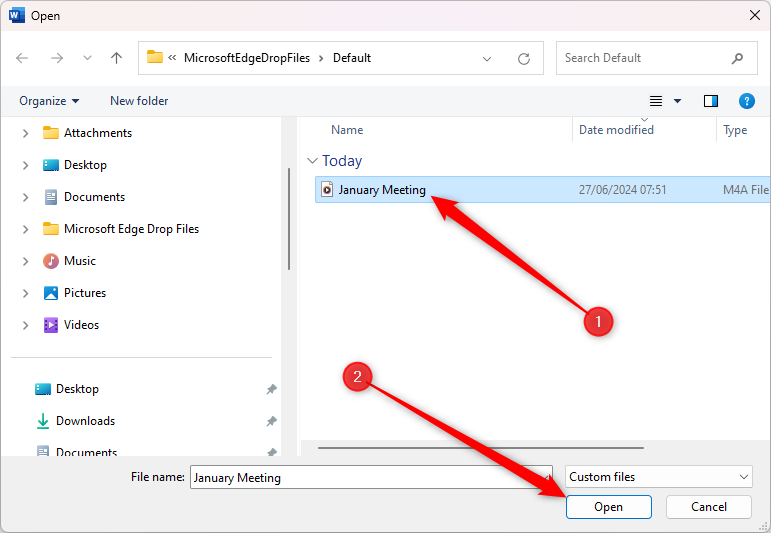
Locate the audio file and click “Open.”
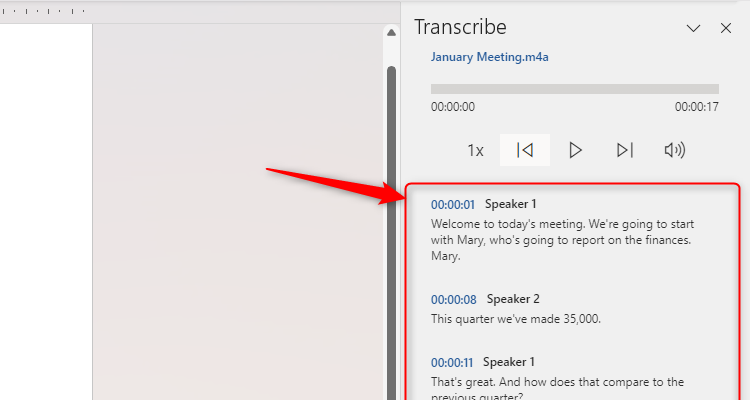
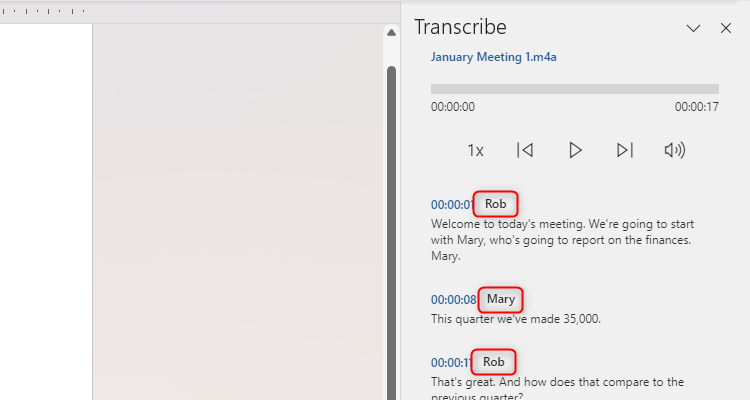
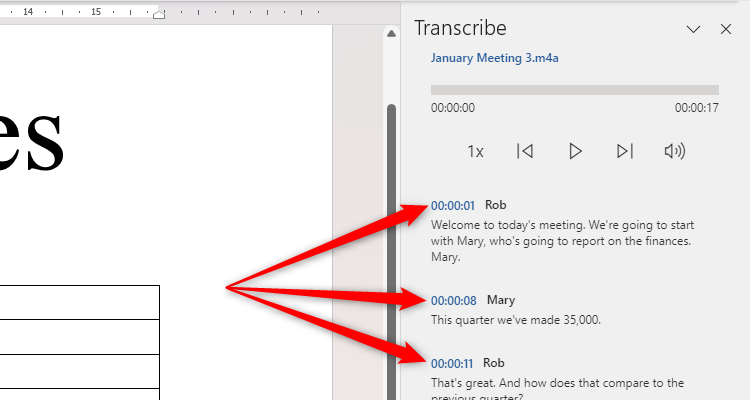
Depending on the size of the file, it may take a few minutes to upload to Word and produce the transcript. However, this automation process saves significant time in your workflow. Once the process is complete, you will see the transcription in the Transcribe pane.
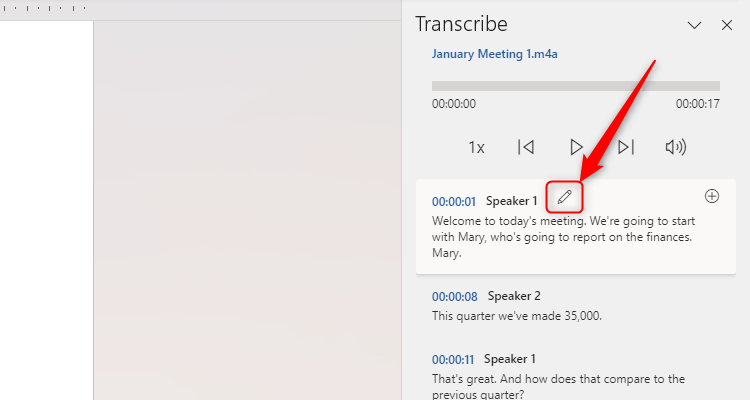
Take a moment to amend the speakers’ names so it’s clear who said what. To do this, first click the pencil icon next to one of the speakers.
You can also click the pencil icon to amend the transcribed text within the Transcribe pane.
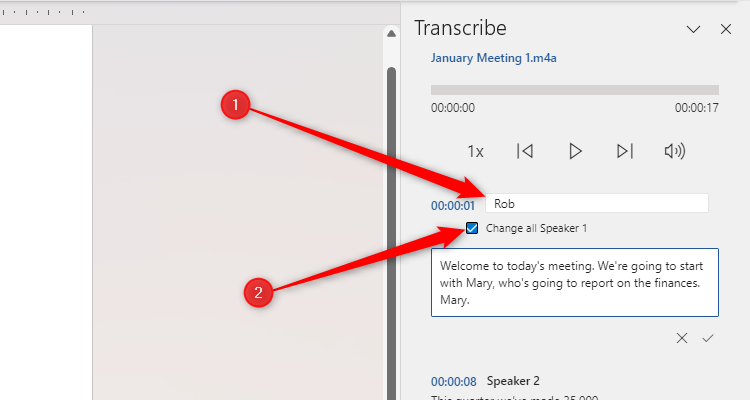
Then, change the person’s name, check the “Change All Speaker 1” checkbox, and click the tick icon under the transcription box.
This will then amend all instances of speaker 1 within the transcript to represent the person who spoke, and you can then repeat the process for the other speakers.
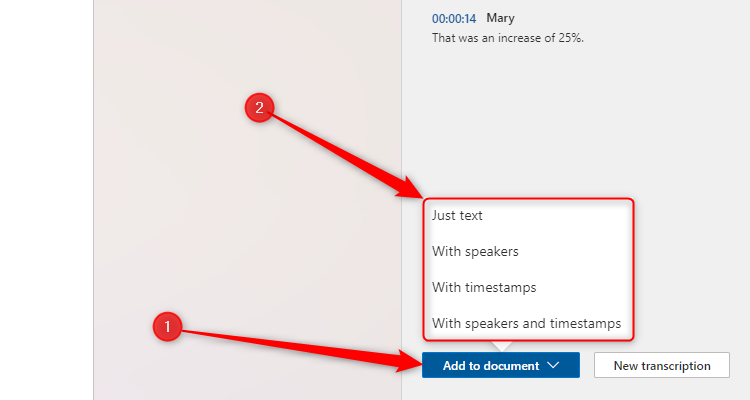
Now, click “Add To Document,” and choose which elements of the transcription you want to include in your minutes.
If you prefer to present a minimized set of minutes from your meeting, insert individual contributions by clicking the “+” icon next to each line of speech.
Recording in Word
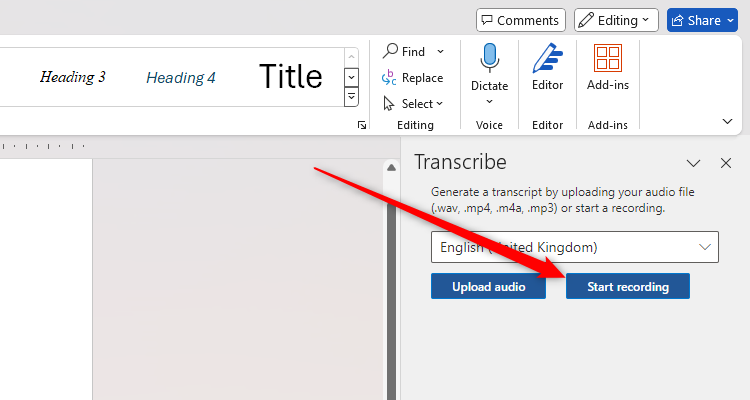
Alternatively, if you prefer to do everything in one place, you can conduct your recording within Microsoft Word itself by clicking “Start Recording” in the Transcribe pane.
Then, follow the same processes to amend the speakers’ names and insert the comments into the document.
Set up AutoCorrect for Shorthand Typing
Whether you type the minutes manually or use Word’s dictation tool, adjusting your AutoCorrect is guaranteed to save you time and ensure consistency. Contrary to what its name suggests, AutoCorrect isn’t only about correcting mistakes—you can also set it up to expand your shorthand typing.
For example, in the tech industry, we often talk about AI, but we might want this to be presented as the more formal “artificial intelligence” in our meeting minutes. Similarly, in education, the frequently used term “special educational needs coordinator” takes time to type, whereas typing the acronym SENCO is much quicker.
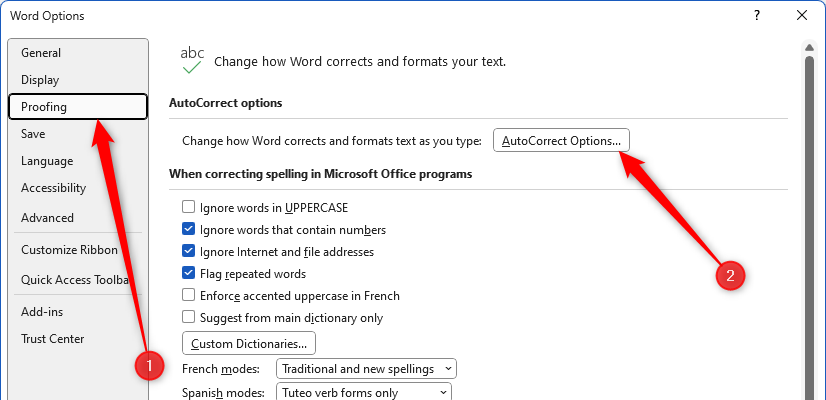
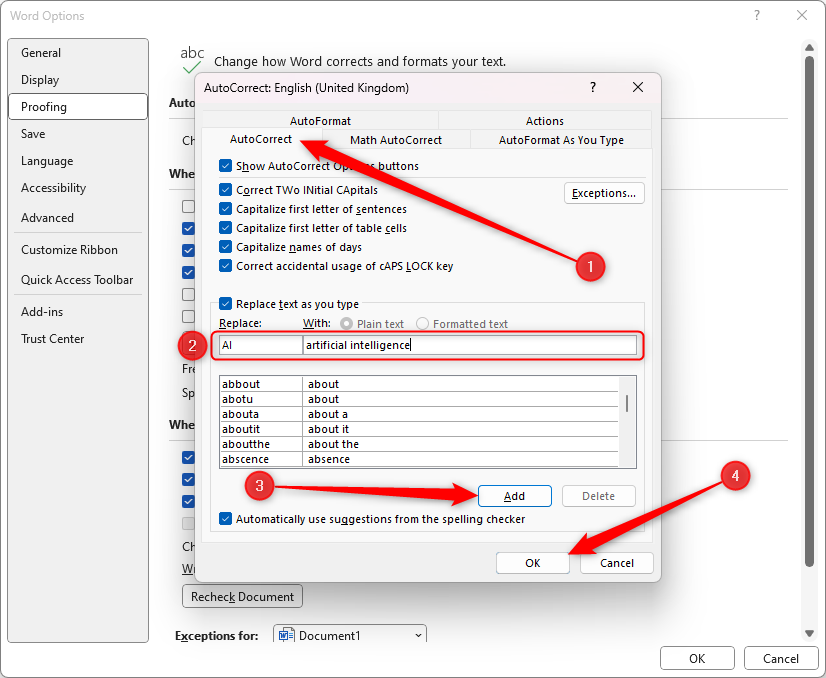
To set these up, click File > Options, and open the “Proofing” tab in the Word Options window. From there, click “AutoCorrect Options.”
Open the “AutoCorrect” tab, and use the table at the bottom of the AutoCorrect window to set up your shorthand conversions. Click “Add” for each new rule you set up, and click “OK” when you’re done.
This should be the case by default, but double-check that “Replace Text As You Type” is checked.
You can then use these shortcuts when typing or editing the meeting minutes before distribution.
Format the Minutes
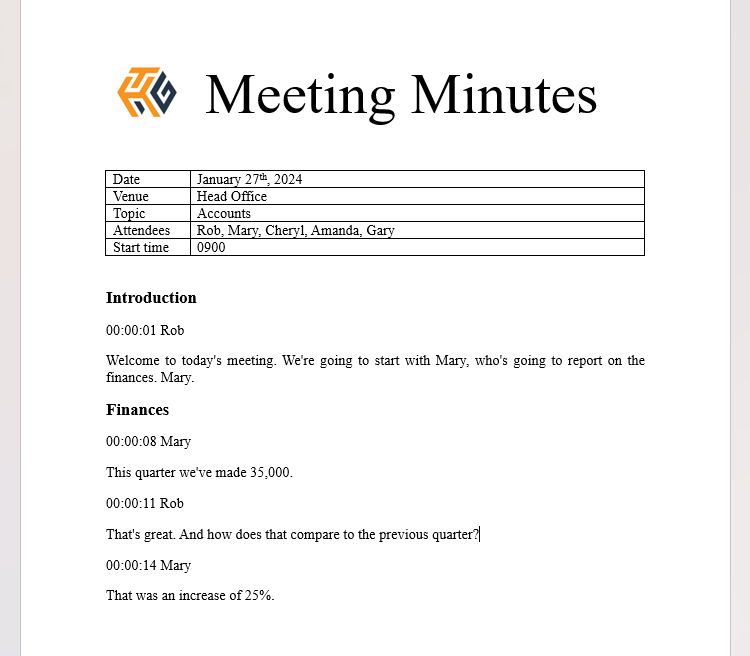
Now that you have the completed meeting transcript, you’re ready to edit its content. Word is great at transcribing different languages, accents, and dialects into text automatically, but if someone coughed during someone’s contribution or a noisy plane went by outside, there may be some minor discrepancies. You might also want to remove any non-verbal utterances, such as fillers, and address any overlaps so that the document reads coherently and professionally. Nevertheless, editing the transcript will certainly take less time than typing the whole thing manually, so bear this in mind as you make the necessary changes.
If you need to hear any of the comments again, click one of the timestamps in the Transcribe pane.
You can now decide whether to use the full verbatim transcript or edit the meeting minutes so that the document summarizes the key points. Either way, use the agenda (which is usually published before the meeting begins) to divide the minutes into headed sections to make for easier reading.
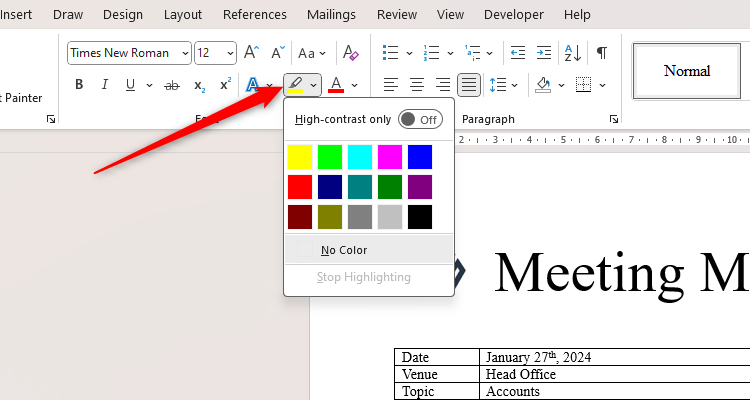
Finally, use Word’s highlighter tool to emphasize any important notes within the minutes. I like to use yellow for action points and green for deadline dates.
Save the Minutes as a PDF
Now that you have a completed set of formatted, timestamped, professional minutes from your meeting, you’re ready to share it with those who attended and anyone else who would benefit from accessing it. The best option is to save the document as a PDF, so that it cannot be amended and remains an accurate record of what was discussed.
To do this, with your Word document open, press F12, choose a suitable location, give the document an appropriate name, and change the “Save As Type” field to PDF.
If you want to give people access to the audio file alongside the transcribed minutes, save and share the document as a Word document, rather than as a PDF. The recipients can then open the Transcribe pane and access the recording using the same methods you did to create the minutes.
Whether creating minutes, typing an essay, or writing a letter, before starting work in Word, you should always take a few moments to prepare the document, so that everything you type is presented exactly how you want it to be.


