The major upgrade for Apple Maps with iOS 18 is topographic hiking trails (same with iPadOS 18, watchOS 11, and macOS Sequoia). New features include detailed planning and guidance for custom hikes, the ability to save the maps offline, elevation details, and more. Here’s how to use Apple Maps topographic hiking trails.
Apple has been expanding Maps and navigation features over the years with capabilities like cycling routes, more transit choices, wayfinding, and more.
Now for 2024, the upcoming fall software updates bring a handy new feature for hikers and runners.
Support for the new topographic hiking trails is available now in the beta releases when searching national parks as well as for other marked trails/trailheads in Apple Maps.
How to use Apple Maps topographic hiking trails
You can create custom topographic hiking trail maps on iPhone, iPad, or Mac and use them on iPhone and Apple Watch
- Make sure you’re running the iOS 18 beta, watchOS 11 beta, or macOS Sequoia beta (full guide)
- Open the Apple Maps app on iPhone, iPad, or Mac
- Search for a trail or trailhead or a national park (all 63 US national parks are supported for topographic trail details)
- Look for the Trailheads/Trail button in the search results > choose a trail or trailhead
- Tap the new Plan a Hike button
- Tap on the screen where you’d like to go
- You’ll see the distance and elevation change
- Now you can choose to Reverse the hike, create an Out & Back map, or Close Loop
- When you’re all set, choose Save to keep the route
- You can give a custom name, now tap Done in the top right corner (topographic hike trail maps are automatically saved to your iPhone for offline use)
- Now you can tap Directions to use the guidance
- Find your saved trail maps by tapping your profile picture in the Maps app > Offline Maps
Here’s how it looks to use Apple Maps topographic hiking trails on iPhone:
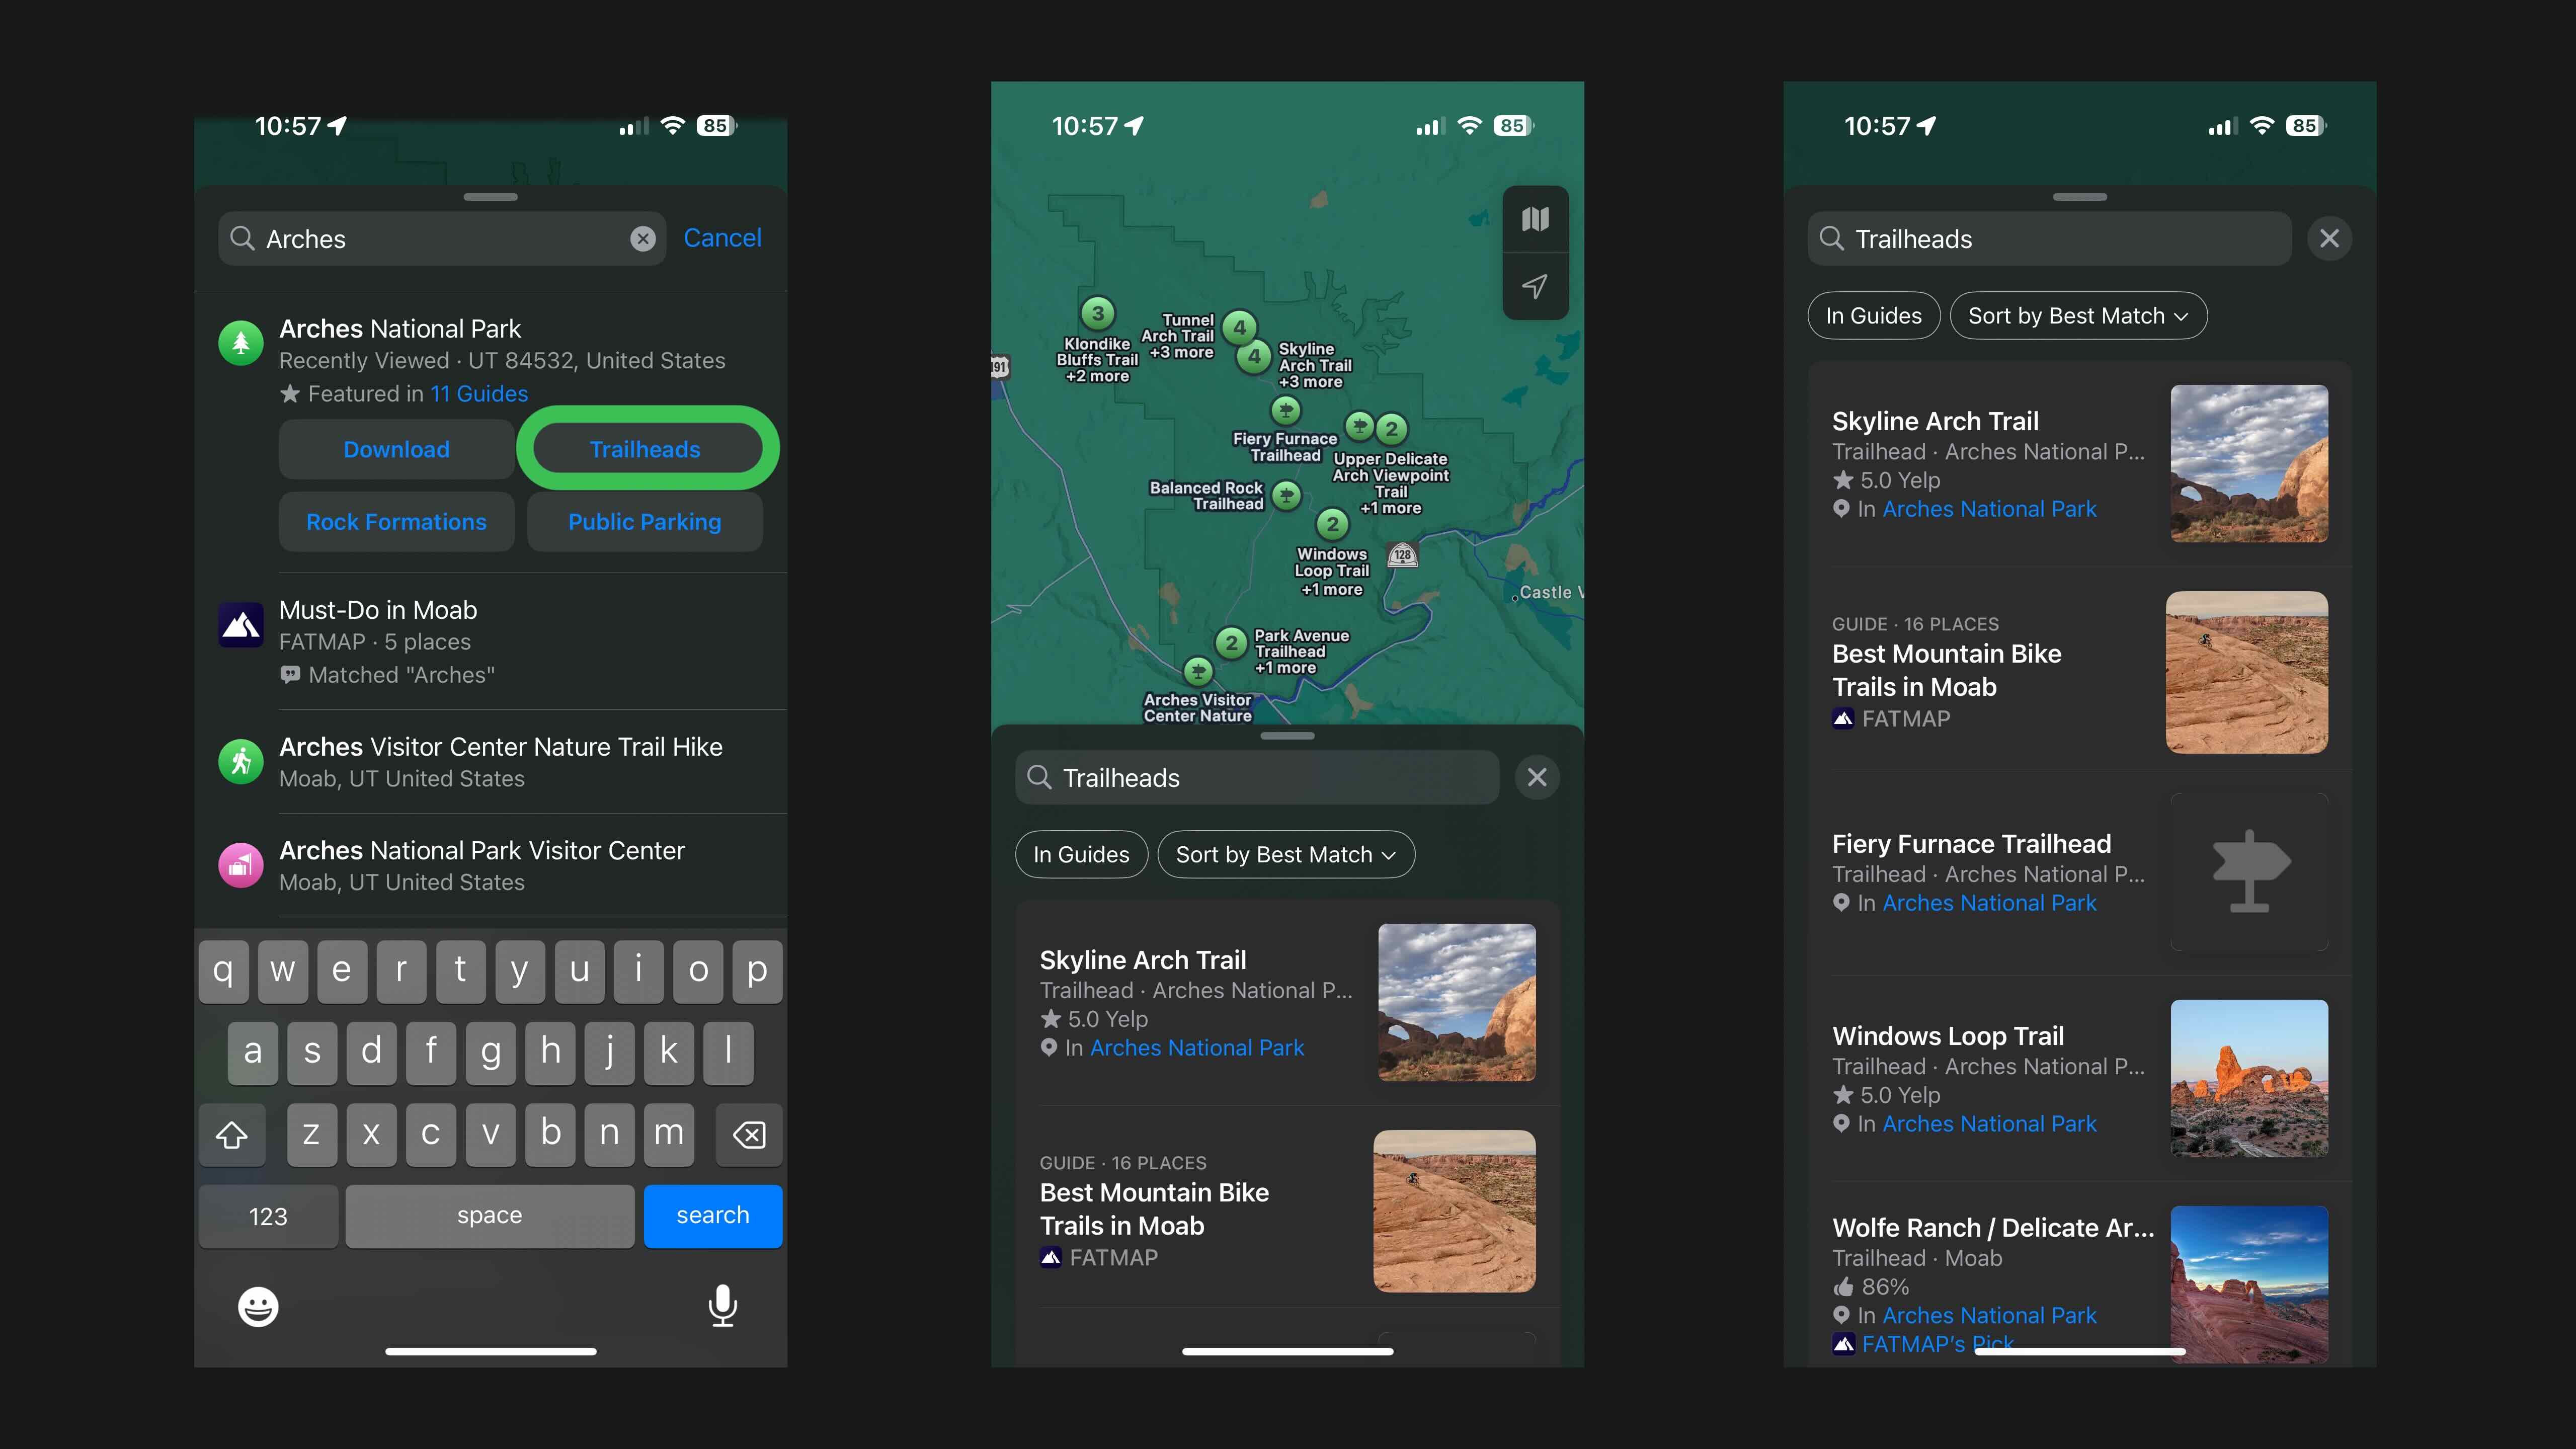
Apple includes Yelp ratings for trails.
Here’s how it looks to choose a trail and plan a custom route. Tip: after tapping “Plan a Hike” zoom in on the map to more easily plan your route.
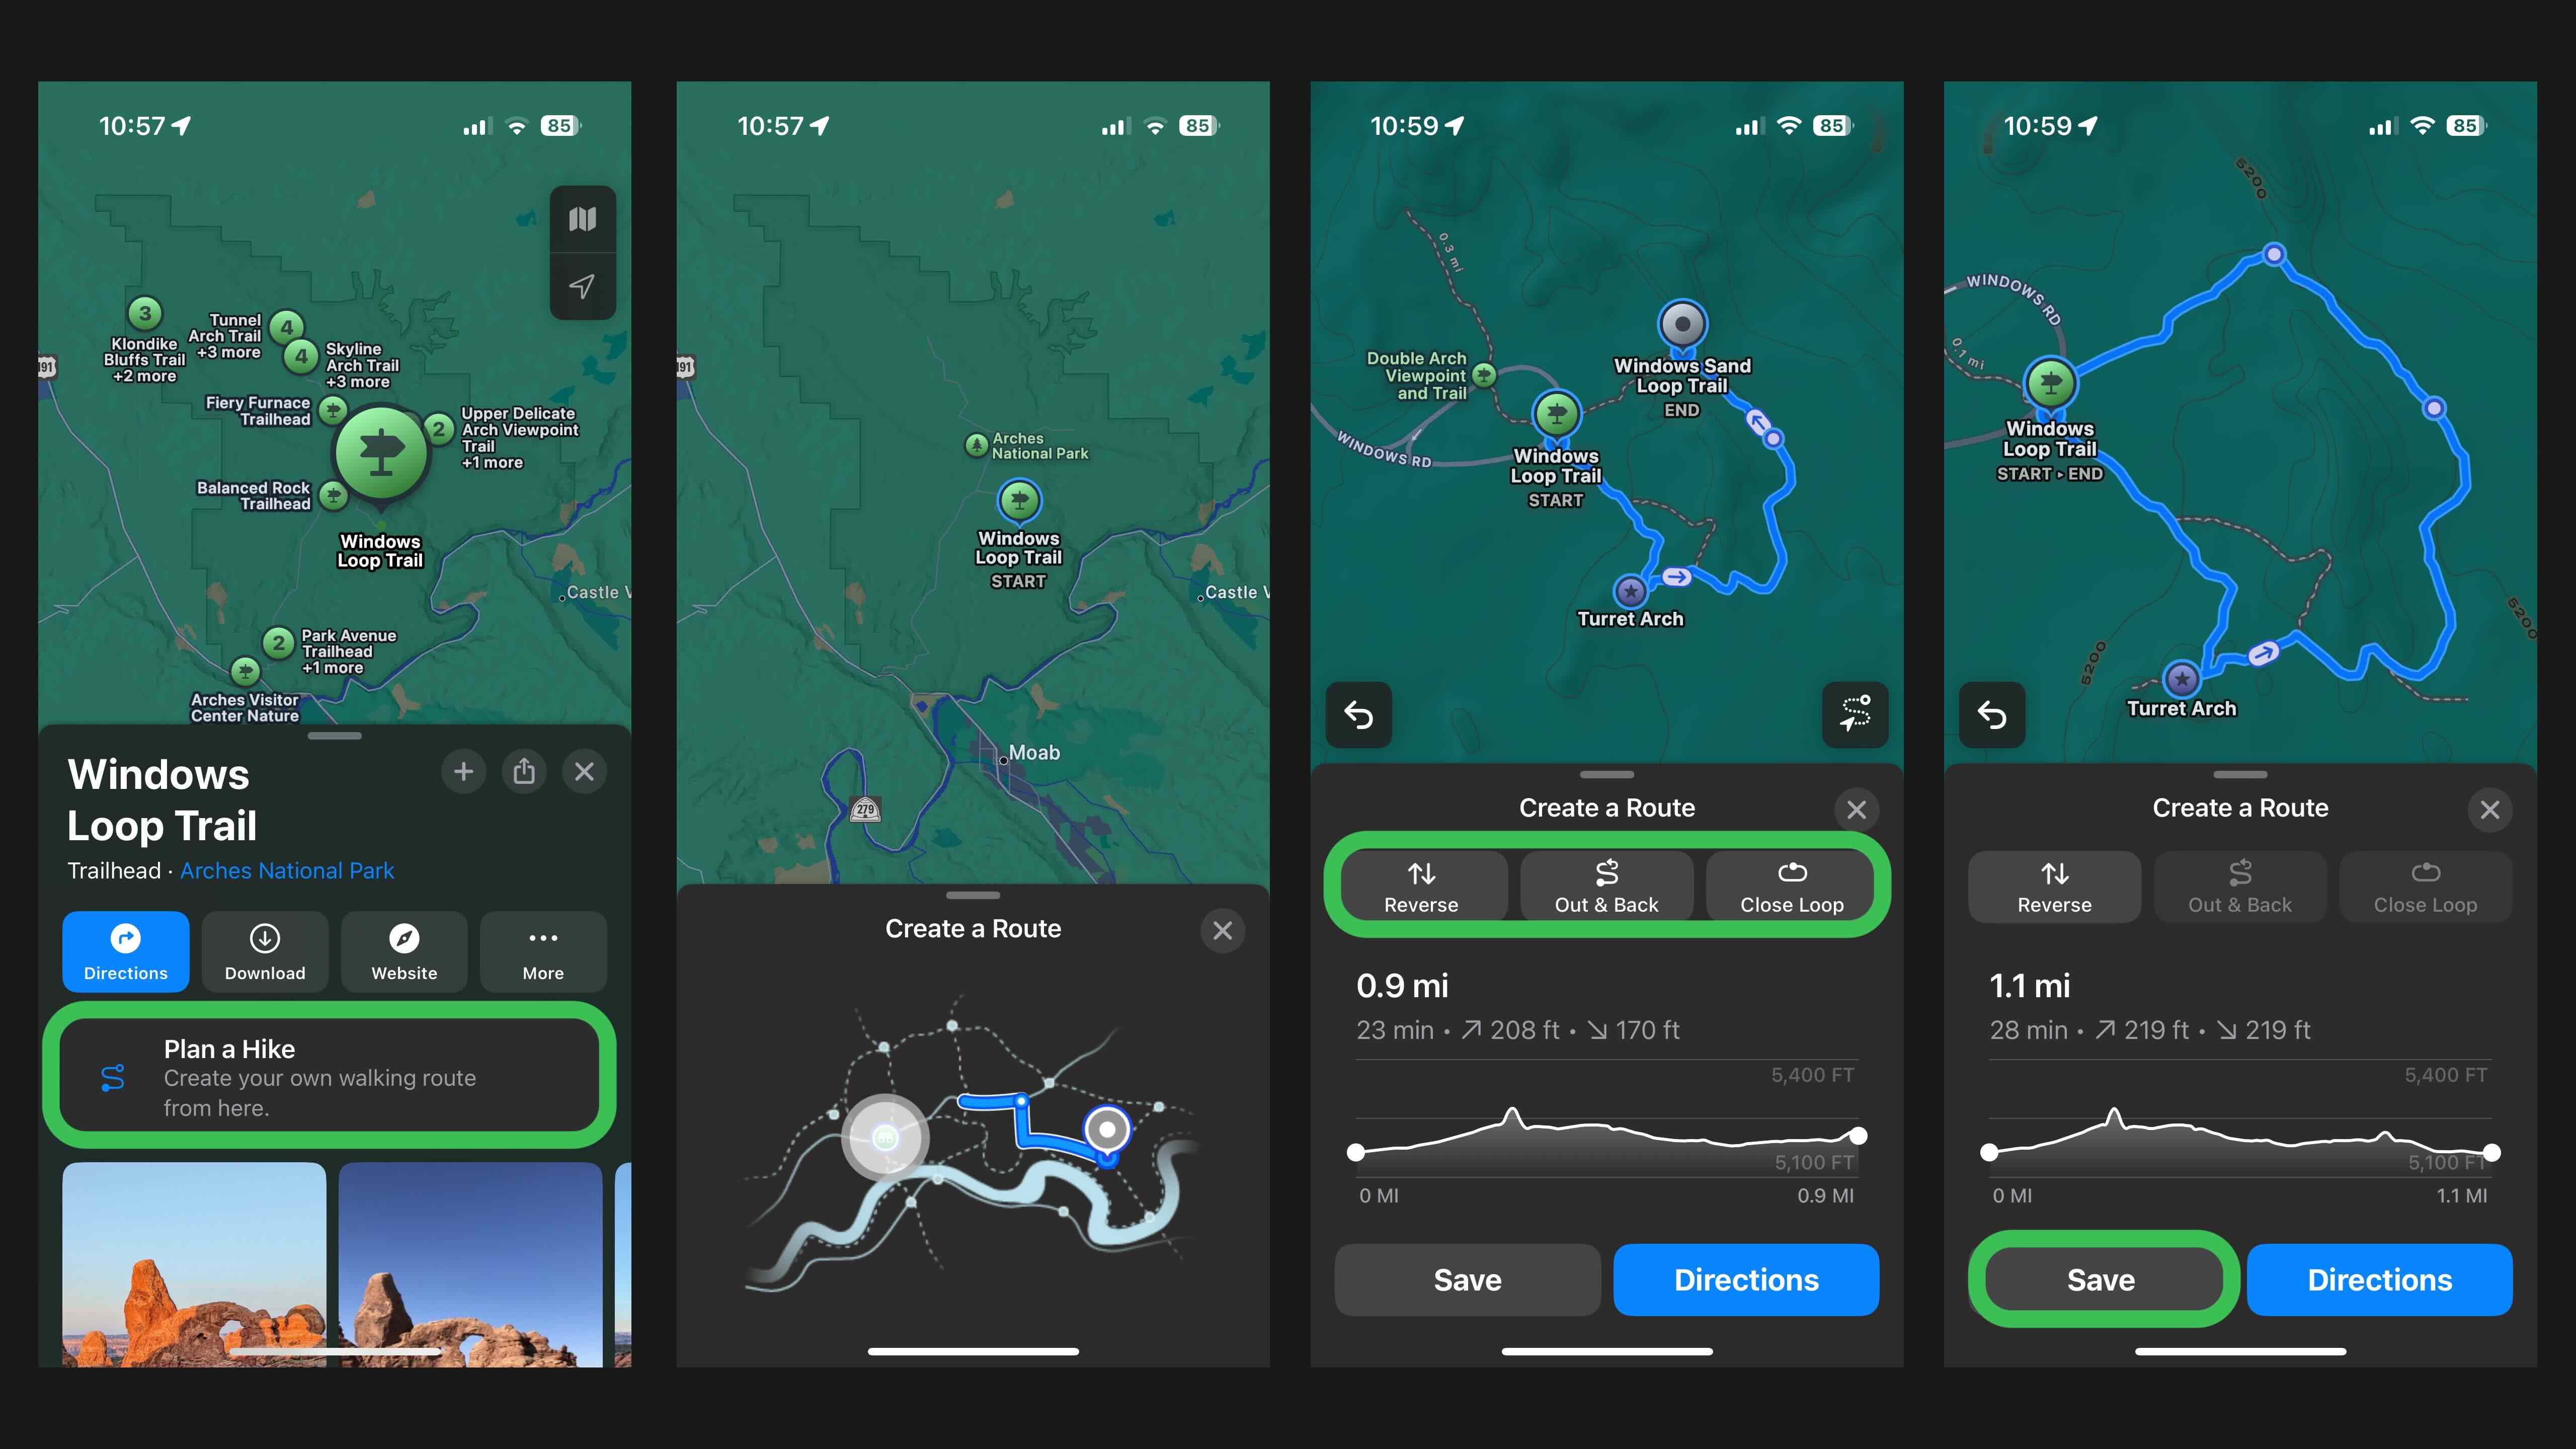
Shown above, you can see the total distance, estimated hike time, elevation change, and some buttons to more easily create your route.
After hitting the Save button, you’ll see a notification that the route/map has been saved for offline use.
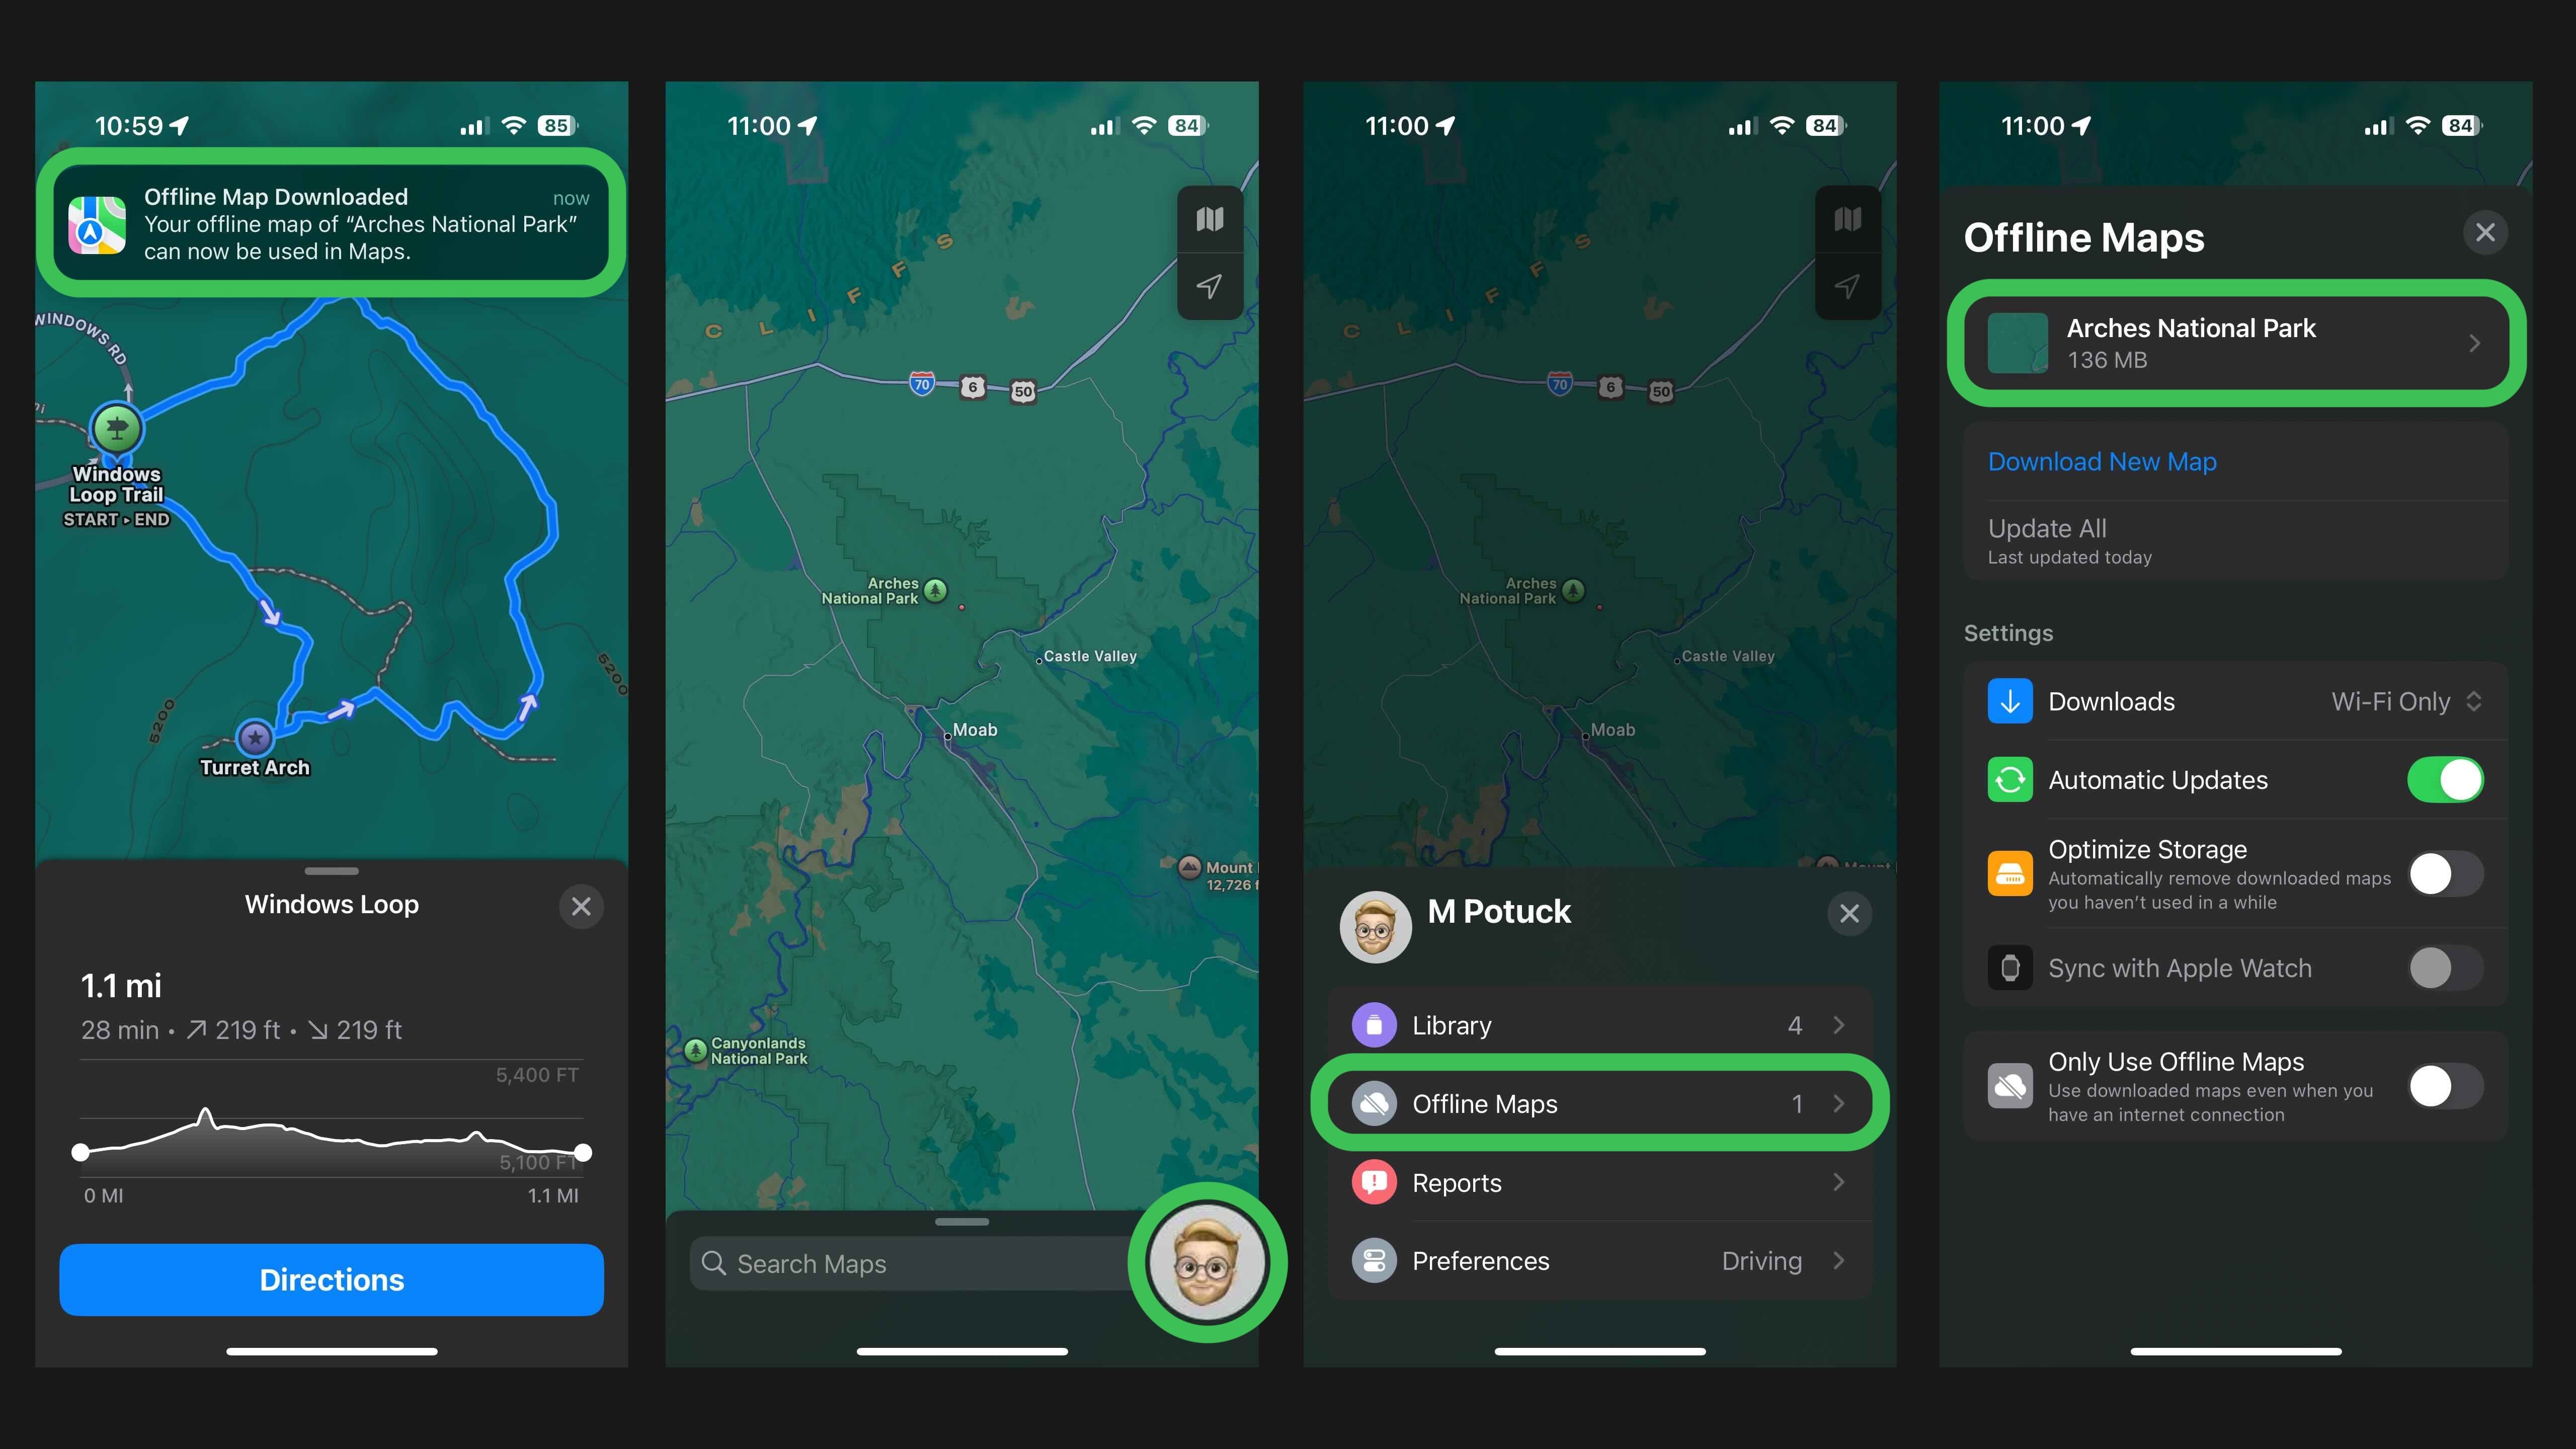
Tap your profile picture > Offline Maps to get back to your saved routes/maps.
Are you excited to use the new Apple Maps topographic hiking trail feature? Share your thoughts in the comments!
Apple Maps also gets upgrades like quick access to saved places and the ability to take personal notes.
More on iOS 18:
FTC: We use income earning auto affiliate links. More.