Microsoft Word offers many ways to save time when creating or editing documents. From shortcuts and templates to AutoCorrect and add-ins, let’s look at some tricks that can speed up your workflow when using Microsoft Word.
1 Learn the Shortcuts
Like any other computer program, Word has many shortcuts that allow you to quickly perform common actions without opening a menu. Shortcuts reduce the number of mouse clicks, which can significantly make you faster.
Here are some of the most popular Microsoft Word shortcuts that you need to learn:
|
Shortcut |
Action |
|---|---|
|
Ctrl + C |
Copy the selected text. |
|
Ctrl + V |
Paste the selected text. |
|
Ctrl + S |
Save the document. |
|
Ctrl + Z |
Undo the last action. |
|
Ctrl + Y |
Redo the last action you undid. |
|
Ctrl + B |
Bold the selected text. |
|
Ctrl + I |
Italicize the selected text. |
|
Ctrl + F |
Find text within the document. |
|
Ctrl + K |
Insert a hyperlink. |
|
Ctrl + P |
Print the document. |
Microsoft Word has tons more shortcuts that help with editing, navigating, formatting, and inserting things.
2 Create Your Own Templates
Do you regularly create documents with the same styles, formatting, designs, and layouts? You can save yourself lots of time by turning them into templates.
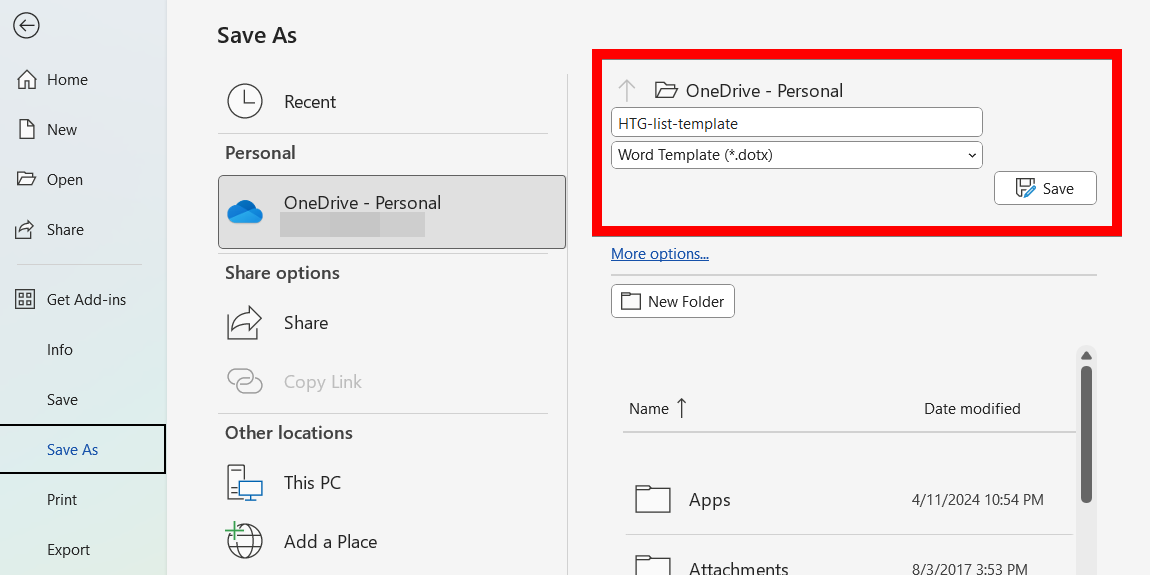
To do that, open the document you want to save as a template and click File > Save a Copy. On the right, give the document a name, set the dropdown to “Word Template (*.dotx),” and then click the “Save” button.
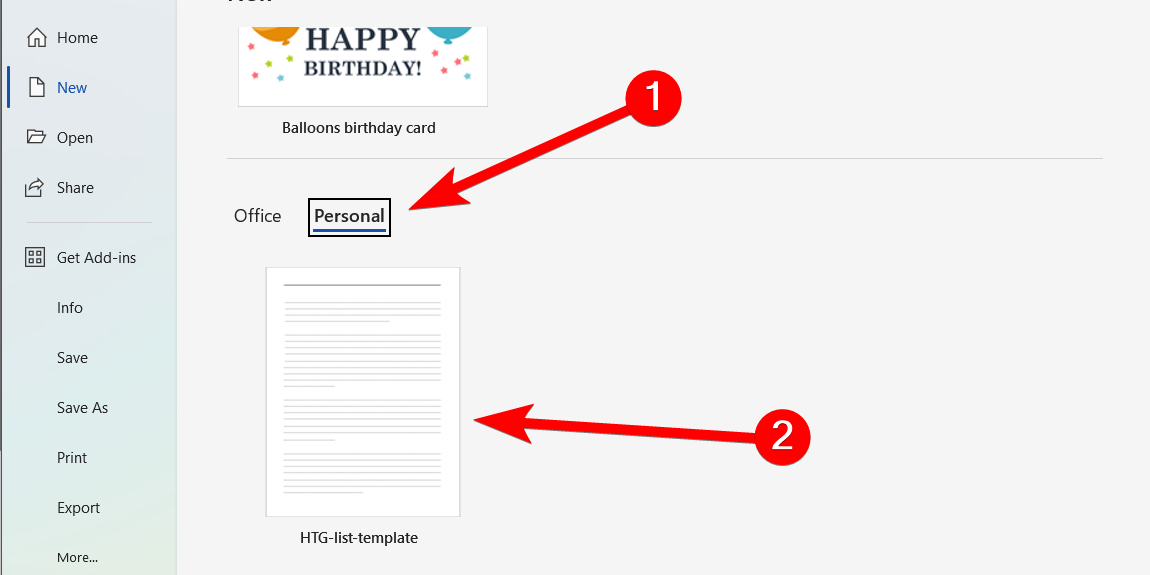
You can select the custom template like any other when creating a new Word document. Just select the “Personal” tab and click the template—it will open as a new document in Word.
3 Use Smart Lookup
There’s no need to switch applications when you want information about a word or phrase in a Word document. You can use Smart Lookup to search for what you need to know.
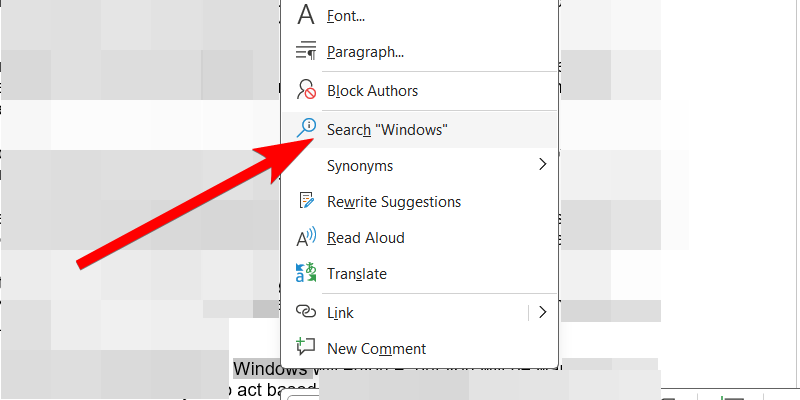
To do that, highlight a word or phrase, right-click it, and click “Search ‘Word/Phrase'” in the menu.
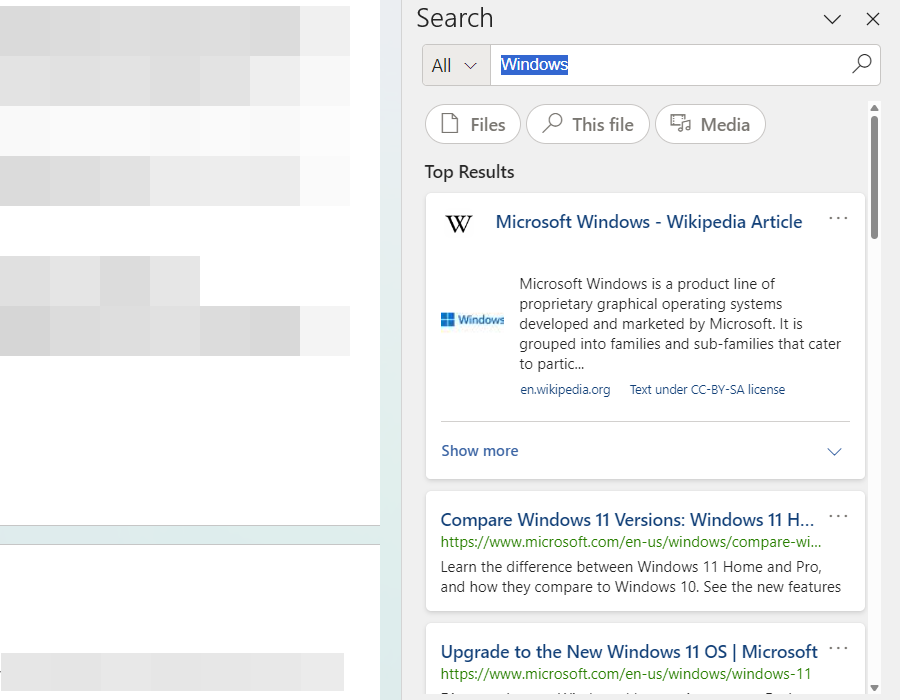
A panel will appear on the right with the search results, allowing you to dig deeper into what you searched for.
4 Learn to Use the Format Painter
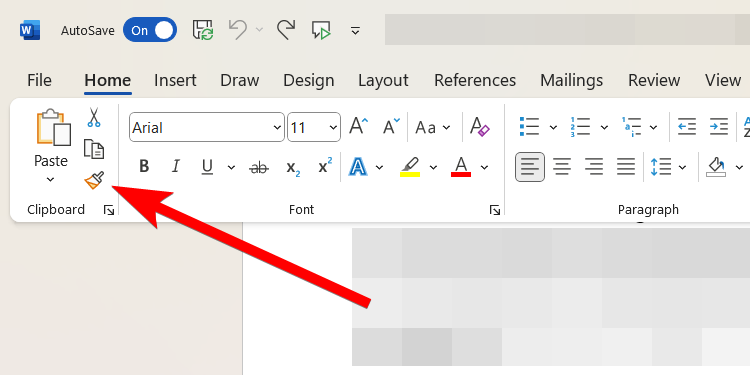
If you want to apply formatting from one section to another, you don’t have to recreate it from scratch. The Format Painter can save you a lot of time by copying and pasting it where you need it.
To use it, place your cursor on the text with the format you want to copy. Then, select the “Home” tab and click the “Format Painter” button—the brush icon—in the Clipboard group on the ribbon. You will notice that your cursor will now have a brush icon next to it.
Next, highlight the text you want to apply the format to, and that’s it. However, when you apply the formatting, the Format Painter becomes inactive. That means you need to repeat these steps to copy and paste the formatting again.
If you want the Format Painter to remain active, allowing you to apply the formatting to multiple sections, double-click the “Format Painter” button instead of single-clicking it.
5 Enable the Navigation Pane
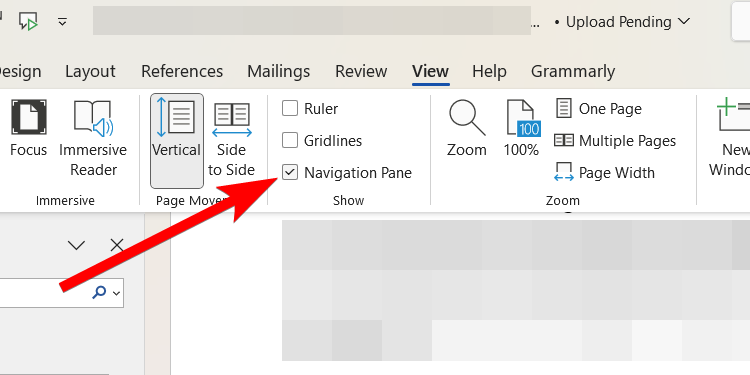
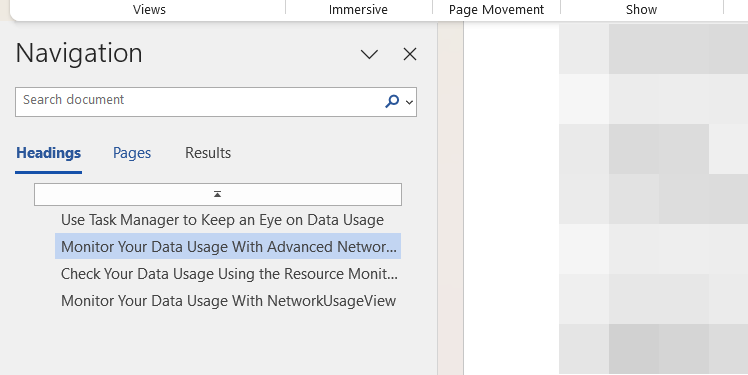
The Navigation Pane in Microsoft Word provides an overview of your document. This allows you to quickly jump to sections and search within the document. You can also reorganize the headings within the pane by dragging them to different positions.
To enable the Navigation Pane, select the “View” tab and tick the “Navigation Pane” checkbox in the Show group of the ribbon.
The Navigation Pane will appear on the left, ready for you to use.
6 Create Custom Shortcuts With AutoCorrect
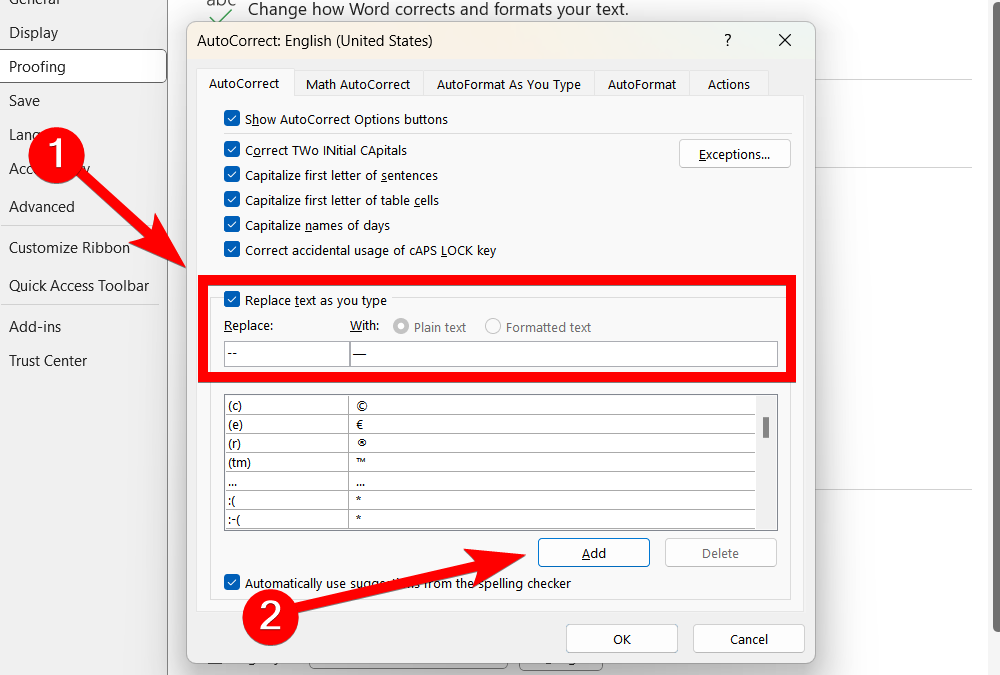
AutoCorrect can easily correct most misspelled words as you type. But it can also help you create custom shortcuts for frequently used words, phrases, and symbols. For example, if you use the em dash (—) regularly, you can make it so that whenever you type two hyphens (–), AutoCorrect replaces them with it.
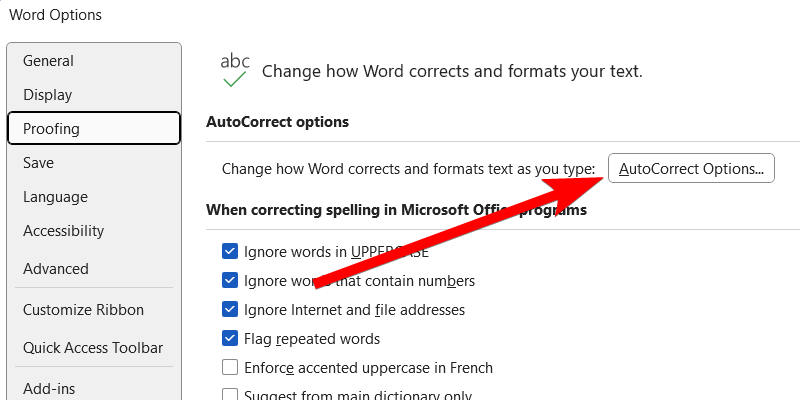
To do that, head to File > Options > Proofing and click the “AutoCorrect Options” button.
In the “AutoCorrect” tab, ensure the “Replace Text as You Type” checkbox is ticked. In the textbox under “Replace,” enter the word, phrase, or symbol you want to be replaced. In the textbox under “With,” enter the shortcut that replaces it. Then, click the “Add” button to include it in the AutoCorrect list.
Click “OK” to close the dialog box. From now on, when you type that shortcut, AutoCorrect will replace it accordingly.
7 Install Productivity Add-Ins
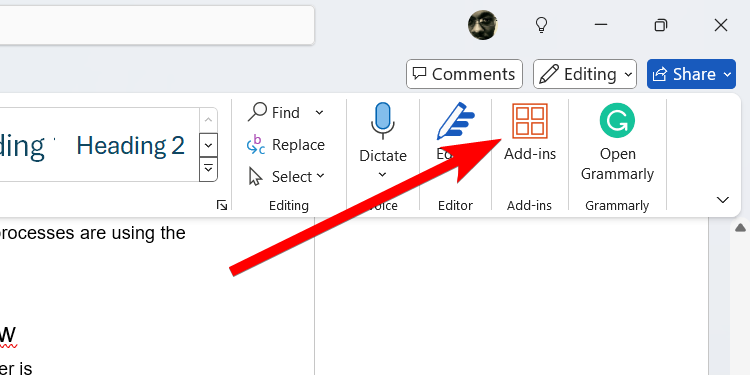
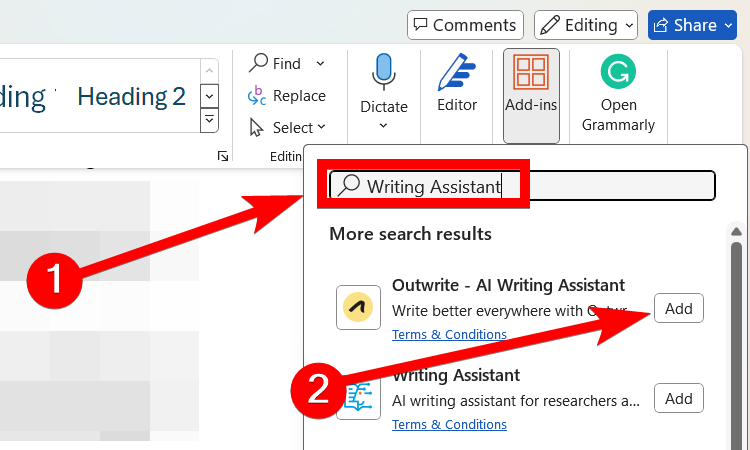
Installing add-ins in Microsoft Word can add new features that streamline your workflow or automate repetitive tasks. To install an add-in in Microsoft Word, select the “Home” tab and click the “Add-Ins” button in the Add-Ins group of the ribbon.
Search for the add-in you want in the pop-up and then click the “Add” button next to it when it appears in the list.
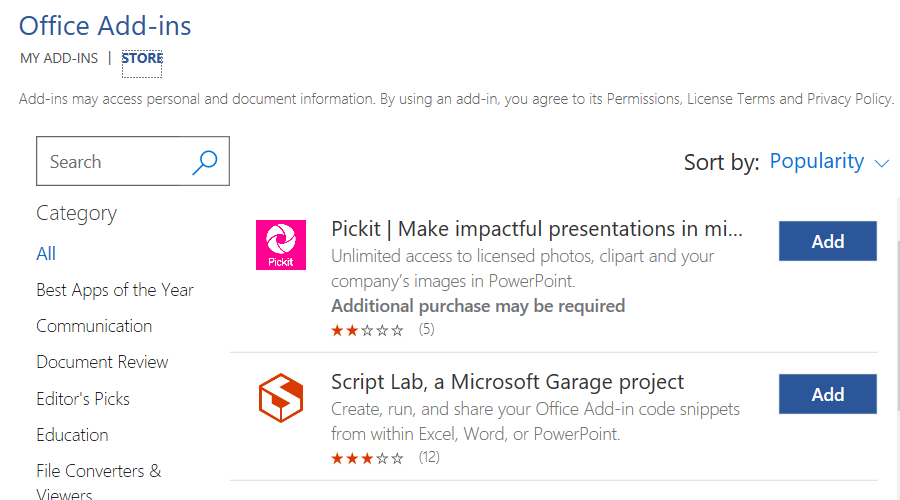
If you want to explore the add-ins available for Microsoft Word, click the “More Add-Ins” button in the bottom-right corner of the pop-up window. This will open the store, where you can search for add-ins by category or using filters.
8 Use Real-Time Collaboration
If you want to work with others on a Word document, you no longer have to send them a copy and manually merge the changes to the main document after they edit it. You can use OneDrive for real-time collaboration (provided everyone has a Microsoft account). If they don’t, they can easily create one on the Microsoft website.
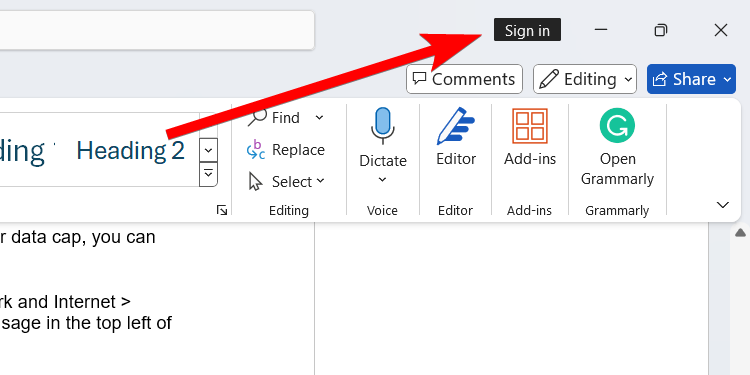
First, you need to sign in to your Microsoft account in Word. To do that, click “Sign In” in the top-right corner of the screen, and then follow the prompts to log in.
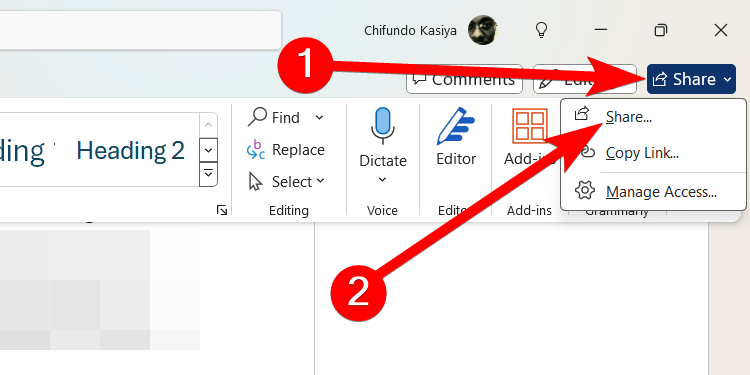
To add someone to a document, click the “Share” button in the top-right corner and click “Share” again in the menu.
Select the OneDrive account you want to upload the file to, give the document a name, and then click the “OK” button.
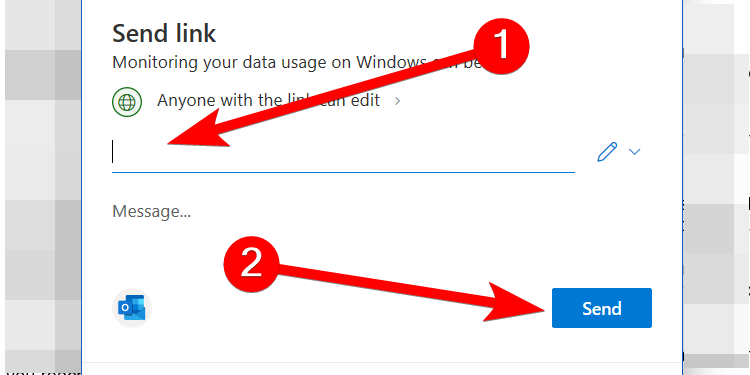
In the dialog box, enter the email addresses of the collaborators, and then click the “Send” button.
9 Use the Word Mobile App When On-the-Go
You no longer need access to a computer to create and edit Microsoft Word documents. You can easily download the mobile app and do that anywhere. If you save the document on OneDrive, you can access it on the app and the changes you make will be synced automatically, allowing you to pick up where you left off when you return to the desktop version.
You can download the Microsoft Word app for Android and iOS from Google Play and the App Store, respectively.
There are many more time-saving tips for Microsoft Word that we can’t possibly fit all of them in one guide. For instance, you can also customize the Quick Access Toolbar to place frequently used commands within reach.
Also, if you want to significantly speed up your writing, consider adding Copilot Pro to Microsoft Word. This AI can help you write, rewrite, and summarize documents quickly, which can significantly enhance your workflow and productivity.


