Alternative text (or alt text for short) is a short description of a graphic that helps people with visual impairments fully understand the content of what’s on their screen. Screen readers read alt text aloud, meaning those who can’t see the details of the graphic still know what it contains.
Alt text isn’t only used on graphics in Microsoft 365’s programs. For example, images on a website or social media post are more accessible when alt text is added to them.
How to Write Alt Text
Some Microsoft 365 programs generate alt text automatically based on what they recognize in your graphic. While these can be a good starting point, they don’t completely fit the bill and often need some tweaking.
Since alt text is read aloud, it should read as if you were describing the contents of the image or other graphic over the phone in a way that would help the other person understand and contextualize it. If you follow these tips, your alt text will work well:
- Make sure you use plain English, like “A picture of a dog sitting on a grassy field.” Don’t overcomplicate your language, but also avoid being too brief.
- Use full sentences with correct spelling and grammar, especially since alt text sometimes appears instead of a graphic if it doesn’t load.
- Avoid repeating sentences written in your main content or as alt text for other graphics (unless totally unavoidable). Remember that screen readers read everything on a screen, so repeated phrases could hurt the experience of people using them.
- You don’t need to add alt text for decorative graphics that don’t add any informative value to the file. Doing so would only waste the reader’s time and unnecessarily overload them with needless content.
- If you’re not sure that what you’ve written works, read it to someone who hasn’t seen the graphic before showing it to them. Ask them how closely the graphic matched what they expected to see from what you read out.
You can add alt text to shapes, pictures, charts, SmartArt, and other graphics in Microsoft Excel, Word, PowerPoint, and Outlook, but the processes and how alt text works differ slightly.
Adding Alt Text in Microsoft Excel and Word
You can add alt text to shapes, pictures, charts, SmartArt, and other graphics in Microsoft Excel and Word. The process for these two programs is the same, so I’ll use Excel to demonstrate.
In most versions of Microsoft Excel, when you click “Insert,” and “Pictures,” you will see a drop-down menu that lets you choose whether the image goes in a cell or over the cells. Alt text only works on pictures placed over the cells, so make sure you choose this option if you plan to make your spreadsheet accessible.
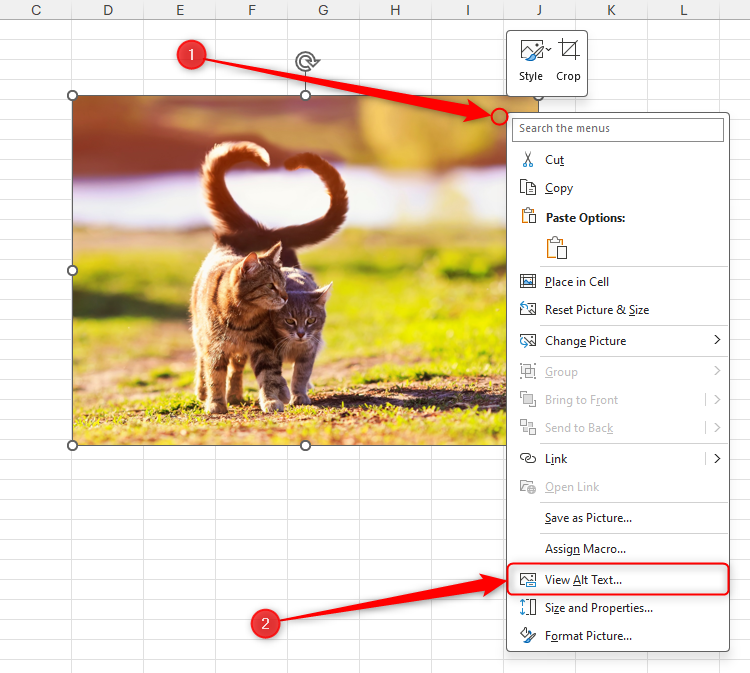
First, right-click the graphic, and select “View Alt Text.”
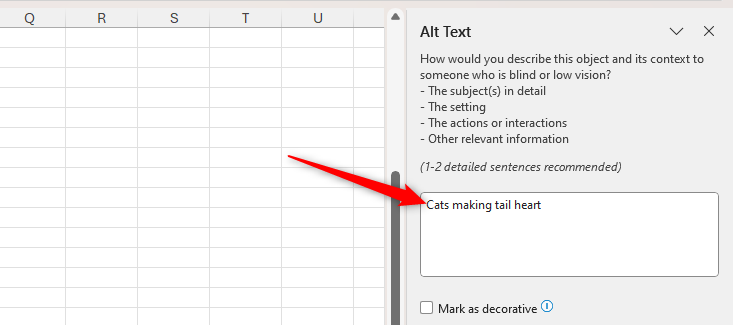
When the Alt Text pane appears on the right-hand side of your screen, it may already contain a suggestion as to what the alt text could say. In this example, “Cats making tail heart” is a good place to start, but it’s not detailed enough and doesn’t use correct grammar or punctuation.
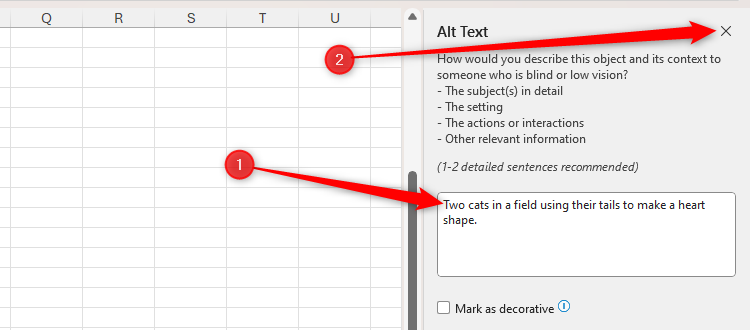
So, I’ll change the alt text to “Two cats in a field using their tails to make a heart shape.” before clicking the “X” in the corner to save it.
Adding Alt Text in Microsoft PowerPoint
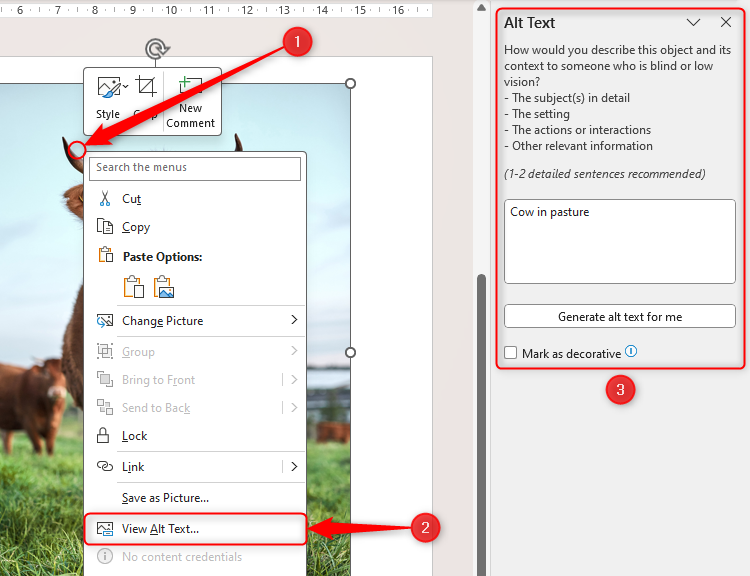
Alt text is usually generated automatically in PowerPoint as a starting point when you right-click a graphic and click “View Alt Text,” and you may also see the option to force the program to try again if you’re not happy.
As always, edit the suggested wording so that it fulfills the guidance in the first section of this article.
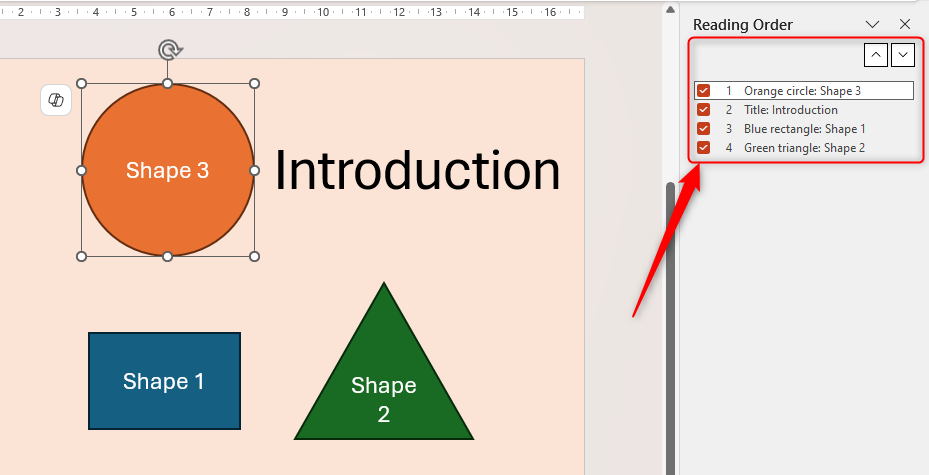
Screen readers use PowerPoint’s built-in Reading Order tool to decide the order in which they will read the contents of each slide. By default, they’ll read your objects in the order in which you added them.
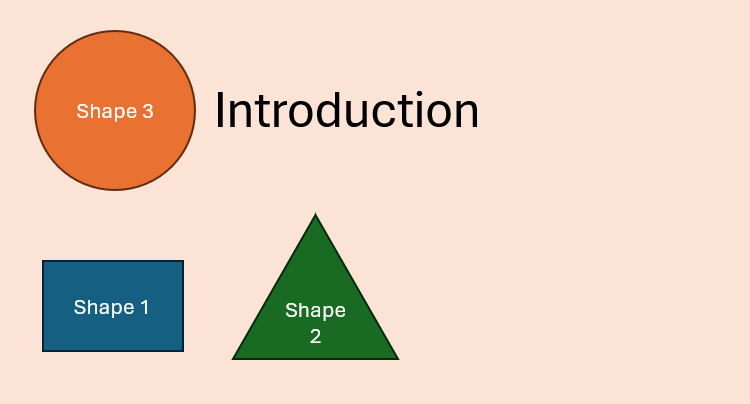
Here, I added shape 3 after adding shapes 1 and 2. As a result, even though shape 3 is higher on the slide, it won’t be read until after the title and shapes 1 and 2, so the slide will be confusing to people using screen readers.
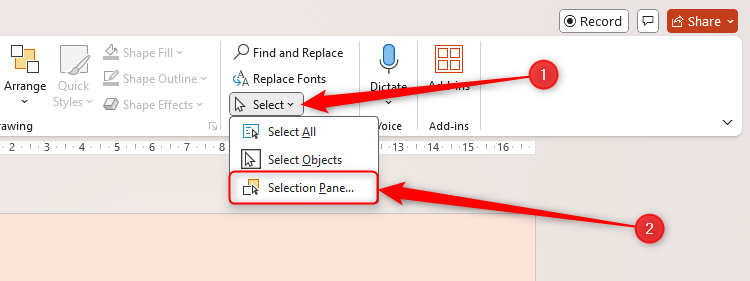
To check everything is in the correct reading order, first, you need to rename each item on your slide. Click Select > Selection Pane in the Home tab.
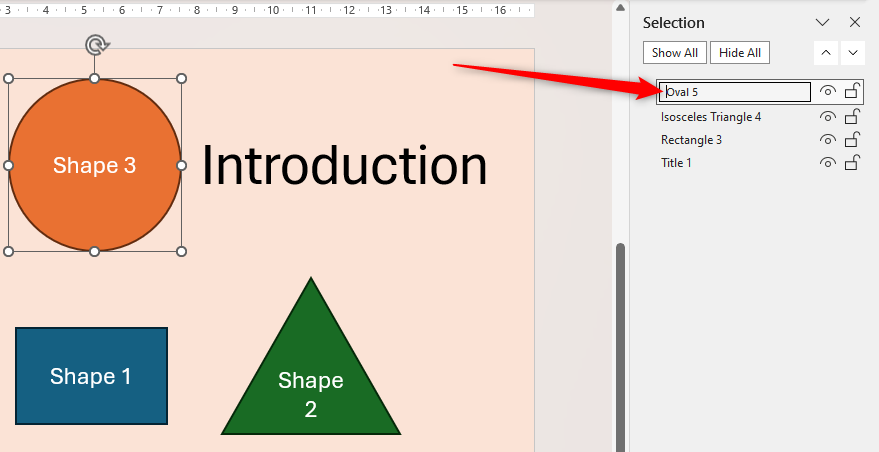
Now, when you select one of the items in the Selection pane, the same object becomes active on the slide, so you know which one you’re naming. Double-click one of those items to change its name. In this example, I could change “Oval 5” to “Orange circle.”
When you’ve renamed all the items, click the “X” in the corner of the Selection pane to save the changes.
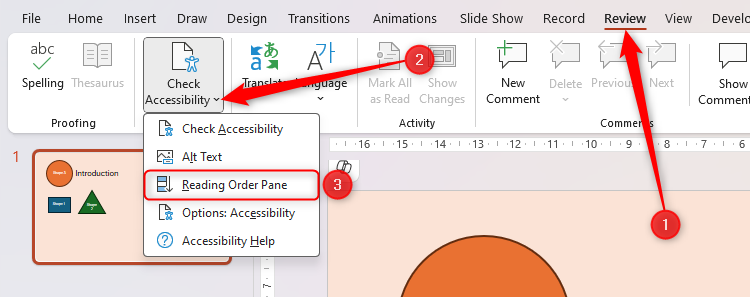
You’re now ready to check and, if needed, adjust the reading order. Click the “Check Accessibility” drop-down in the Review tab, and select “Reading Order Pane.”
Because I named the slide’s objects, I can clearly see the order in which they would be read by a screen reader. If you need to change the reading order, either click and drag the names upwards or downwards, or select one of the items and use the up and down arrows.
Adding Alt Text in Microsoft Outlook (New)
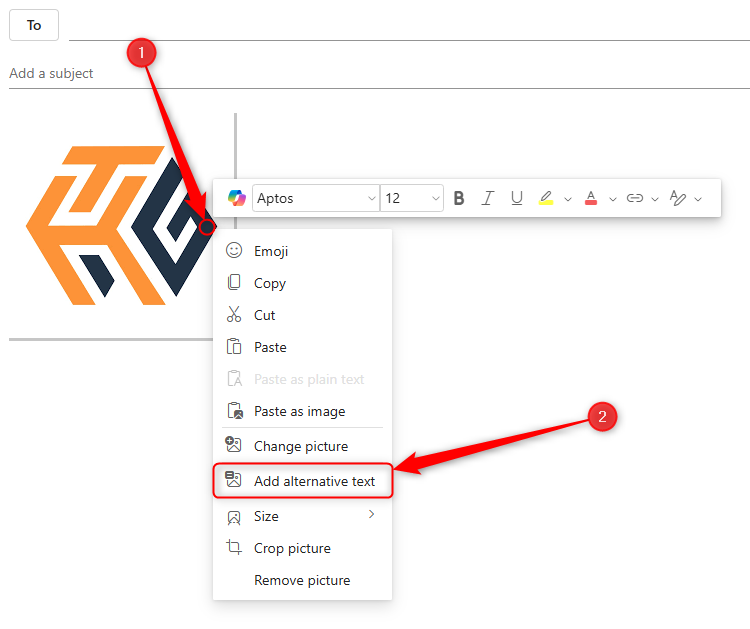
To add alt text to a message draft in the new Microsoft Outlook, right-click the graphic and click “Add Alternative Text.”
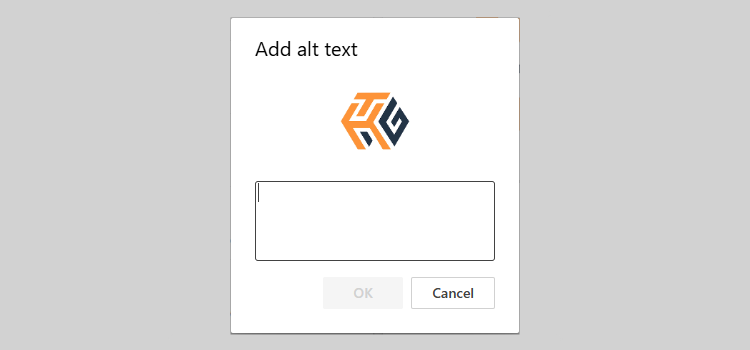
Unlike in the other Microsoft 365 programs, you add alt text in Outlook via a separate window that appears in the center of your screen. Microsoft Outlook doesn’t generate alt text automatically, so you start with a blank canvas. Just remember to follow the tips in the first section of this article.
When you’re happy, click “OK.”
Alt text is just one of many little-known tools in the Microsoft 365 suite that you can use to make your and others’ lives easier. For example, you can use the Check Accessibility feature in Excel, Word, OneNote, PowerPoint, and Outlook to make sure your work doesn’t present issues for people with disabilities.


