 At a glance
Expert’s Rating
Pros
- Excellent continuous data protection with versioning
- Easy, timeline browsing of backed-up files
- Integrated into Windows
- Backs up user-created libraries
Cons
- Easy “Add folder” function removed from Windows 11
Our Verdict
Windows File History is still the easiest, cheapest (free) continuous data protection software for Windows. The Add folder function has been removed, but it will back up Libraries you create yourself.
One of the best file-level backup programs for Windows is actually included with the operating system: File History. True, it’s not quite as encompassing as Apple’s Time Machine, lacking a disaster-recovery component (that’s found elsewhere). However, it does offer the same easy continuous data protection (CDP) and timeline recovery of files.
This review is part of our ongoing roundup of the best backup software. Go there for information on competing products and how we tested them.
Windows File History: Features
As stated, File History is continuous, file-level backup. In other words, after the initial backup, it copies changed files, new folders, etc. to your backup media at more granular intervals than the traditional daily/weekly backup.
File History doesn’t copy files the moment they change, that’s real-time backup, a more advanced and resource-hungry form of continuous data protection, or CDP. The utility can be set for intervals of anywhere from every 10 minutes to once a day. I usually opt for hourly as a happy medium. Losing an hour’s work I can live with, and as often as I save changed documents when writing, it keeps the version count down to a reasonable level.
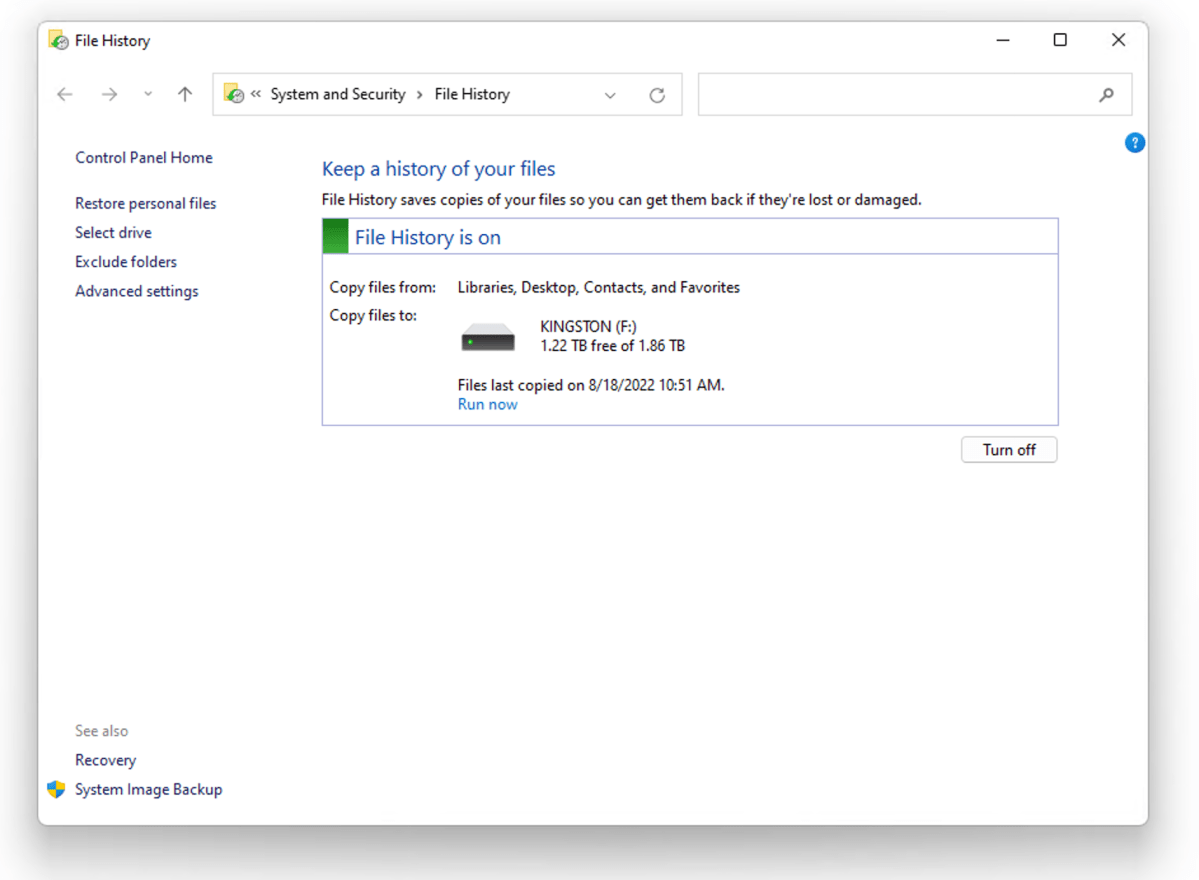
Version count? Window File History keeps older versions of files (versioning) so you can get back to that brilliant idea you started with before you mucked it up by over-thinking or over-editing. Don’t ask me why I used that example… 😉 Note that these versions are displayed according to the time they were backed up in the timeline browser shown in the lead photo of this review.
By default, File History backs up the standard Windows libraries: Contacts, Desktop, Documents, Downloads, Favorites, Links, Music, OneDrive, Pictures, Saved Games, Searches, Videos, and Camera Roll. That’s where most users keep all their important stuff, so cool. However….

Many users (including yours truly) keep collections of stuff outside of these standard locations. In versions of Windows prior to 11, File History let you easily add these external folders to the backup via the Add a folder function shown below. Alas, this function bit the dust with Windows 11. But don’t panic, there’s still a way to add a folder, it’s just might not be intuitive to all users. I’ll explain said method in a moment.

So why would Microsoft remove such a handy feature? If I were a cynic, I might suspect the company is trying to leverage you into using OneDrive and its other online services. Think I’m paranoid? The home version of Windows doesn’t even offer the option of a local (non-online) account without you resorting to trickery. Big hint: Install without being connected to the internet.
Online storage such as OneDrive is, of course, convenient and is available to all your devices, but transferring data across the internet is generally far slower than to and from fast direct-attached or local storage.
Then there’s security. Local storage is simply more secure than sending your data across the internet—no matter how much companies try to convince you otherwise.
As to that workaround…
Backing up non-standard locations under Windows 11
The way to back up data not found in the standard locations isn’t hard, it just may not be immediately obvious. Largely, because it’s not really documented. The deal is that File History backs up all libraries—including those you create yourself. Yes, to reiterate, File History backs up user Libraries.
Of course, you don’t have to create your own library. Right-click on any folder, and use the Add to library option to include it in one of Windows existing libraries. Easy-peasy. Easy, except that you may not see the Libraries in Windows Explorer. If they’re not shown in your Quick access section, simply click on the icon to the far left of Windows Explorer’s address bar, type “Libraries,” and hit Enter.
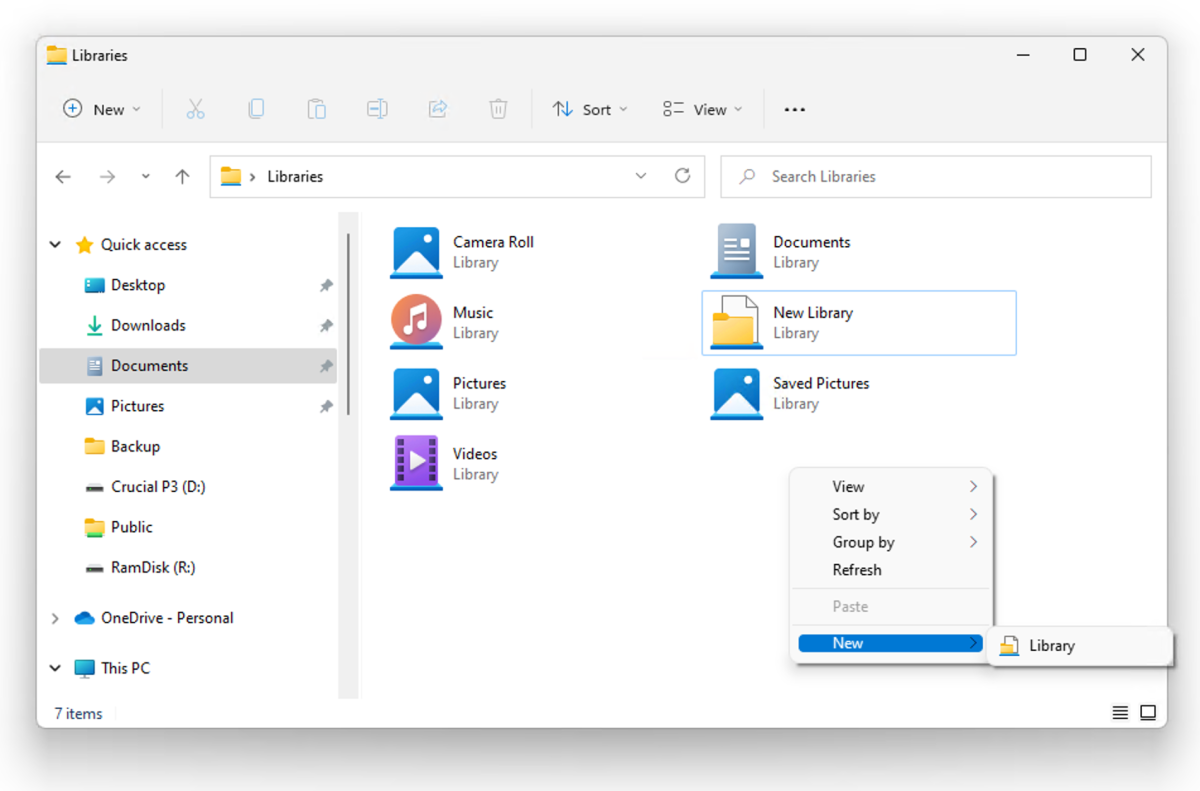
This is also where you can most easily create your own libraries, which might be a bit cleaner organizationally. Once in the Libraries folder, right-click on empty space, select Show more options, and then select New, then Library. There are other methods, but this is the most easily illustrated. See below.

There is one minor drawback to using your own, rather than pre-existing libraries. Being abstracted collections that can refer to any number of locations, they won’t appear among the other libraries in the actual backup file repository (a folder named FileHistory on your backup drive).
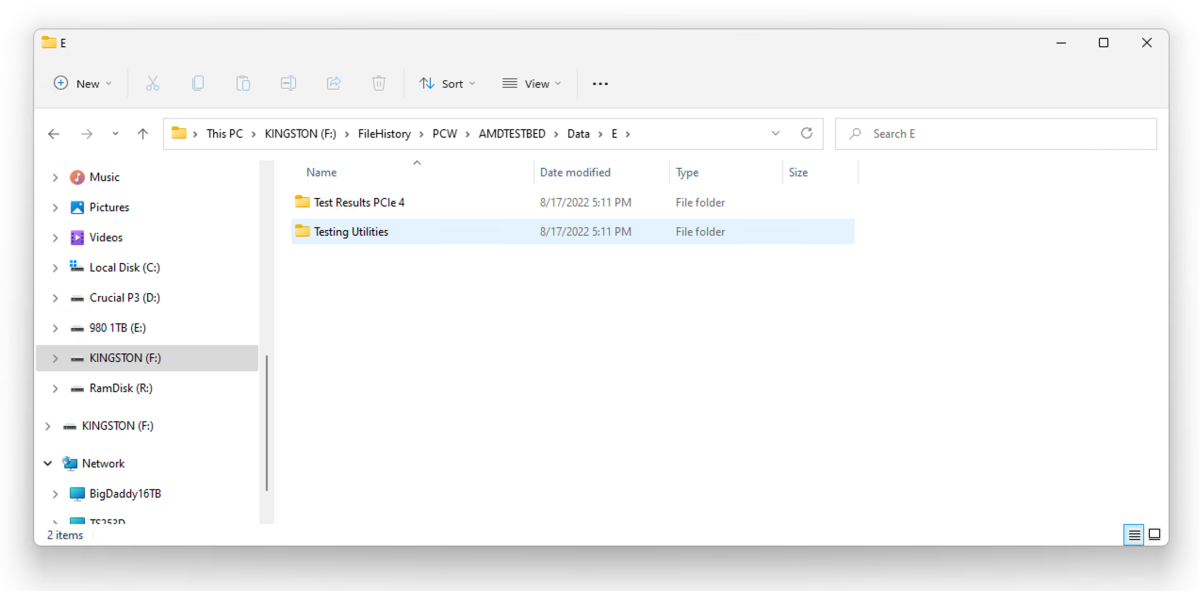
Instead, the folders included in your user-created libraries appear under their original names and locations as shown below. The folders in this screen capture were part of the user-created library “New library” shown in the screen capture above. This is good to know in case you want to grab files and the original Windows installation is kaput.
However, user created libraries will show up in File History’s dedicated restore browser (shown at the top of this article and accessed in Windows 11 with the Restore personal files option in the File History dialog). As this is what most users will use, the just-explained drawback is a bit of a tempest in a teapot.

Though the fact that File History backs up user libraries isn’t advertised by Microsoft anywhere that I could find (I’m sure I’ll hear from the company if there is…), once you know it can be done, there’s a certain elegant minimalism to it. I quite like it to be honest.
Bottom line
Microsoft’s decision to remove the “add folder” function from File History without providing hints on how to back up non-standard locations is regrettable. (I’m being generous in my choice of words.)
Regardless, File History remains a fantastic, free, integrated, set-it-and-forget-it way to keep you important data continuously backed up. Few users will need anything more.
Note that Windows also provides disaster recovery features (Recovery disc, System Backup (Windows 7)) which work well enough for restoring to the same PC with the same hardware. However, if you want the ultimate in reliable disaster recovery, check out R-Drive Image.


