Summary
- Cloud desktops run an entire PC online for remote access from any device or location.
- Raspberry Pi Connect allows you to set up a free cloud desktop using your own Raspberry Pi device.
- A full Linux desktop using Raspberry Pi Connect is feasible, but may be lacking in speed and usability.
Cloud desktops provide a full desktop PC through a web browser or app, where all of your data is stored online, safe from thieves if the physical device you’re using is stolen. Cloud desktop subscriptions can be expensive, so here’s how I set one up for free using Raspberry Pi Connect.
Why Cloud Desktops?
Cloud desktops are becoming increasingly popular among both enterprise and home users. While there are concerns about keeping all of your data stored online (and not somewhere where you are in full control of it), this means that if your device is lost or stolen, you can just log back into your cloud desktop from a new device and pick up right where you left off. Cloud desktops are also a neat way to access full desktop applications from your phone or tablet, giving you more advanced productivity apps in your pocket.
Traditionally, the functionality provided by cloud desktops could be implemented with private VPNs and remote desktop solutions, but these usually require a bit of tinkering to set up. Cloud desktops provide this functionality pre-configured out-of-the-box, allowing you to just sign up and log in. Raspberry Pi Connect offers a similar simplified experience at no cost—all you need to do is supply the Pi.
Setting Up Raspberry Pi Connect
You’ll want a relatively beefy Raspberry Pi to handle this. Anything less than a Raspberry Pi 3 running a desktop Linux OS is going to be very slow to use. Once you’ve sourced a Pi, you’ll need to install the latest version of Raspberry Pi OS (which includes Raspberry Pi Connect). You can do this by following the instructions in the Raspberry Pi documentation. Make sure you configure an internet connection when setting up your Raspberry Pi, as none of this will work without it!
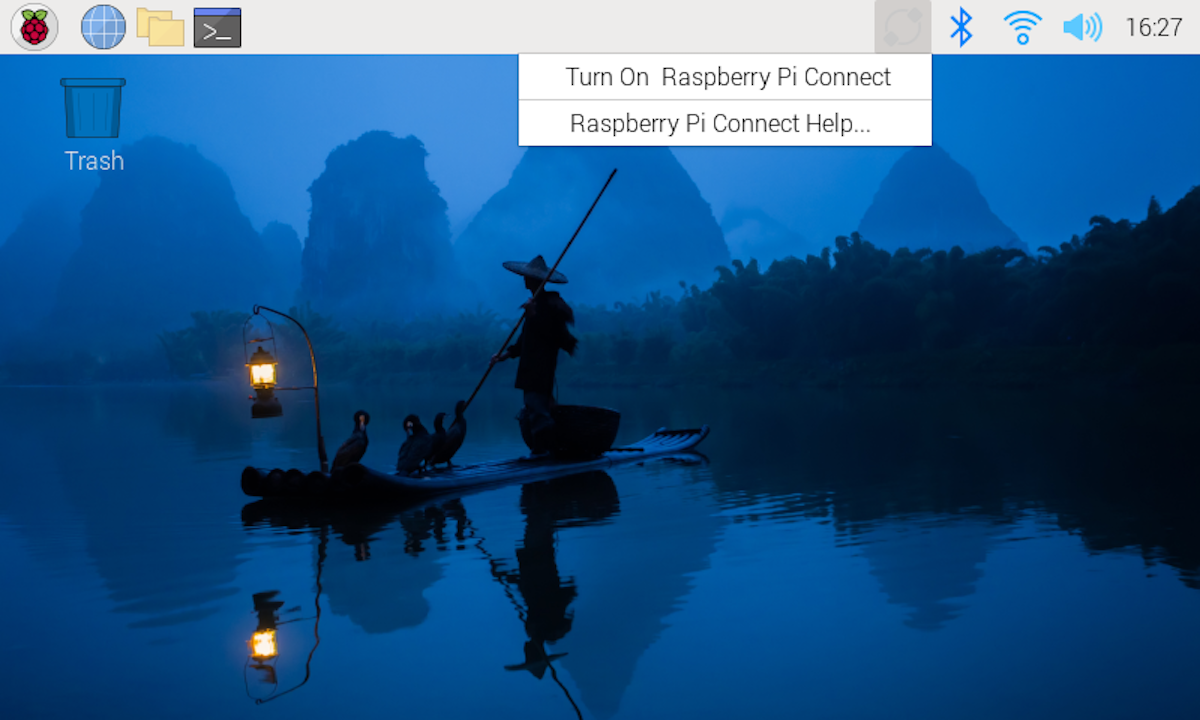
Once your Pi is set up, and you’re logged in to the desktop (using a monitor and keyboard at this stage), click on the Raspberry Pi Connect icon in the menu bar and then select “Turn on Raspberry Pi Connect”.
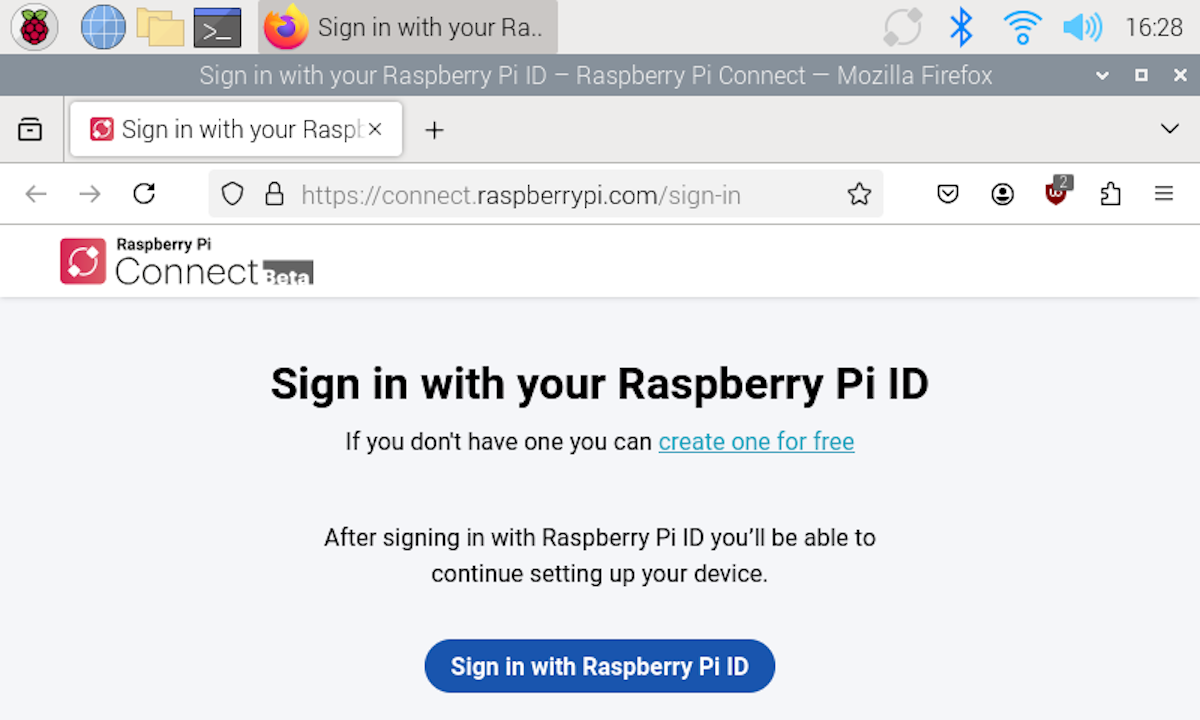
In the window that appears, create (or sign in to your existing) Raspberry Pi account. Make sure you enable two-factor authentication: you want the best possible security for anything that can be used to remotely access your devices and data.
Finally, give your Raspberry Pi a name that will be displayed in Raspberry Pi Connect, and click “Create Device and Sign In”.
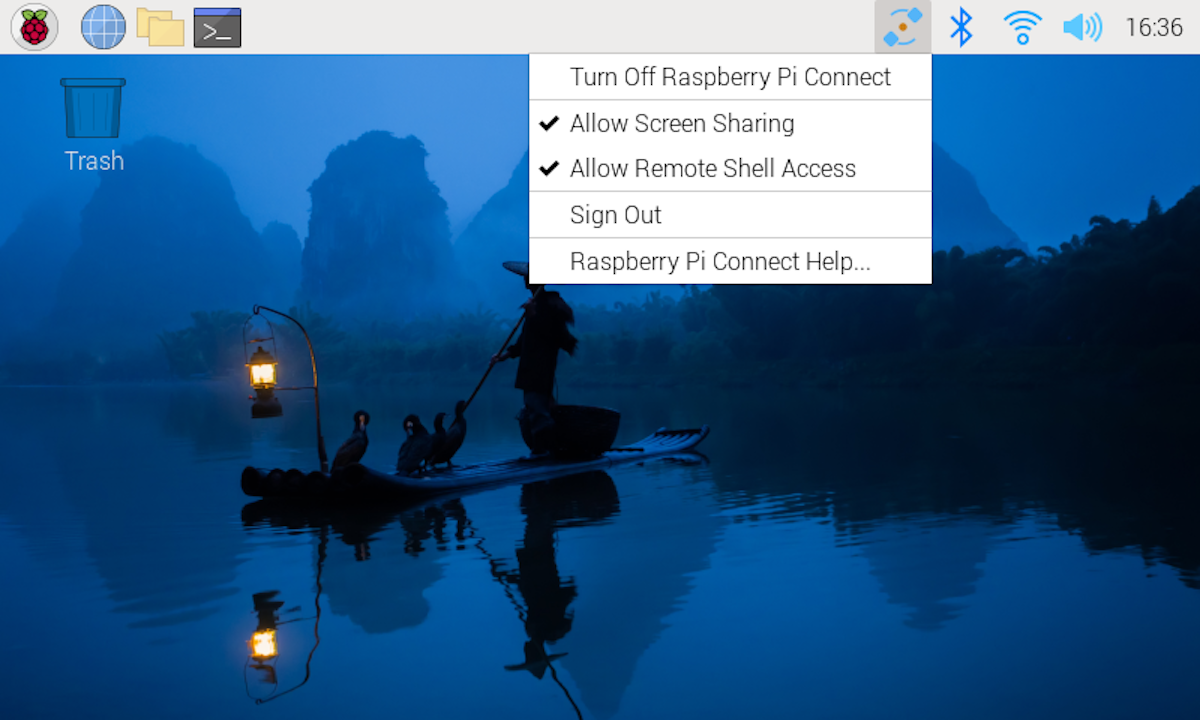
Once you’re signed in, right-clicking on the Raspberry Pi Connect icon will show options to enable or disable remote access, and sign out of Raspberry Pi Connect.
Connecting to Your Raspberry Pi Cloud Desktop
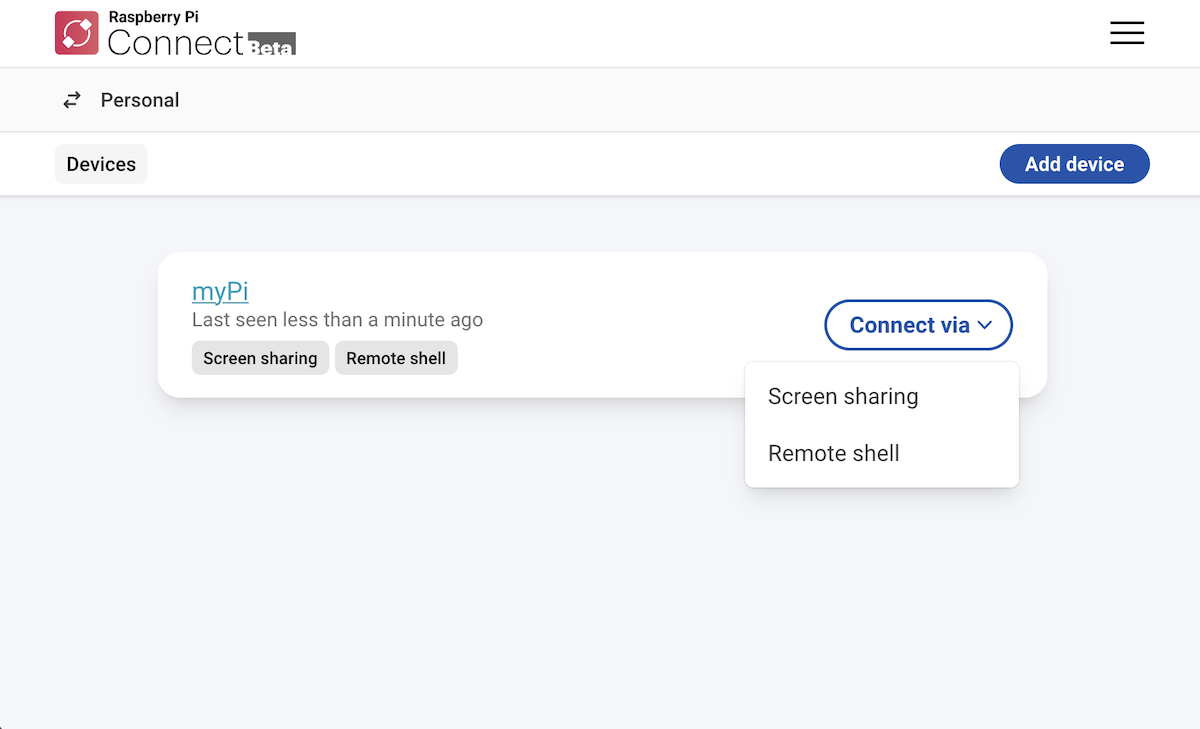
To connect to your new Raspberry Pi-powered cloud desktop from another device, head to connect.raspberrypi.com and log in with your Raspberry Pi account details. Next to your newly-added device, click “Connect Via” and then select “Screen Sharing”.
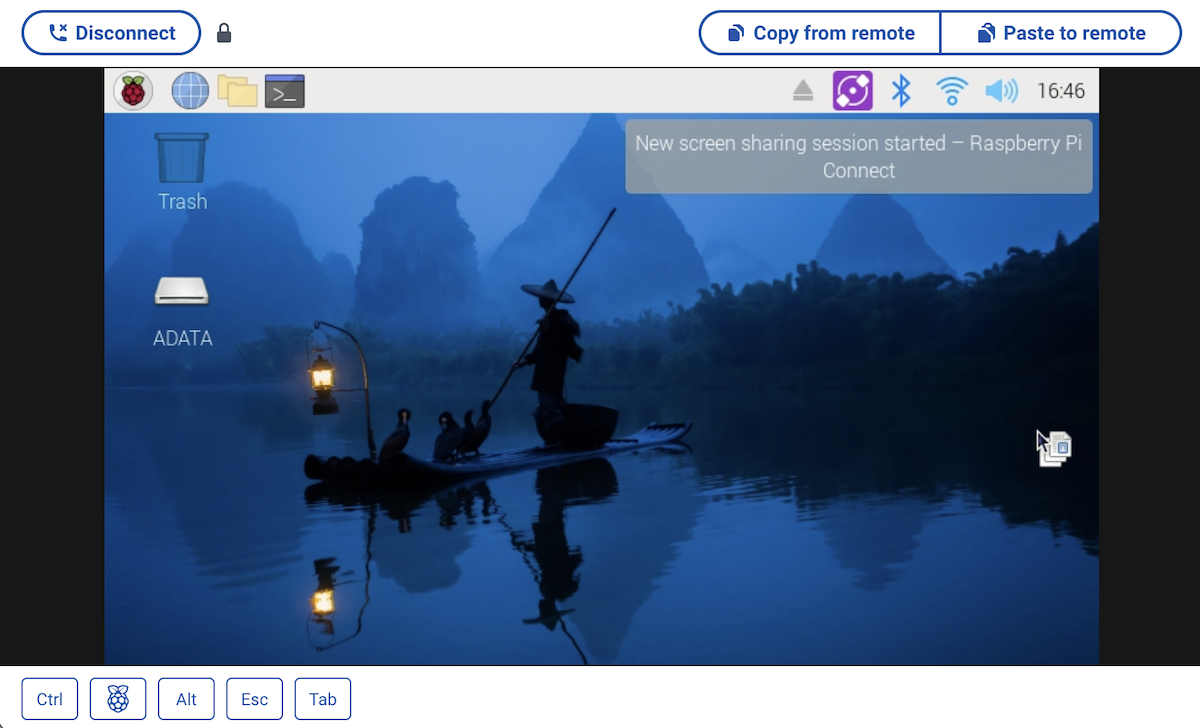
And that’s it! You should be connected to your Pi, with remote access to a full Linux desktop from your web browser, accessible from any (modern) device.
How Well Does It Actually Work?
My main goal with this project was to have access to a full Linux desktop OS on my phone. I often find mobile apps limiting, and yearn for the days of pocketable devices with full keyboards that can run desktop apps. I also don’t want to carry around a second device: phones have increasingly giant displays, so carrying a tablet or small laptop seems redundant if I can just add a keyboard to the device that’s already in my pocket.
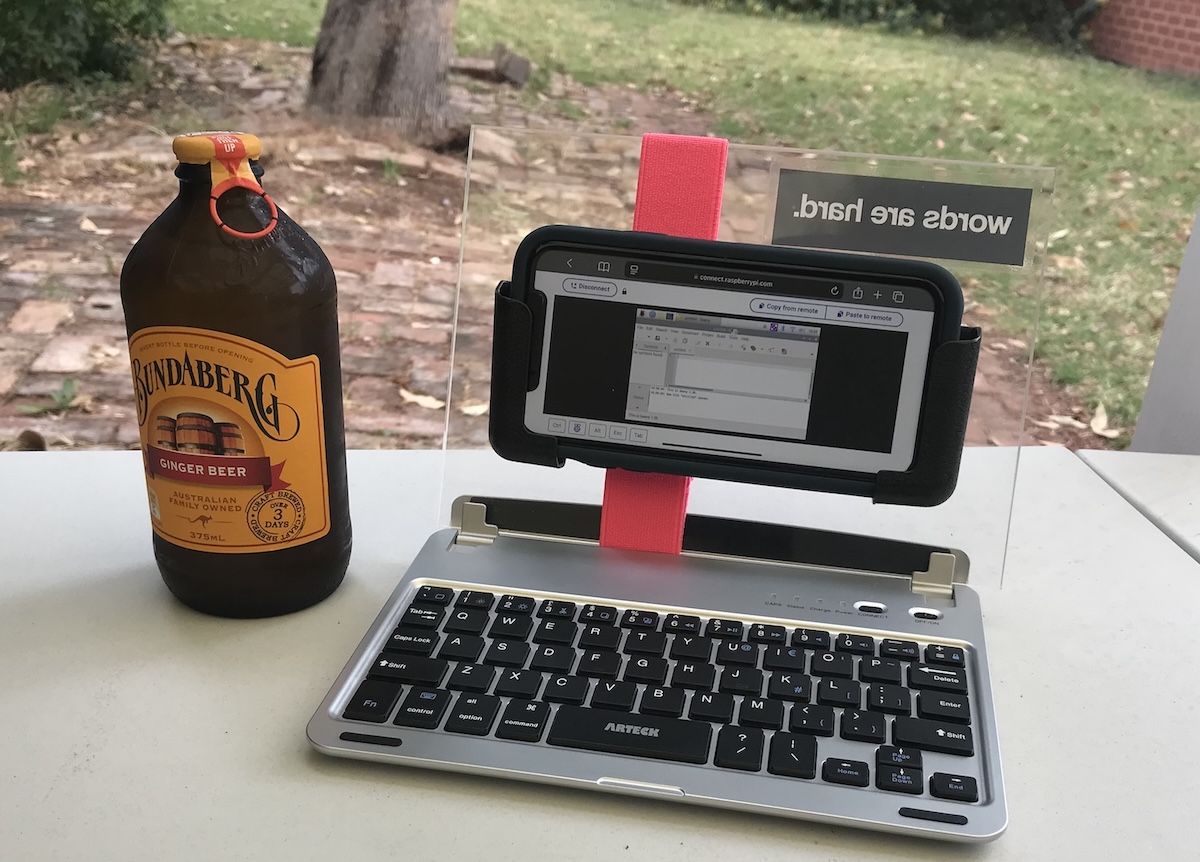
Here’s what I threw together to try and make the most out of my cloud desktop: A bit of perspex, an old iPad mini keyboard, some mounting brackets to hold my phone up, and a tasty ginger beer for scale. I’ve definitely re-invented the wheel here, but it’s nice to carry one device and just throw the keyboard rig in my bag when I think I’ll need to do a bit of remote work. One side benefit of this setup over carrying a tablet or laptop is there’s one device to secure and back up, and one data plan to pay for.
As for Raspberry Pi Connect itself—it’s a bit slow, and the fact that you can’t maximize the screen and have to work around your browser window means that you’ll be squinting to read anything on all but the largest phones. For anything but light work, it’s probably worth investing the time to set up VNC and a simple VPN solution like TailScale for a more robust and responsive remote desktop solution.
Staying Productive (And Secure) While You’re on the Move
If you’re worried about the security of your devices while you’re on vacation or a business trip, check out our guide to staying secure while you’re traveling and our list of best budget VPNs for 2024. If you want a cloud desktop but want to save your Pi for another project, you can create a virtual Linux Workstation using Google Cloud Platform (with a bit of technical know-how).


